Have a Question?
How to Install Arista NG Firewall (Formerly Untangle) on Protectli Vaults
Regarding Newest Versions of Arista NGFW
With Arista NG Firewall Version 17.3.0 or newer, all NICs found in Protectli Vaults are supported by the operating system. It is important to use version 17.3.0 or newer when installing Arista NG Firewall on a Protectli Vault that has 2.5GbE (i226-V or i225-V) NICs, because older versions do not support these NICs.
Overview
Arista NG Firewall has been successfully installed on all current Protectli Vault and Vault Pro products. However, as Arista recommends certain specs depending on the amount of clients that are connecting to the device, you should refer to the hardware recommendations outlined by Arista at the following link to verify your Protectli hardware meets expectations: https://wiki.edge.arista.com/index.php?title=Hardware_Requirements
You should also take into consideration if you plan on utilizing additional features like VPNs or Intrusion Detection/Prevention Systems, because those features are more taxing on the CPU. A higher performing CPU will handle these features better.
For a generalized table based on Arista's expectations, these Vaults should work for you*:
| Number of Clients | Recommended Vaults | Storage Space Recommendation | Additional Notes |
|---|---|---|---|
| 1-50 | Any Protectli Vault or Vault Pro | 40GB+ | At least 4GB of RAM recommended |
| 51-150 | V1211, V1410, V1610, any VP Series Vault Pro, FW6D, FW6E | 80GB+ | At least 8GB of RAM recommended |
| 151-500 | V1610, VP2430, VP2440, any VP4600 Series Vault Pro, any VP6600 Series Vault Pro | 160GB+ | At least 16GB of RAM recommended |
| 501-1500 | VP4650, VP4670, any VP6600 Series Vault Pro | 250GB+ | At least 16GB of RAM recommended |
| 1501-5000 | Any VP6600 Series Vault Pro | 500GB+ | At least 32GB of RAM recommended |
*There are always intricacies with any network, especially in business settings, so please take our recommendations with a slight grain of salt. Our table is purely based on Arista's recommendations and comparing it to some of the hardware that they offer.
Installing Arista NG Firewall
You must first create an Arista account before you can access the download links for the operating system's images.
- You can create an account at this link: https://launchpad.edge.arista.com/account
- Afterwards, you can download the images at this link: https://launchpad.edge.arista.com/download
- Click on the "Download" button for the ISO Installer (Graphical mode)
- Only use the Serial console version if you are configuring the OS through a serial console connection opposed to connecting a monitor via HDMI or Display Port
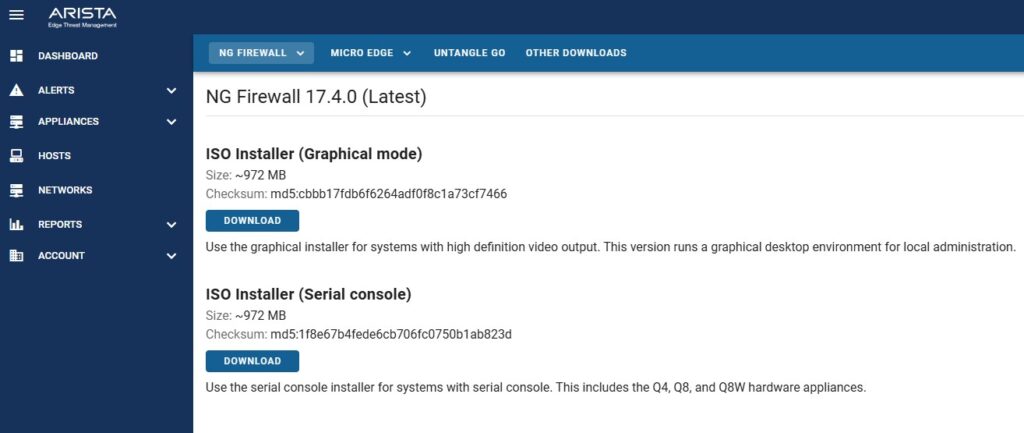
At the time of updating this article, version 17.4.0 is the newest version available, but if a newer version has since been released, you are typically encouraged to use the newer version. If we find any issues with newer versions we will note those issues on this article.
Burning the Installation Image to a USB Drive
The easiest way to transfer the installation image to a USB drive is by using software called "Rufus" on Windows or "balenaEtcher" on Mac OS. See this link for detailed instructions on how to create a bootable USB drive using Rufus or balenaEtcher.
If using Rufus "ISO mode" should be selected.
Potential Errors When Installing
Many thanks to Arista for implementing a fix for this issue. Prior to 17.4.1, certain units would receive a GRUB installation error. If you are using a version older than 17.4.1:
Some Protectli Vault and Vault Pro models, when utilizing coreboot firmware, will receive an error towards the end of the installation process stating that the GRUB bootloader cannot be installed. If you come across this error, you can press 'Continue', select 'Continue without boot loader', then press 'Continue' again. The installation will continue. No issues have been found as a result of this when using Arista as the main operating system on a Vault.
If you are overwriting an SSD, NVMe, etc that already has an existing operating system on it, there is a chance you will get some errors during the installation process. You will effectively need to re-partition the disk. This may also be related to units that have on-board eMMC. You may see a message that states "Failed to partition the selected disk, This probably happened because the selected disk or free space is too small to be automatically partitioned" If this happens, click the "Go back" button at the bottom right of the screen, choose "Detect Disks", select "Guided – use entire disk", select the drive you wish to install to, then continue with the installation.
If you continue to get partitioning errors, you will most likely need to completely wipe the drive and then try again.
If you do continue to get errors, hit the Go back button until you see the Debian installer main menu, then choose "execute a shell", then continue. We will now run a command to completely wipe the drive. This may take upwards of 20 minutes depending on how big the drive is. Type and enter: ls /sys/block, this will show you all your storage devices. Locate the device that you are trying to install to, for example "nvme0n1" would be the NVMe. A normal SATA drive might be sda, sda1, but make sure you don't confuse it with your USB drive.
Next, type and enter: dd if=/dev/zero of=/dev/nvme0n1 BS=1M
*Replace /dev/nvme0n1 with whatever the actual name of the storage device is.
Please wait until you get a message that states "xxx records out, xxx records in". Afterwards, back out of the shell and return to the Debian menu. Choose "Install base system", partition the drive, and continue with the installation.
Installing the Operating System to the Vault
- Verify The Vault is powered down
- Verify a monitor is connected via HDMI or Display Port (Or serial cable if doing a serial install)
- Verify the USB keyboard is plugged into the Vault as well as the USB drive that you burned the Arista NG Firewall ISO to
- Connect an Ethernet cable to the Vault's WAN port (port 1 typically) that is connected to a network with DHCP enabled (most likely your modem)
- Note: The OS may download files from the internet during installation
- Power on the Vault and hold F11 during boot to select your USB drive
- After a small amount of time, you should be greeted with an Arista splash screen with options to install
- Press Enter to select Graphical Install
- Some resolutions may make this page look unreadable, just hit Enter to continue with the installation when you see the blue-colored Arista splash screen
- Allow installation to continue, the installer will automatically start going through a few configurations
- If you are attempting to install the UEFI version and an error message asks if you would like to Force UEFI installation, choose "Yes" (This is effectively applicable to any VP or V Series Vault)
- You should eventually get to a prompt asking to Partition disks. Select the drive you wish to install to, and hit continue
- If a prompt titled "[!!] Partition disks" shows up, Select "Finish partitioning and write changes to disk"
- The installation will continue until completed, if any additional prompts show up, follow along until the unit requires a reboot
- Allow the Vault to reboot and verify it boots to the drive you installed the OS to (you can also remove the USB drive at this point)
- If you are on coreboot, you may need to change boot order to make sure that the Vault is booting to the correct drive
- Hold <DEL> at the time of boot to access the coreboot menu
- Navigate to Boot Maintenance Manager > Boot Options > Change Boot Order
- Hit <Enter> to select the first option
- Use arrow keys to highlight the SSD
- Press <Shift> and <+> to move it up to the top selection
- Hit <Enter>
- Hit <F10> to save
- Reboot
- Verify Arista NGFW is successfully loading
- Verify the Configuration starts (you should see a Chromium based browser, and a message stating "Thanks for choosing Arista!")
- If you do not have an internet connection at this point, you will need to choose the configure internet option and follow the prompts
- If you do have an active internet connection, choose the "Login" button and login with your Arista account
- The next page after logging in will allow you to add the unit to your account
- You can then create an admin password for this device. Make sure to choose a secure, complex password that you also won't forget. A password manager is always useful for things like this!
- Fill out the other options, agree to the Arista Edge Threat Management EULA, and continue
- You will eventually gain access to the dashboard
- If you go to Config > Network, you will see that eth0 is "External" and eth1 is "Internal"
- External is WAN and Internal is LAN
- The default for the External port IP Address is DHCP (will automatically acquire an IP address)
- The default for the Internal port is static IP Address of 192.168.2.1 and is a DHCP server
- Verify that you can browse to 192.168.2.1 via a computer connected to the the "Internal" (LAN) port and login using the password assigned during the setup
Compatibility
As of the date of this article's last update, version 17.4.1 has been succesfully installed on every Protectli Vault product with both AMI and coreboot.
Conclusion
Documentation for the operating system can be found on Arista's website, which contains a wide range of useful articles and tutorials to configure your firewall the way you want: https://support.edge.arista.com/hc/en-us/categories/17632019082135
If you have any questions or concerns, feel free to reach out to us at support@protectli.com!