Have a Question?
How to Customize the Boot Splash Screen for AMI BIOS
Overview
The "Splash Screen" is the graphical image or logo that is briefly displayed at boot up of the system. The splash screen for the Vault can be customized to enhance the brand awareness of the product and/or solution. Protectli provides a Windows tool that can be used to change AMI BIOS and customize the splash screen. Please note that this tool is not compatible with coreboot.
Splash Screen File
The splash screen file is a "bitmap" file with an extension of ".bmp" in Windows. The bitmap file used for the splash screen must have maximum dimensions of 800 x 600 and be less than 1.4 MB. If there is already a logo file in ".jpg" or ".png" format, that file can be converted to a bitmap file using the Windows Paint program or other tools.
Verify the Desired Splash Screen File
- On Windows, right click the desired file
- Select Properties
- Verify "Type of File" is BMP file
- Select the Details tab
- Verify the Dimensions are 800 x 600 or less
- Verify the Size is 1.4 MB or less
Convert the Desired Splash Screen File
If the desired file is in JPG or PNG format, it can be converted to Bitmap using the Windows Paint program. This procedure is only necessary if the desired file is not already in Bitmap format.
- On Windows, right click the desired file
- Select Edit
- Verify the Paint program starts and the graphical image is displayed
- Select File->Save As->Save as type:
- Verify the dropdown menu that contains these bitmap options is displayed
- Monochrome Bitmap
- 16 Color Bitmap
- 24 Color Bitmap
- 24-bit Bitmap
- Select the desired bitmap format
- Note that the formats listed in the dropdown are in increasing order of quality and increasing order of size
- Select Save
- Right click on the newly created bitmap and verify that it is less than 1.4 MB
- If greater than 1.4 MB, repeat this procedure with a lesser quality bitmap format
Download the BIOS
The BIOS folder for each specific model of the Vault is available at this link. Be very sure when downloading and installing the BIOS that it is the correct BIOS for the specific Vault. Installing incorrect BIOS may result in an inoperable system.
- Download the BIOS zip file for the model of the Vault from the link above
- Verify the BIOS zip file is downloaded
- Unzip the file and verify the BIOS folder is downloaded
Download the BIOS Logo Tool
There are two BIOS logo tools. One is for the FW1, FW2, and FW4 models of the Vault. The other is for the FW6 models of the Vault. Lastly there is one only for the VP2420. The FW1, FW2, and FW4 tool is at this link. The FW6 tool is at this link. The V1000 tool is at this link. The VP2420 tool is at this link.
- Download the BIOS logo tool zip file for the model of the Vault from the link above
- Verify the proper BIOS logo tool zip file is downloaded
- Unzip the BIOS logo tool
Use the BIOS Logo Tool to Change the Splash Screen
- Double click on the BIOS Logo executable file
- Verify the "Change Logo" application appears on the screen
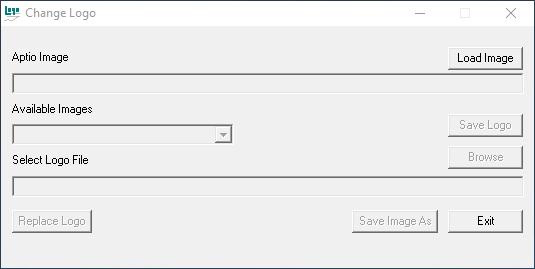
Change Logo Application
- Select the "Load Image" button
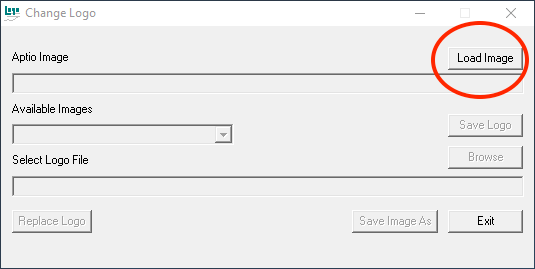
Load Image Button
- Verify navigator window is displayed
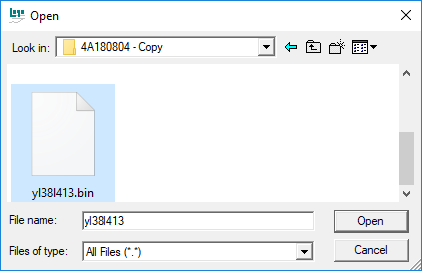
Navigator Window
- Verify/Select "Files of type:" All Files
- Navigate to the BIOS folder
- Select the .bin file
- Select "Open"
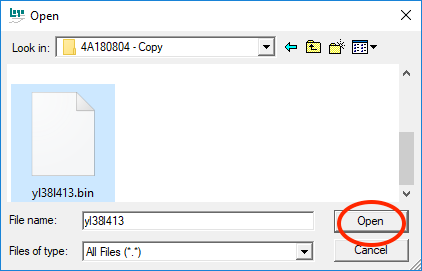
.bin File
- Verify the .bin file is displayed in the proper folder in the "Aptio Image" Box
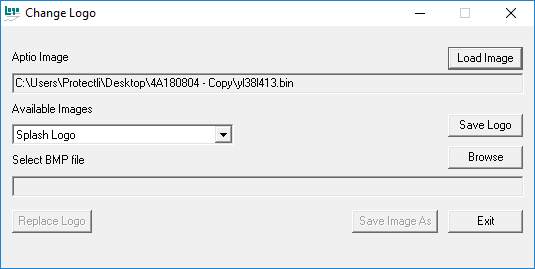
Aptio Image Box
- Select Browse Button
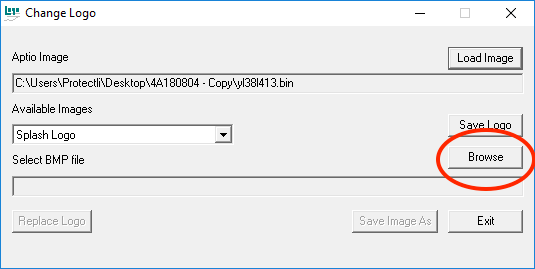
Browse to find Bitmap File
- Verify the navigator window is displayed
- Select files of type "BMP Files (*bmp)
- Navigate to the desired bitmap file
- Select the .bmp file
- Select Open
- Verify the desired bitmap file is displayed in the "Select BMP file" box
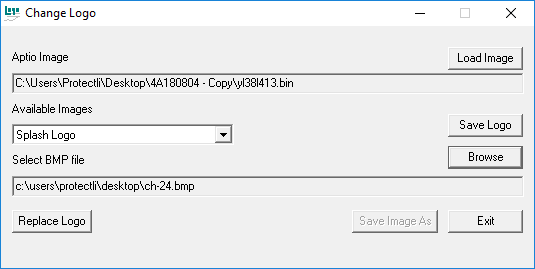
Select BMP File
- Select the Replace Logo button
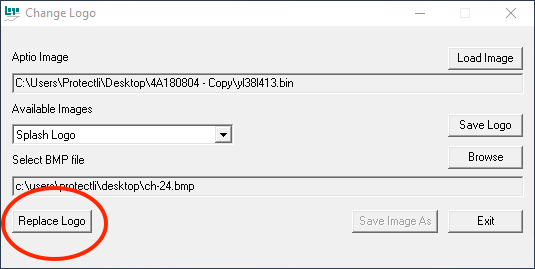
Replace Logo
- Verify the "Save Image As" button is now not grayed out
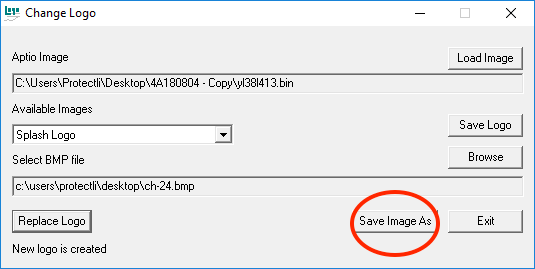
Save Image As Button
- Select the "Save Image As" button
- Verify the navigator window is displayed
- Navigate to the BIOS folder, this is where the new BIOS file will be placed
- Manually enter the name of the original .bin file, note that it must be exactly the same name
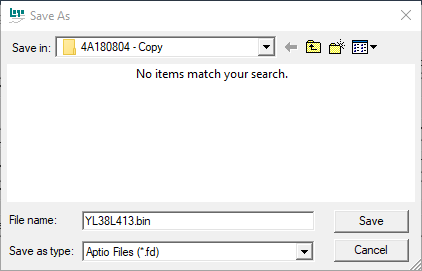
BIN File
- Select Save button
- Verify the Success message is displayed in the lower left of the tool
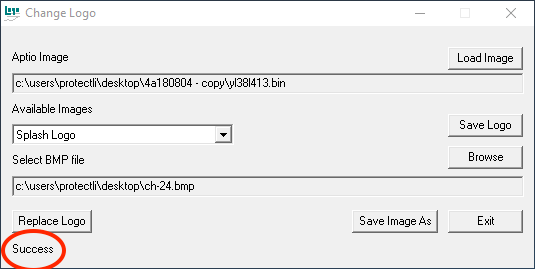
Success Message
Create Bootable USB Drive and Install New BIOS
Now that the new bitmap file has been created, the BIOS folder must be transferred to a USB drive and then used to update the BIOS on the Vault. Follow the instructions at this link to create a bootable USB drive, transfer the new BIOS folder to the USB drive, and install the new BIOS on the Vault.
- Verify the splash screen has the new logo or image during initial boot
- Verify the system boots
At this point, the new splash screen should be installed on The Vault. However, if you experience any issues, please feel free to reach out to us at: support@protectli.com. For more information, visit our Knowledge Base.
