Have a Question?
How to Reset the Vault's CMOS/BIOS
The Vault's CMOS is a small amount of battery backed memory that retains system information and settings that are used by the BIOS. The CMOS can occasionally get into a state where it needs to be reset in order to address odd behavior. This can occur due to an improper shutdown or other reasons. Symptoms of odd behavior on the Vault include:
- Video output that is black, despite power being applied to the unit
- Odd Performance issues
- BIOS lockouts (setting and forgetting the BIOS Administrator or User Password)
- Boot directly to BIOS without the Vault being able to recognize any connected drives
- Other odd behavior
Resetting the CMOS restores the BIOS to the default settings and can sometimes resolve these types of issues.
FW2B and FW4B
To reset the CMOS/BIOS on the FW2B or FW4B series:
- Verify the Vault power supply is disconnected
- Open the Vault cover
- Using a screwdriver or other metal tool, short the two pins shown in the photo below for about 10 seconds.
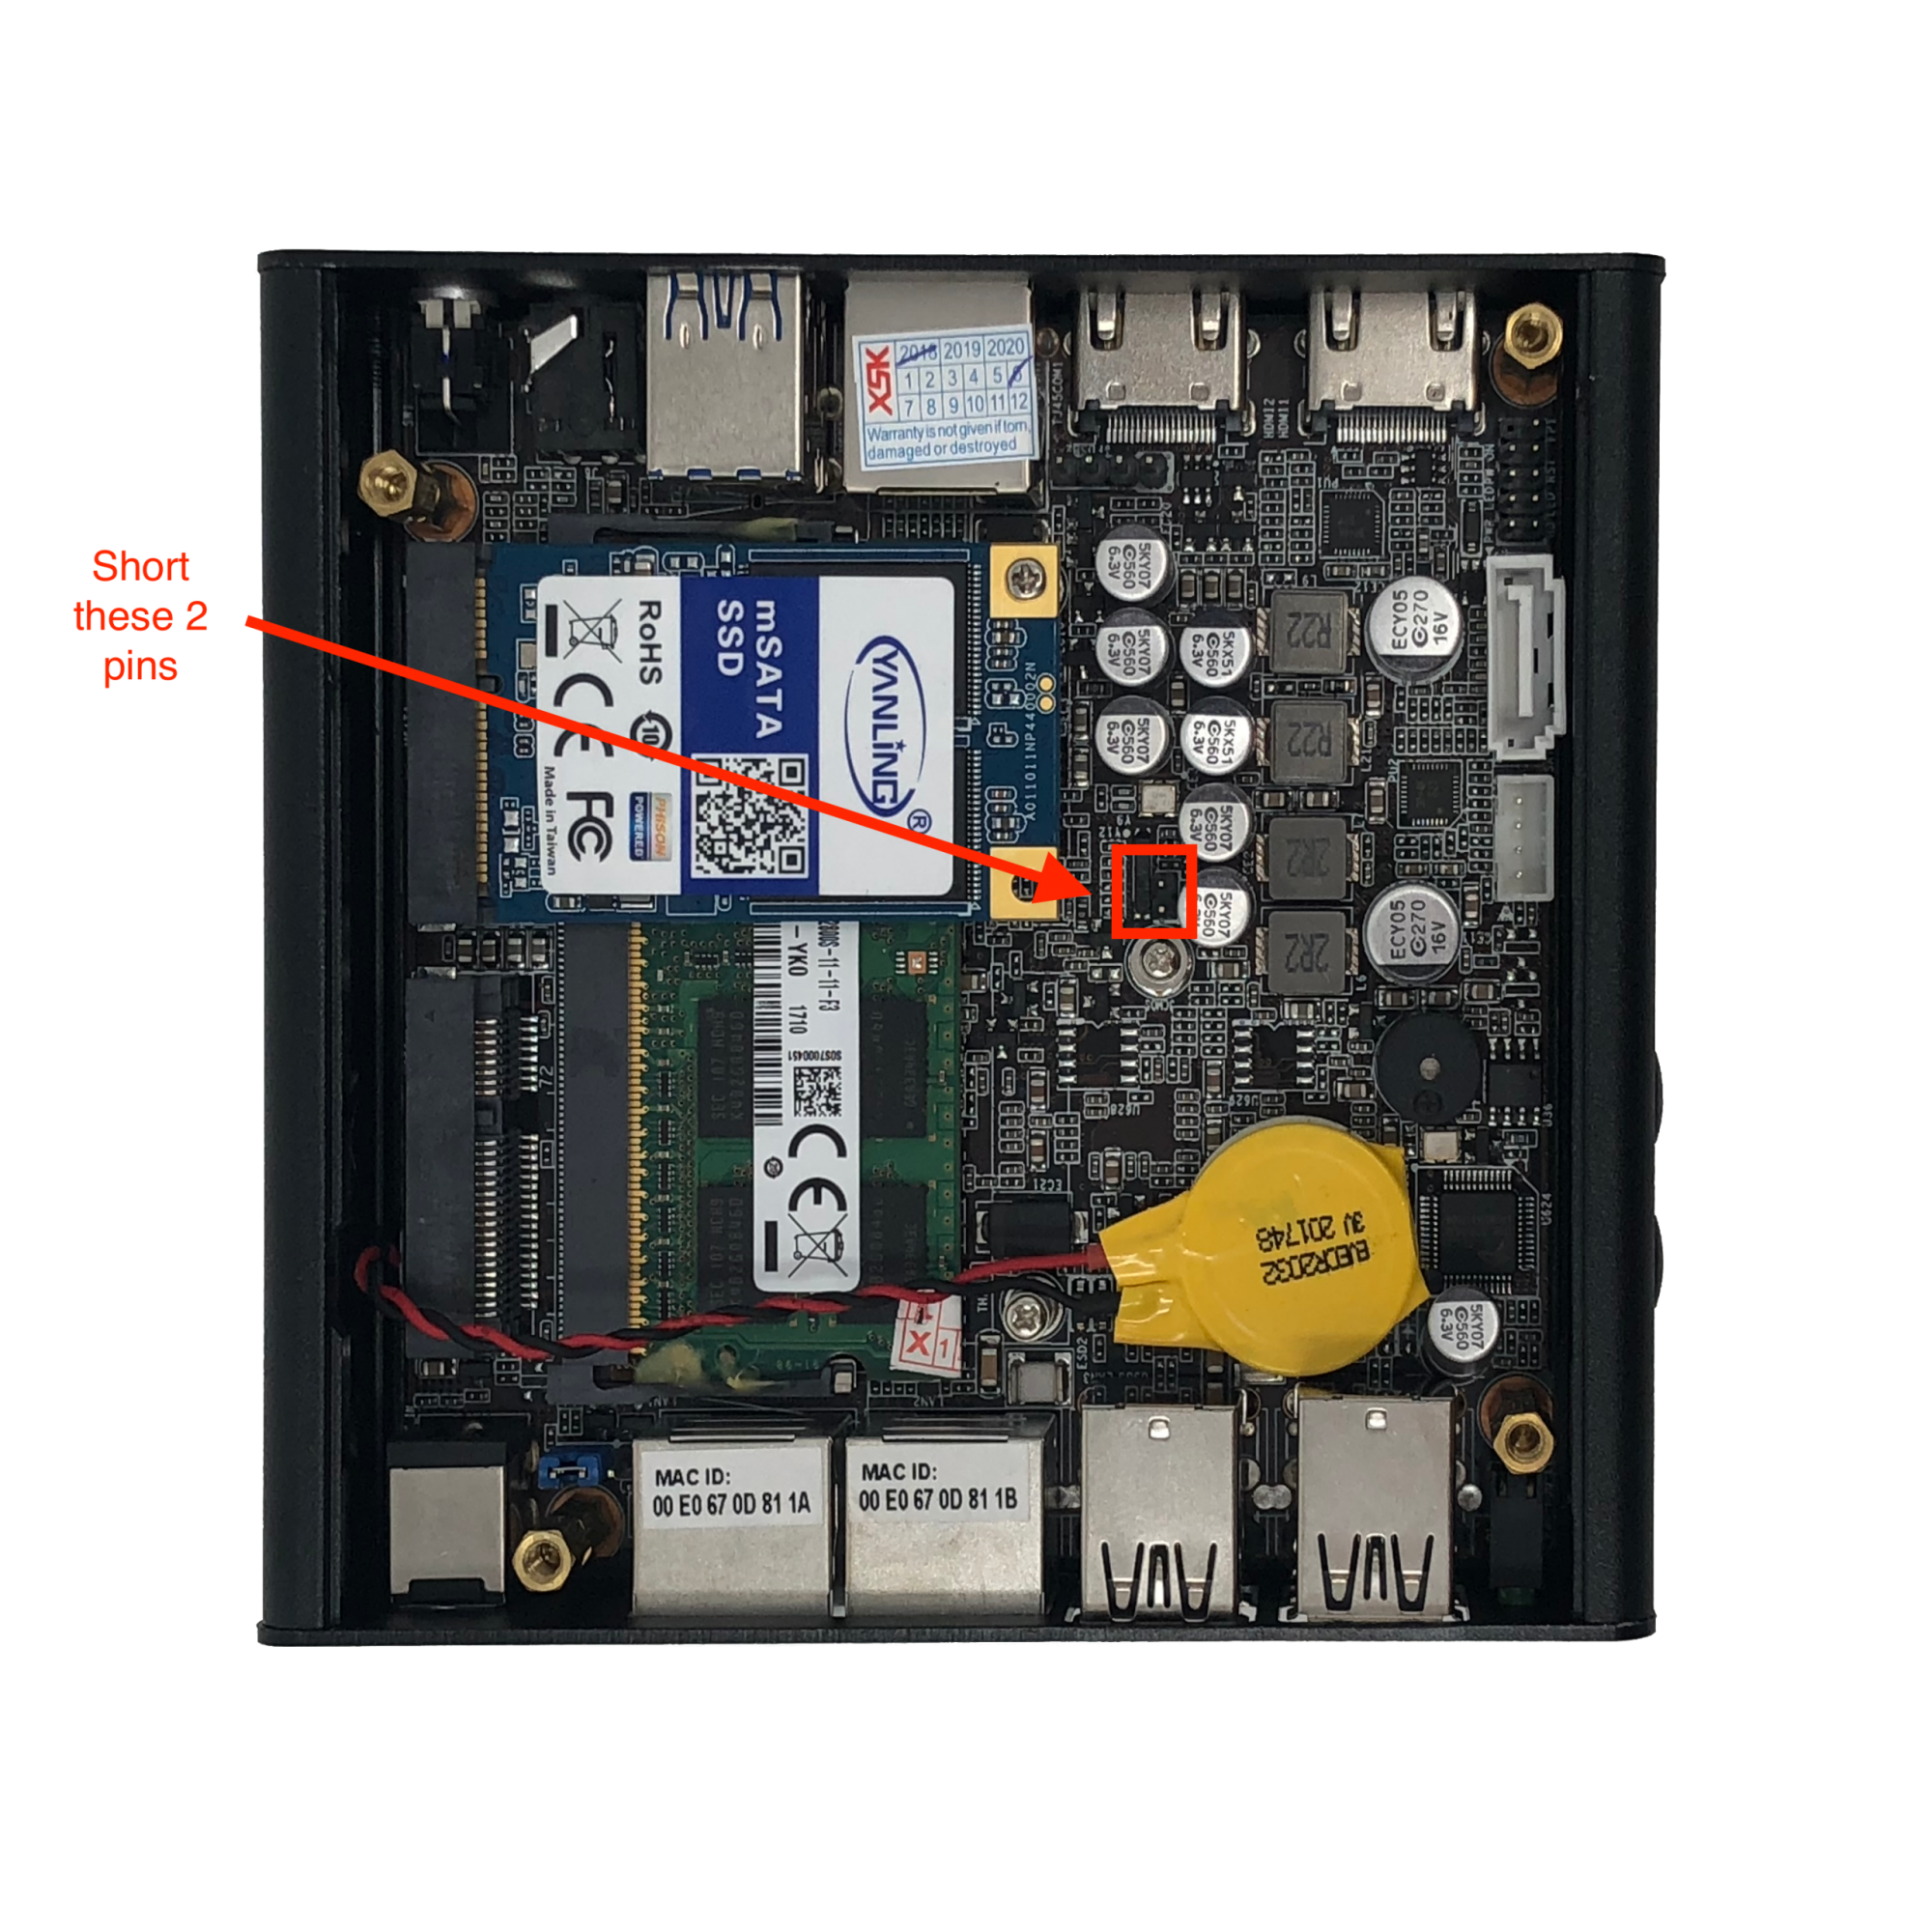
FW2B, FW4B CMOS Reset Pins
FW2B/FW4B Video Guide:
FW4C
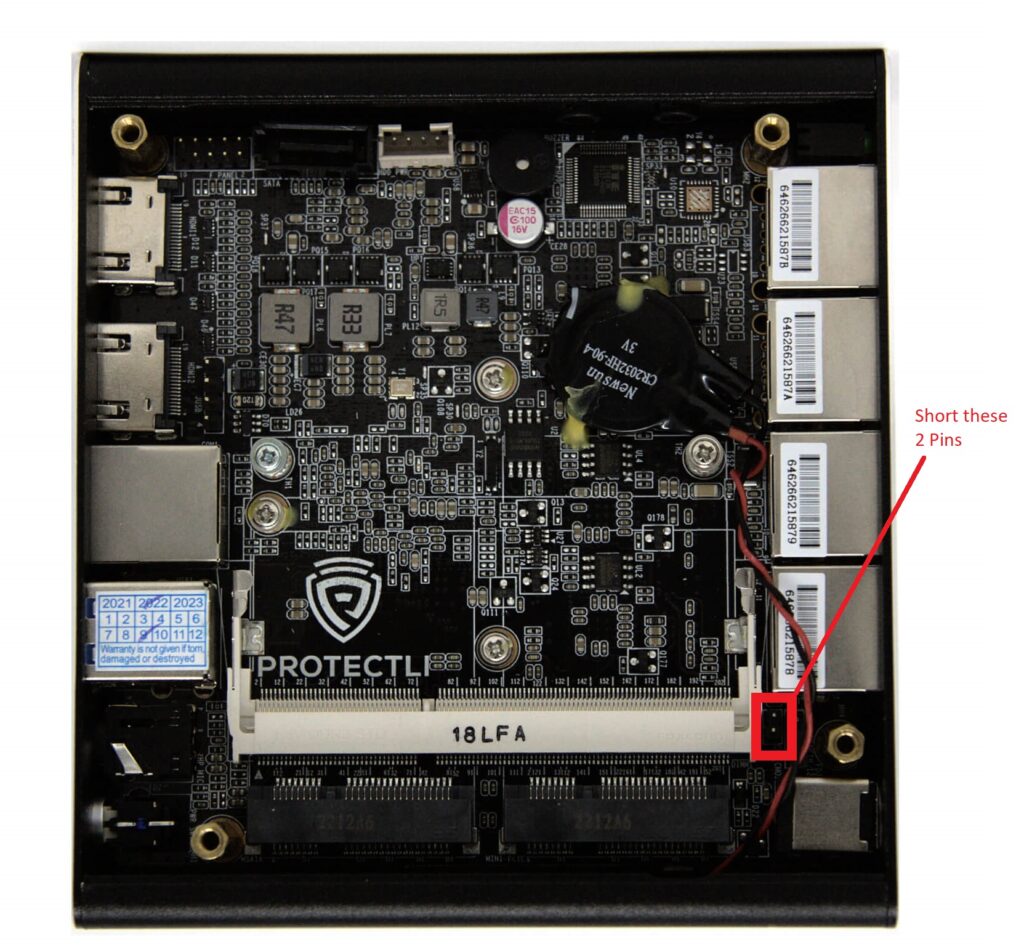
Although the FW4C has an identical chassis to the FW2B and FW4B, the CMOS reset pins are in a slightly different location due to a different motherboard layout.
To reset the CMOS/BIOS on the FW4C:
- Verify the Vault power supply is disconnected
- Open the Vault cover
- Using a screwdriver or other metal tool, short the two pins shown in the photo below for about 10 seconds.
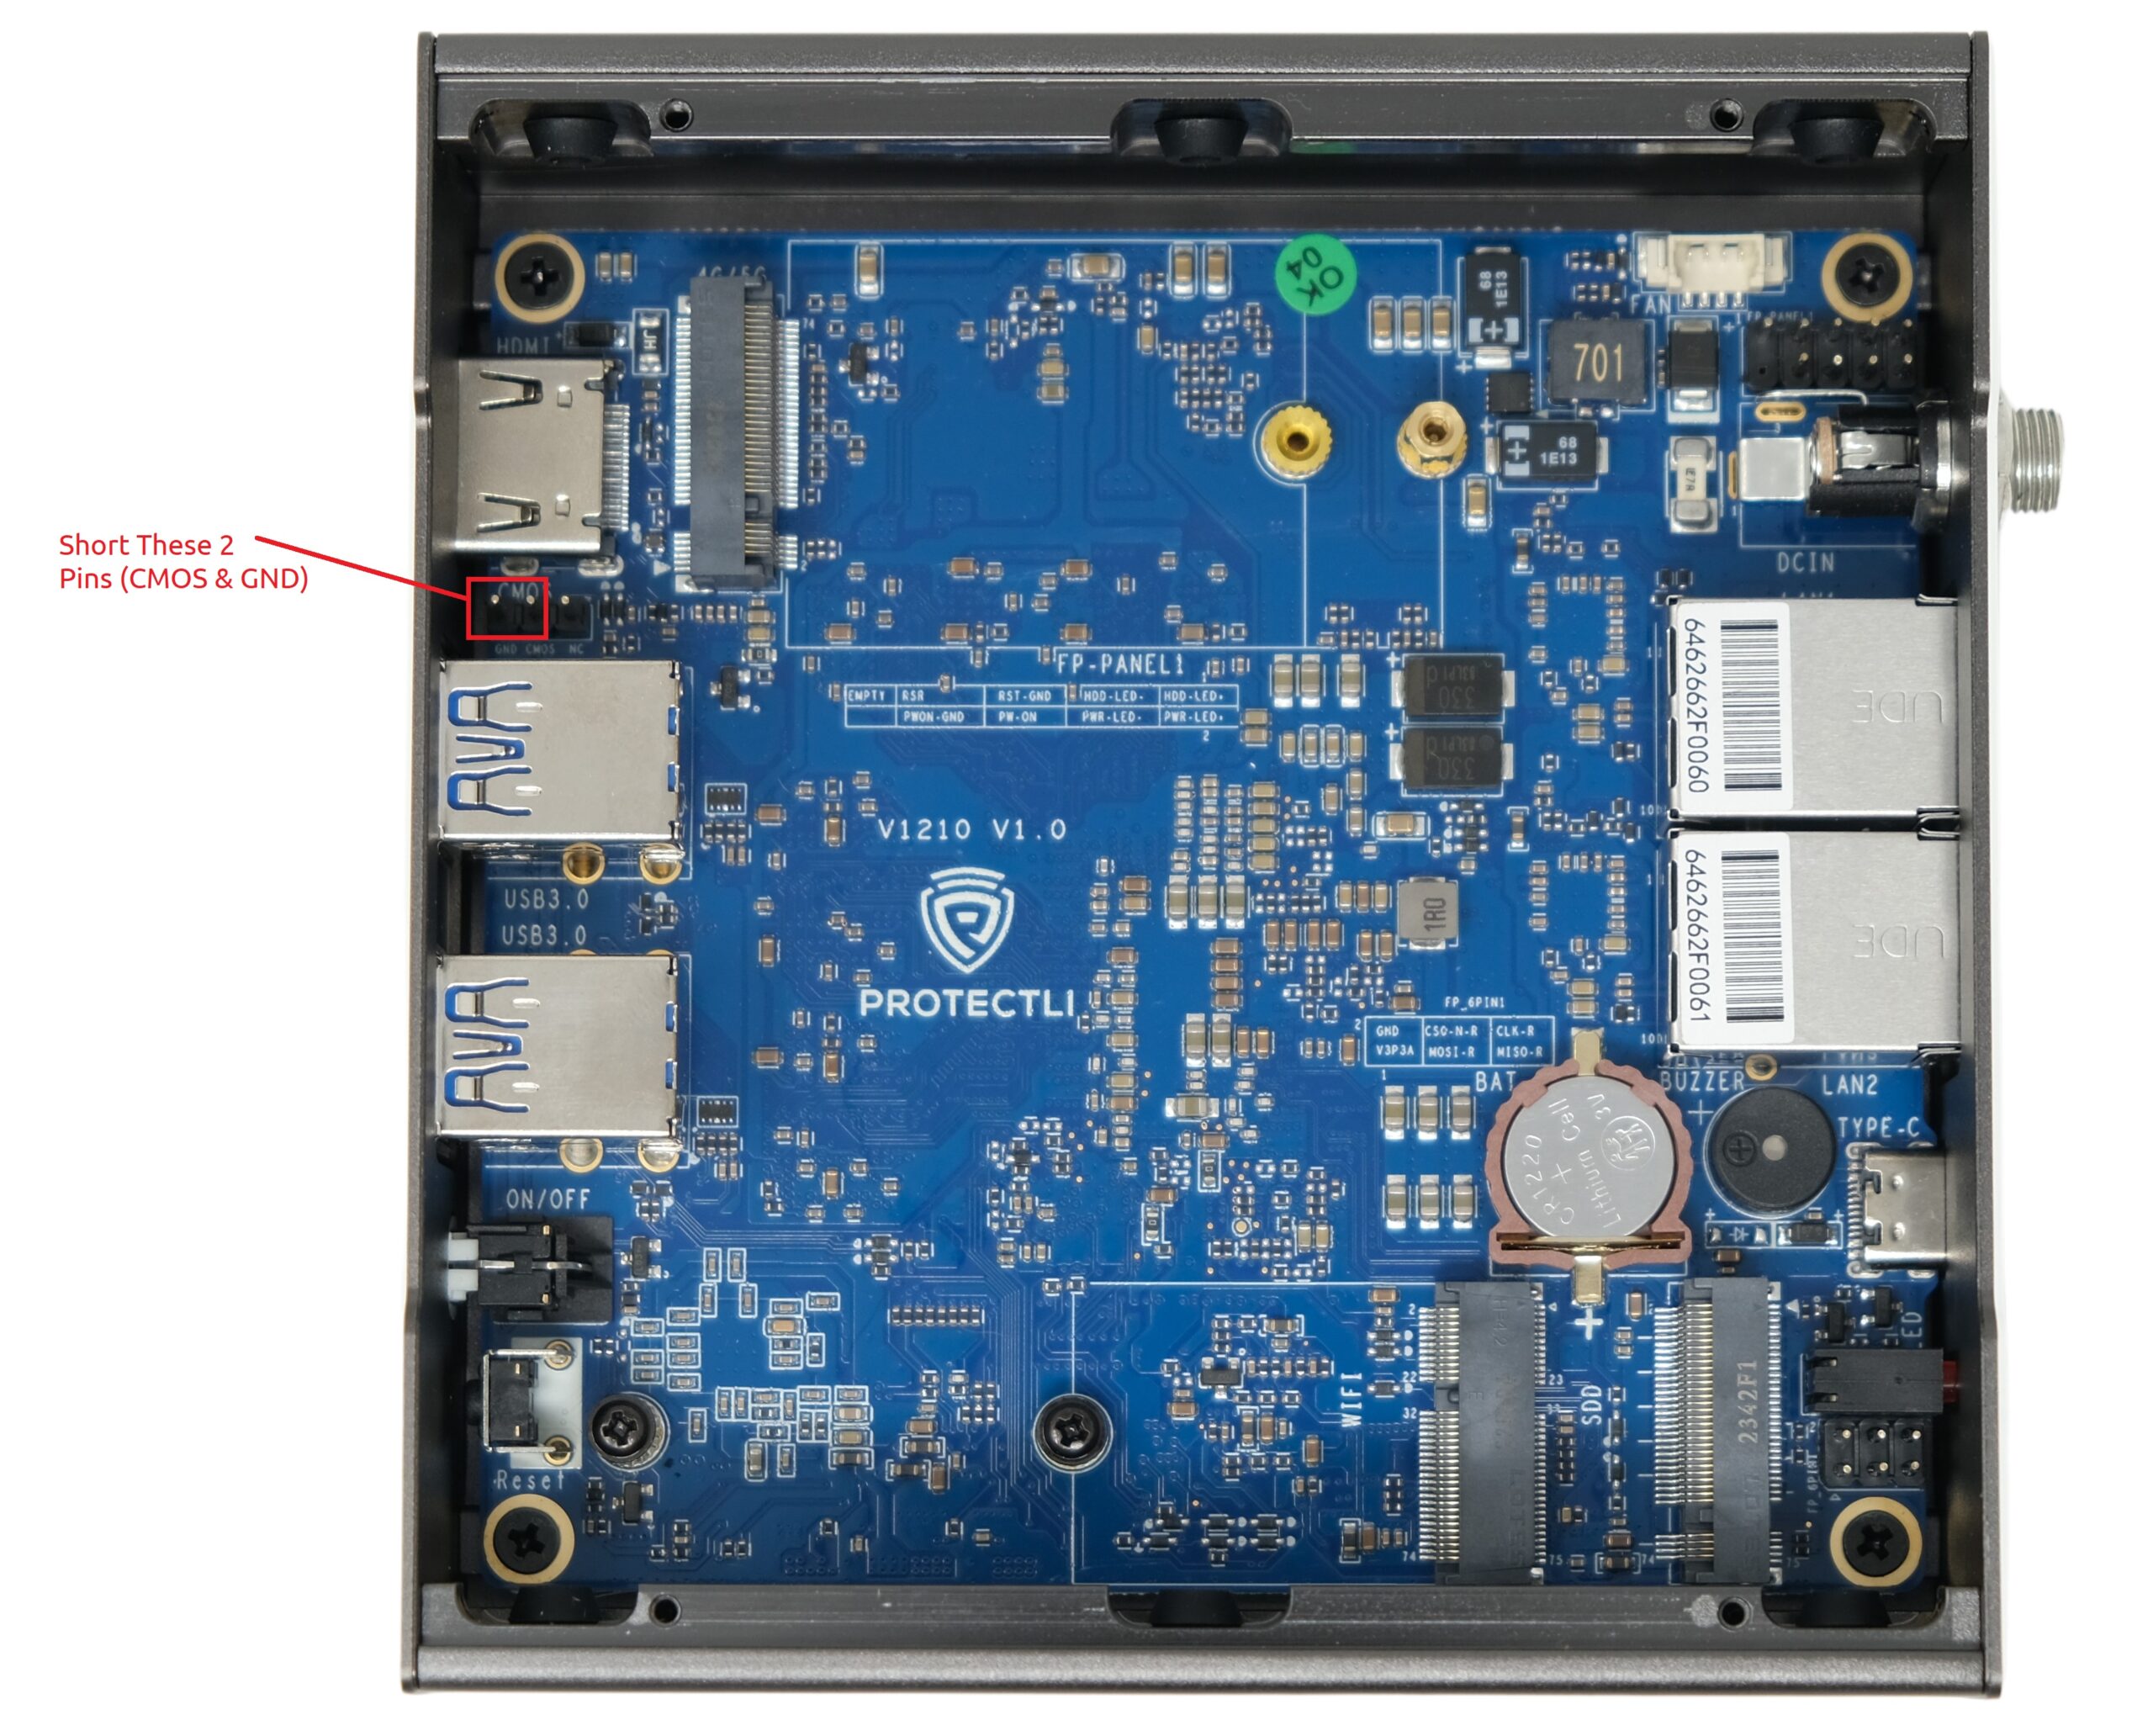
V Series (V12XX)
To reset the CMOS/BIOS on the V1XXX series:
- Verify the Vault power supply is disconnected
- Open the Vault cover
- Using a screwdriver or other metal tool, short the two pins shown in the photo below for about 10 seconds.
- Make sure to short the pins labeled "CMOS" and "GND" on the board
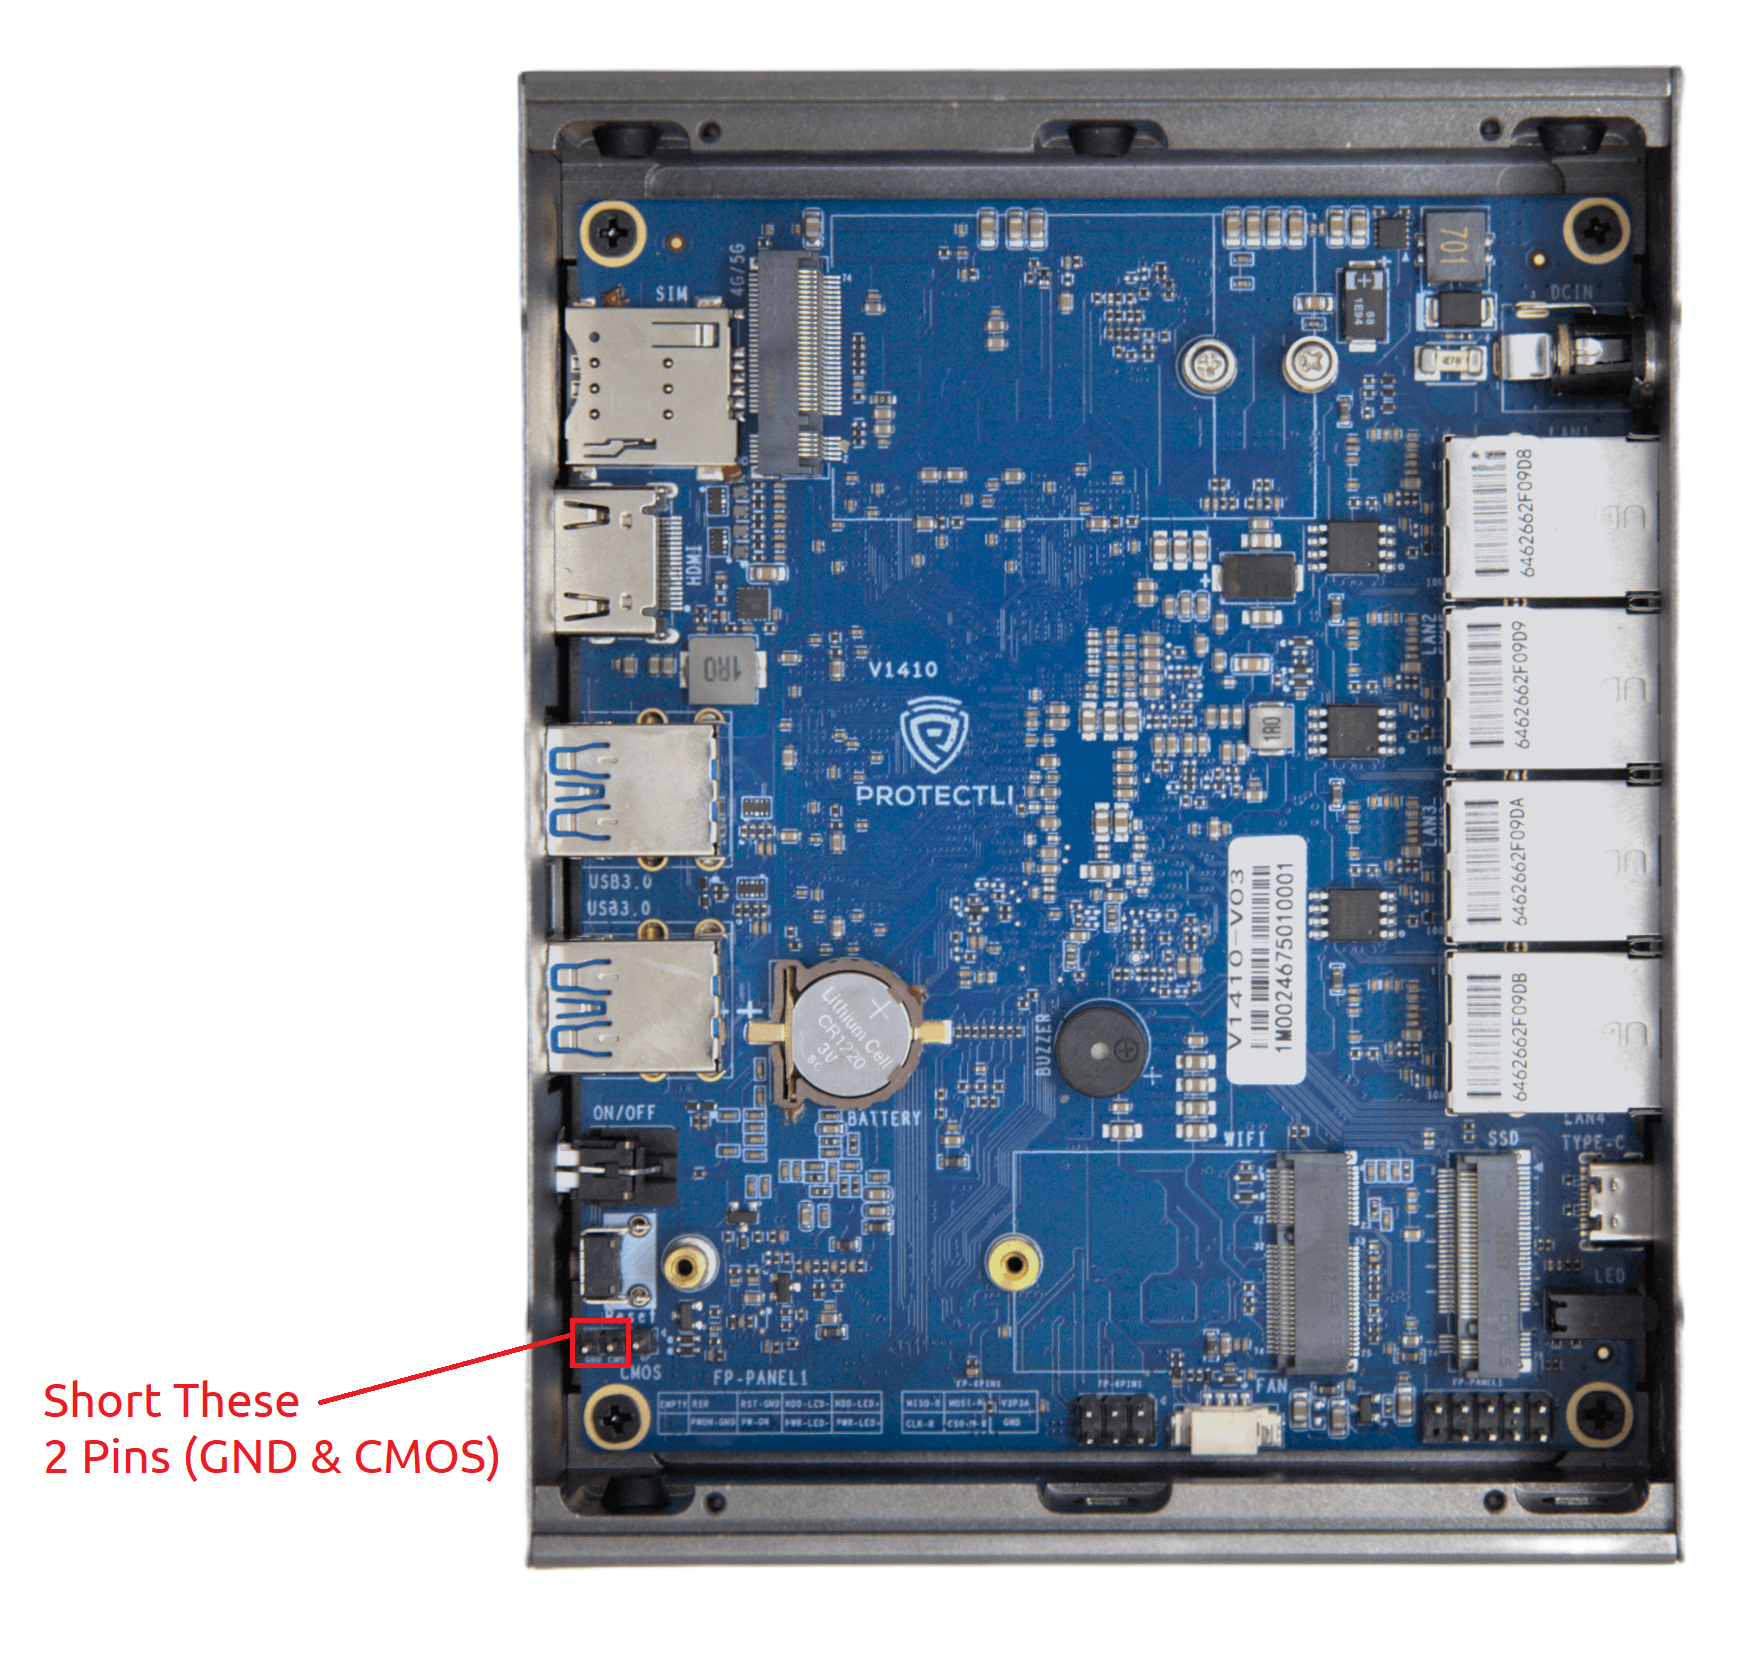
V Series (V14XX)
To reset the CMOS/BIOS on the V1XXX series:
- Verify the Vault power supply is disconnected
- Open the Vault cover
- Using a screwdriver or other metal tool, short the two pins shown in the photo below for about 10 seconds.
- Make sure to short the pins labeled "CMOS" and "GND" on the board
V Series (V16XX)
To reset the CMOS/BIOS on the V1XXX series:
- Verify the Vault power supply is disconnected
- Open the Vault cover
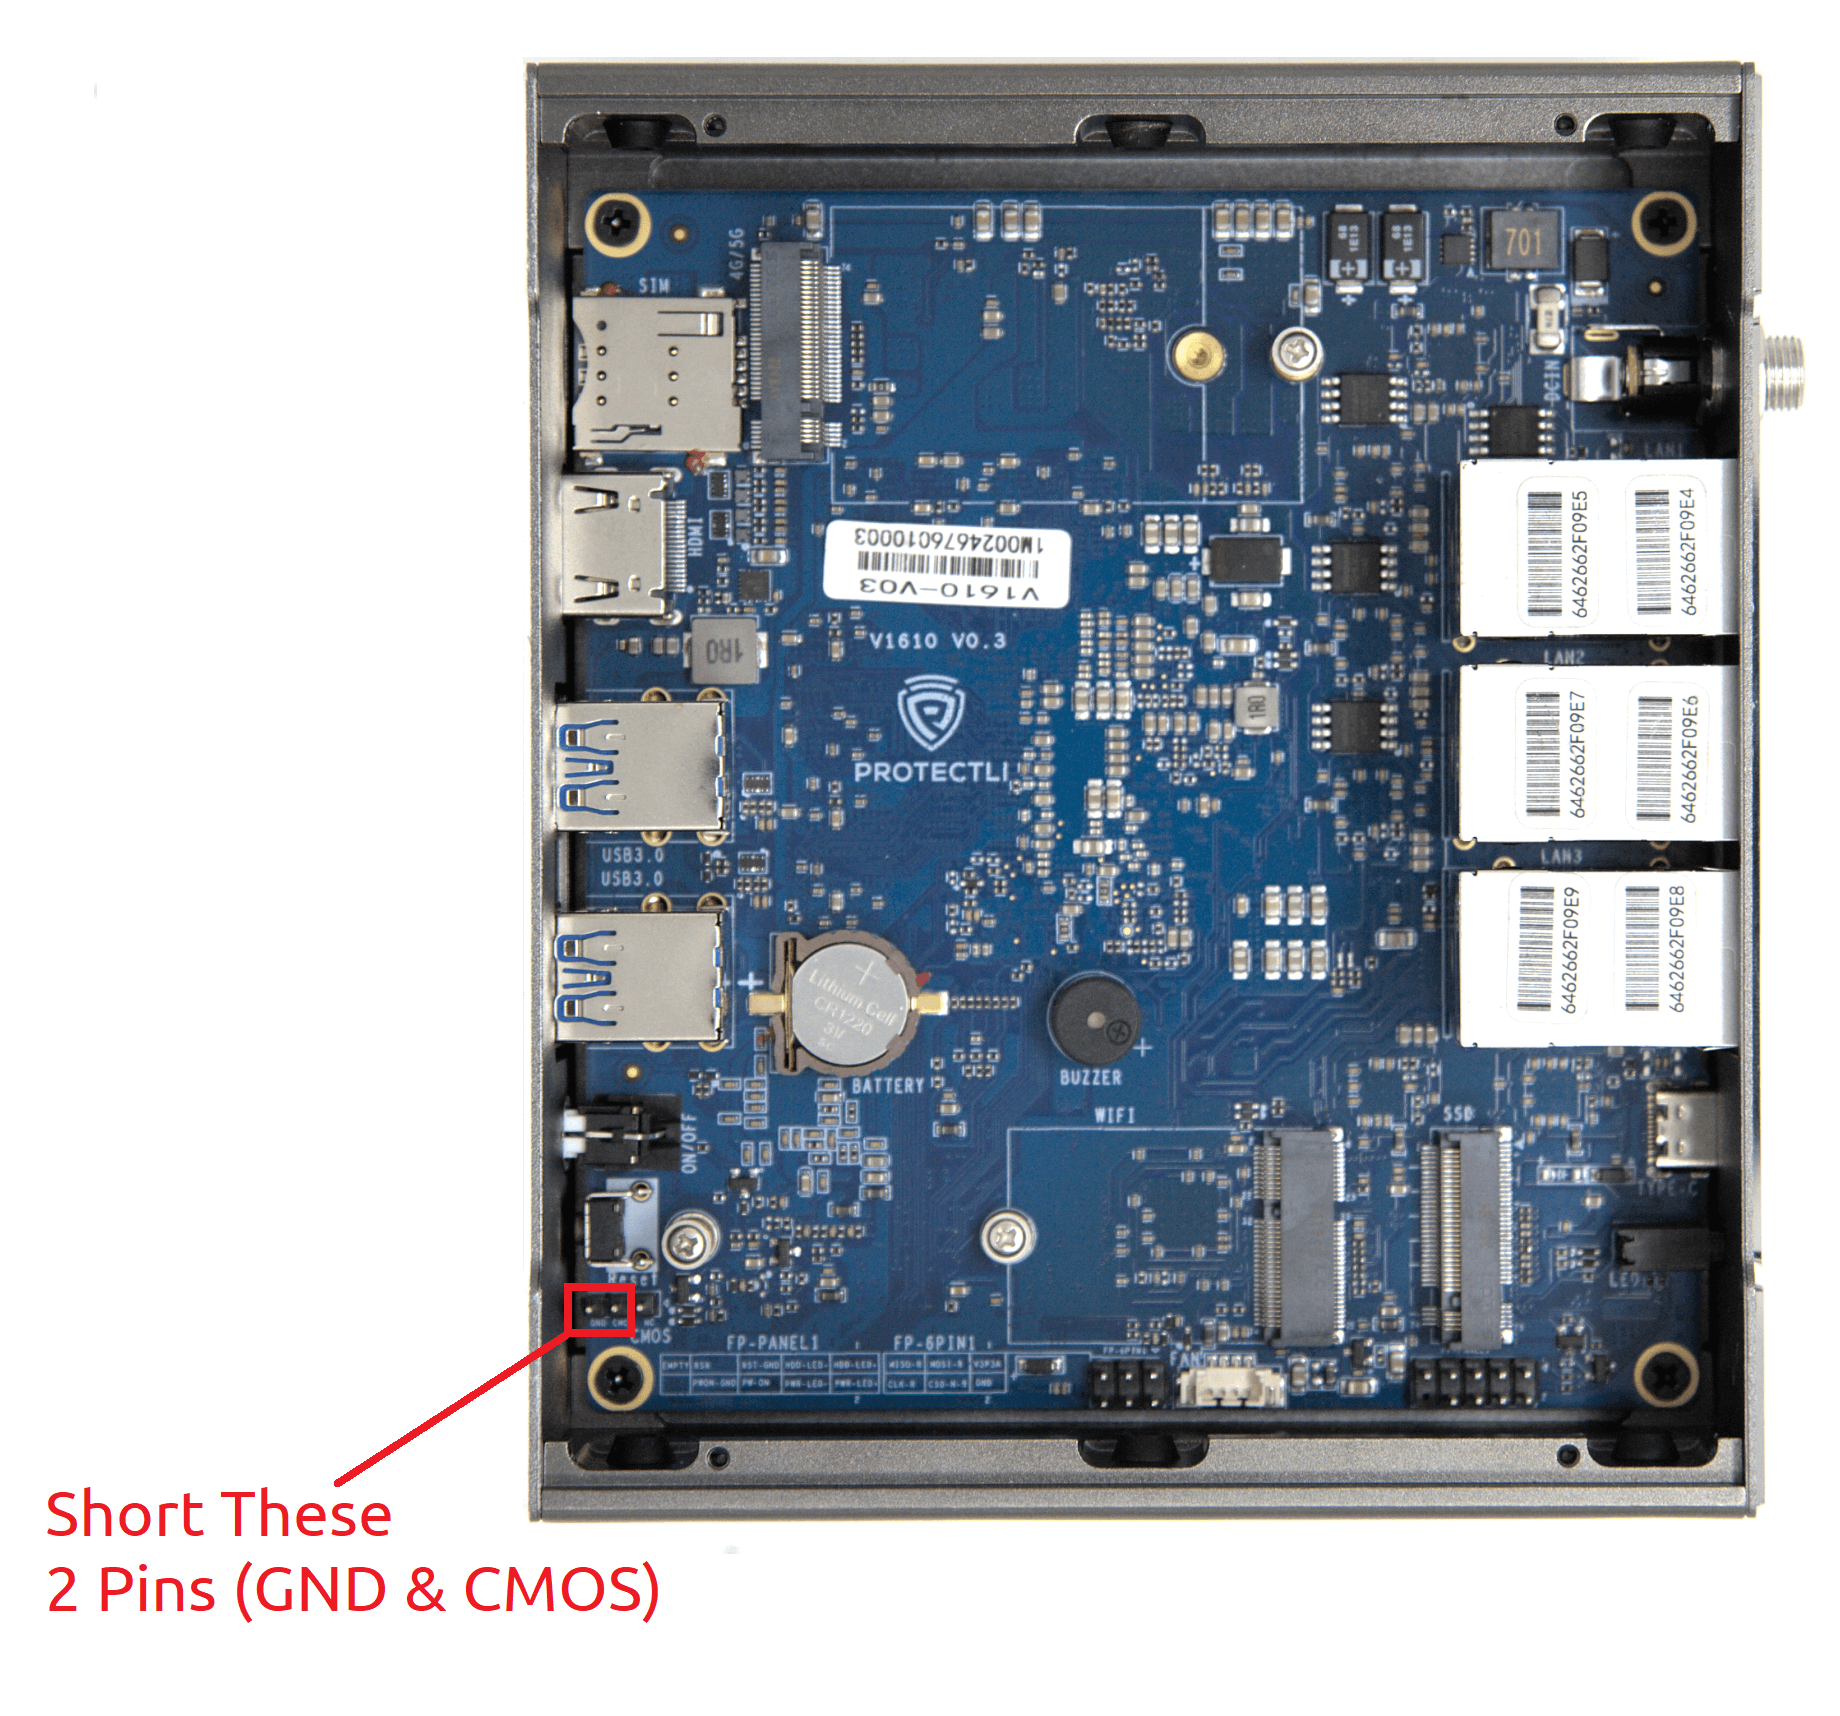
- Using a screwdriver or other metal tool, short the two pins shown in the photo below for about 10 seconds.
- Make sure to short the pins labeled "CMOS" and "GND" on the board
FW6 Series
To reset the CMOS/BIOS on the FW6 series:
- Verify the Vault power supply is disconnected
- Open the Vault cover
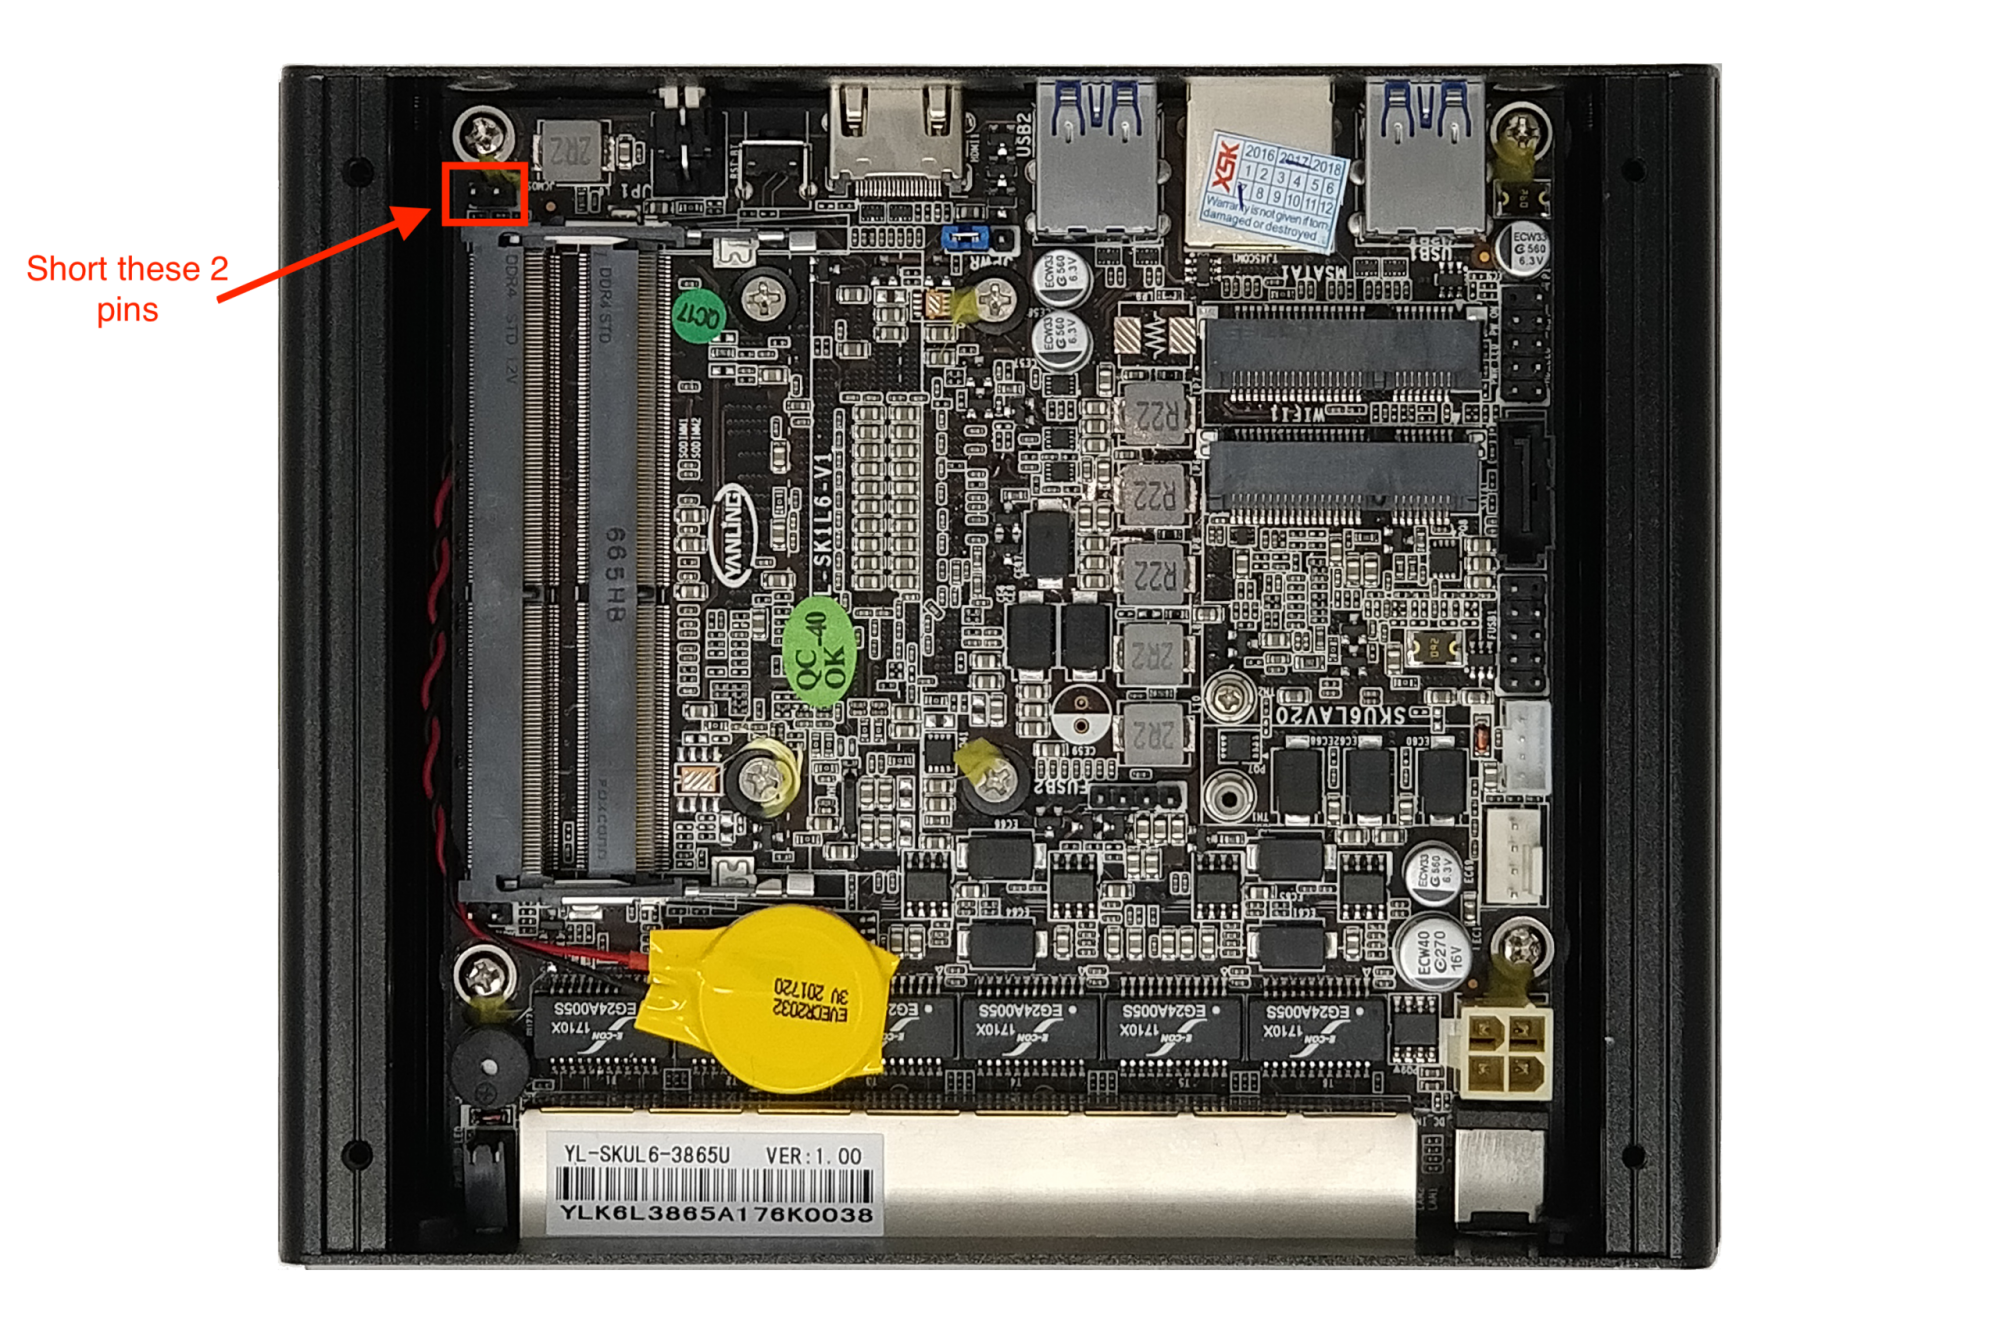
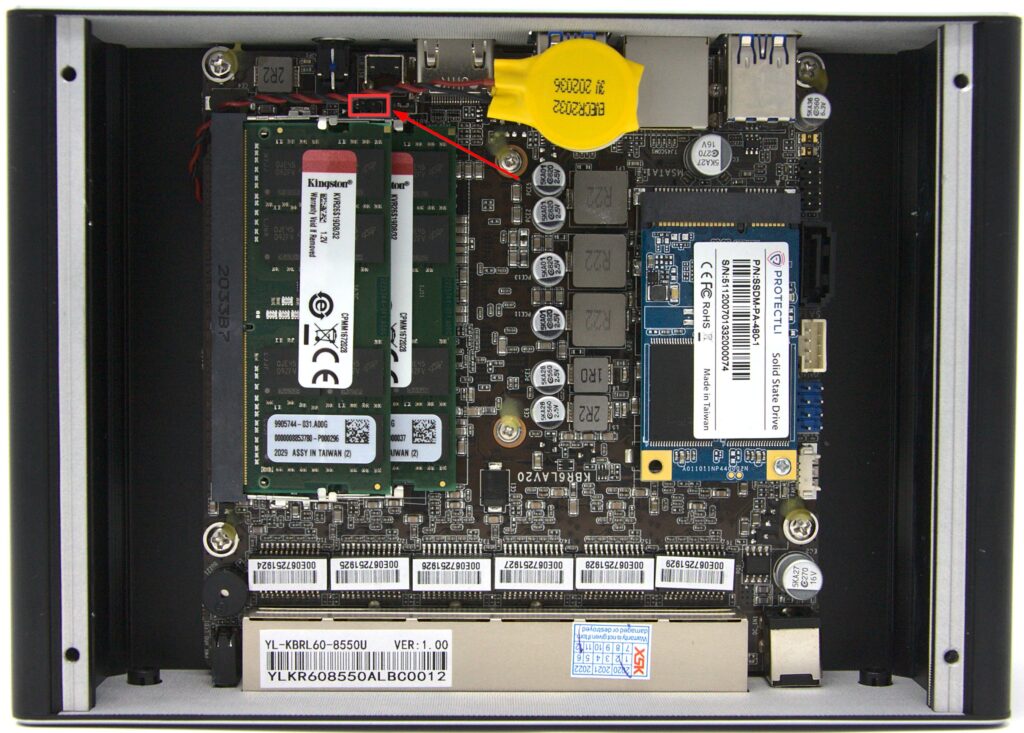
- Using a screwdriver or other metal tool, short the two pins shown in the photo below for about 10 seconds.
FW6D/E Video Guide:
VP Series
To reset the CMOS/BIOS on the VP series:
- Verify the Vault power supply is disconnected
- Open the Vault cover
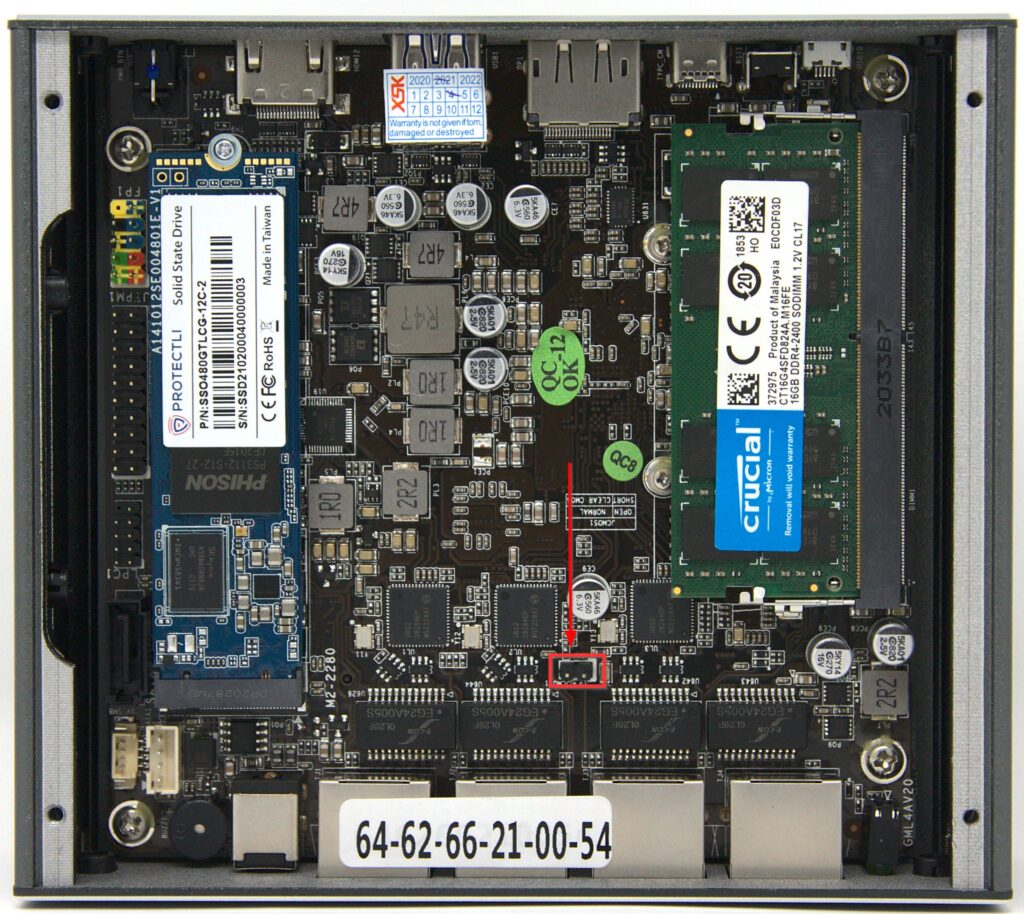
- Using a screwdriver or other metal tool, short the two pins shown in the photo below for about 10 seconds.
VP2410
VP2410 Video Guide:
VP2420
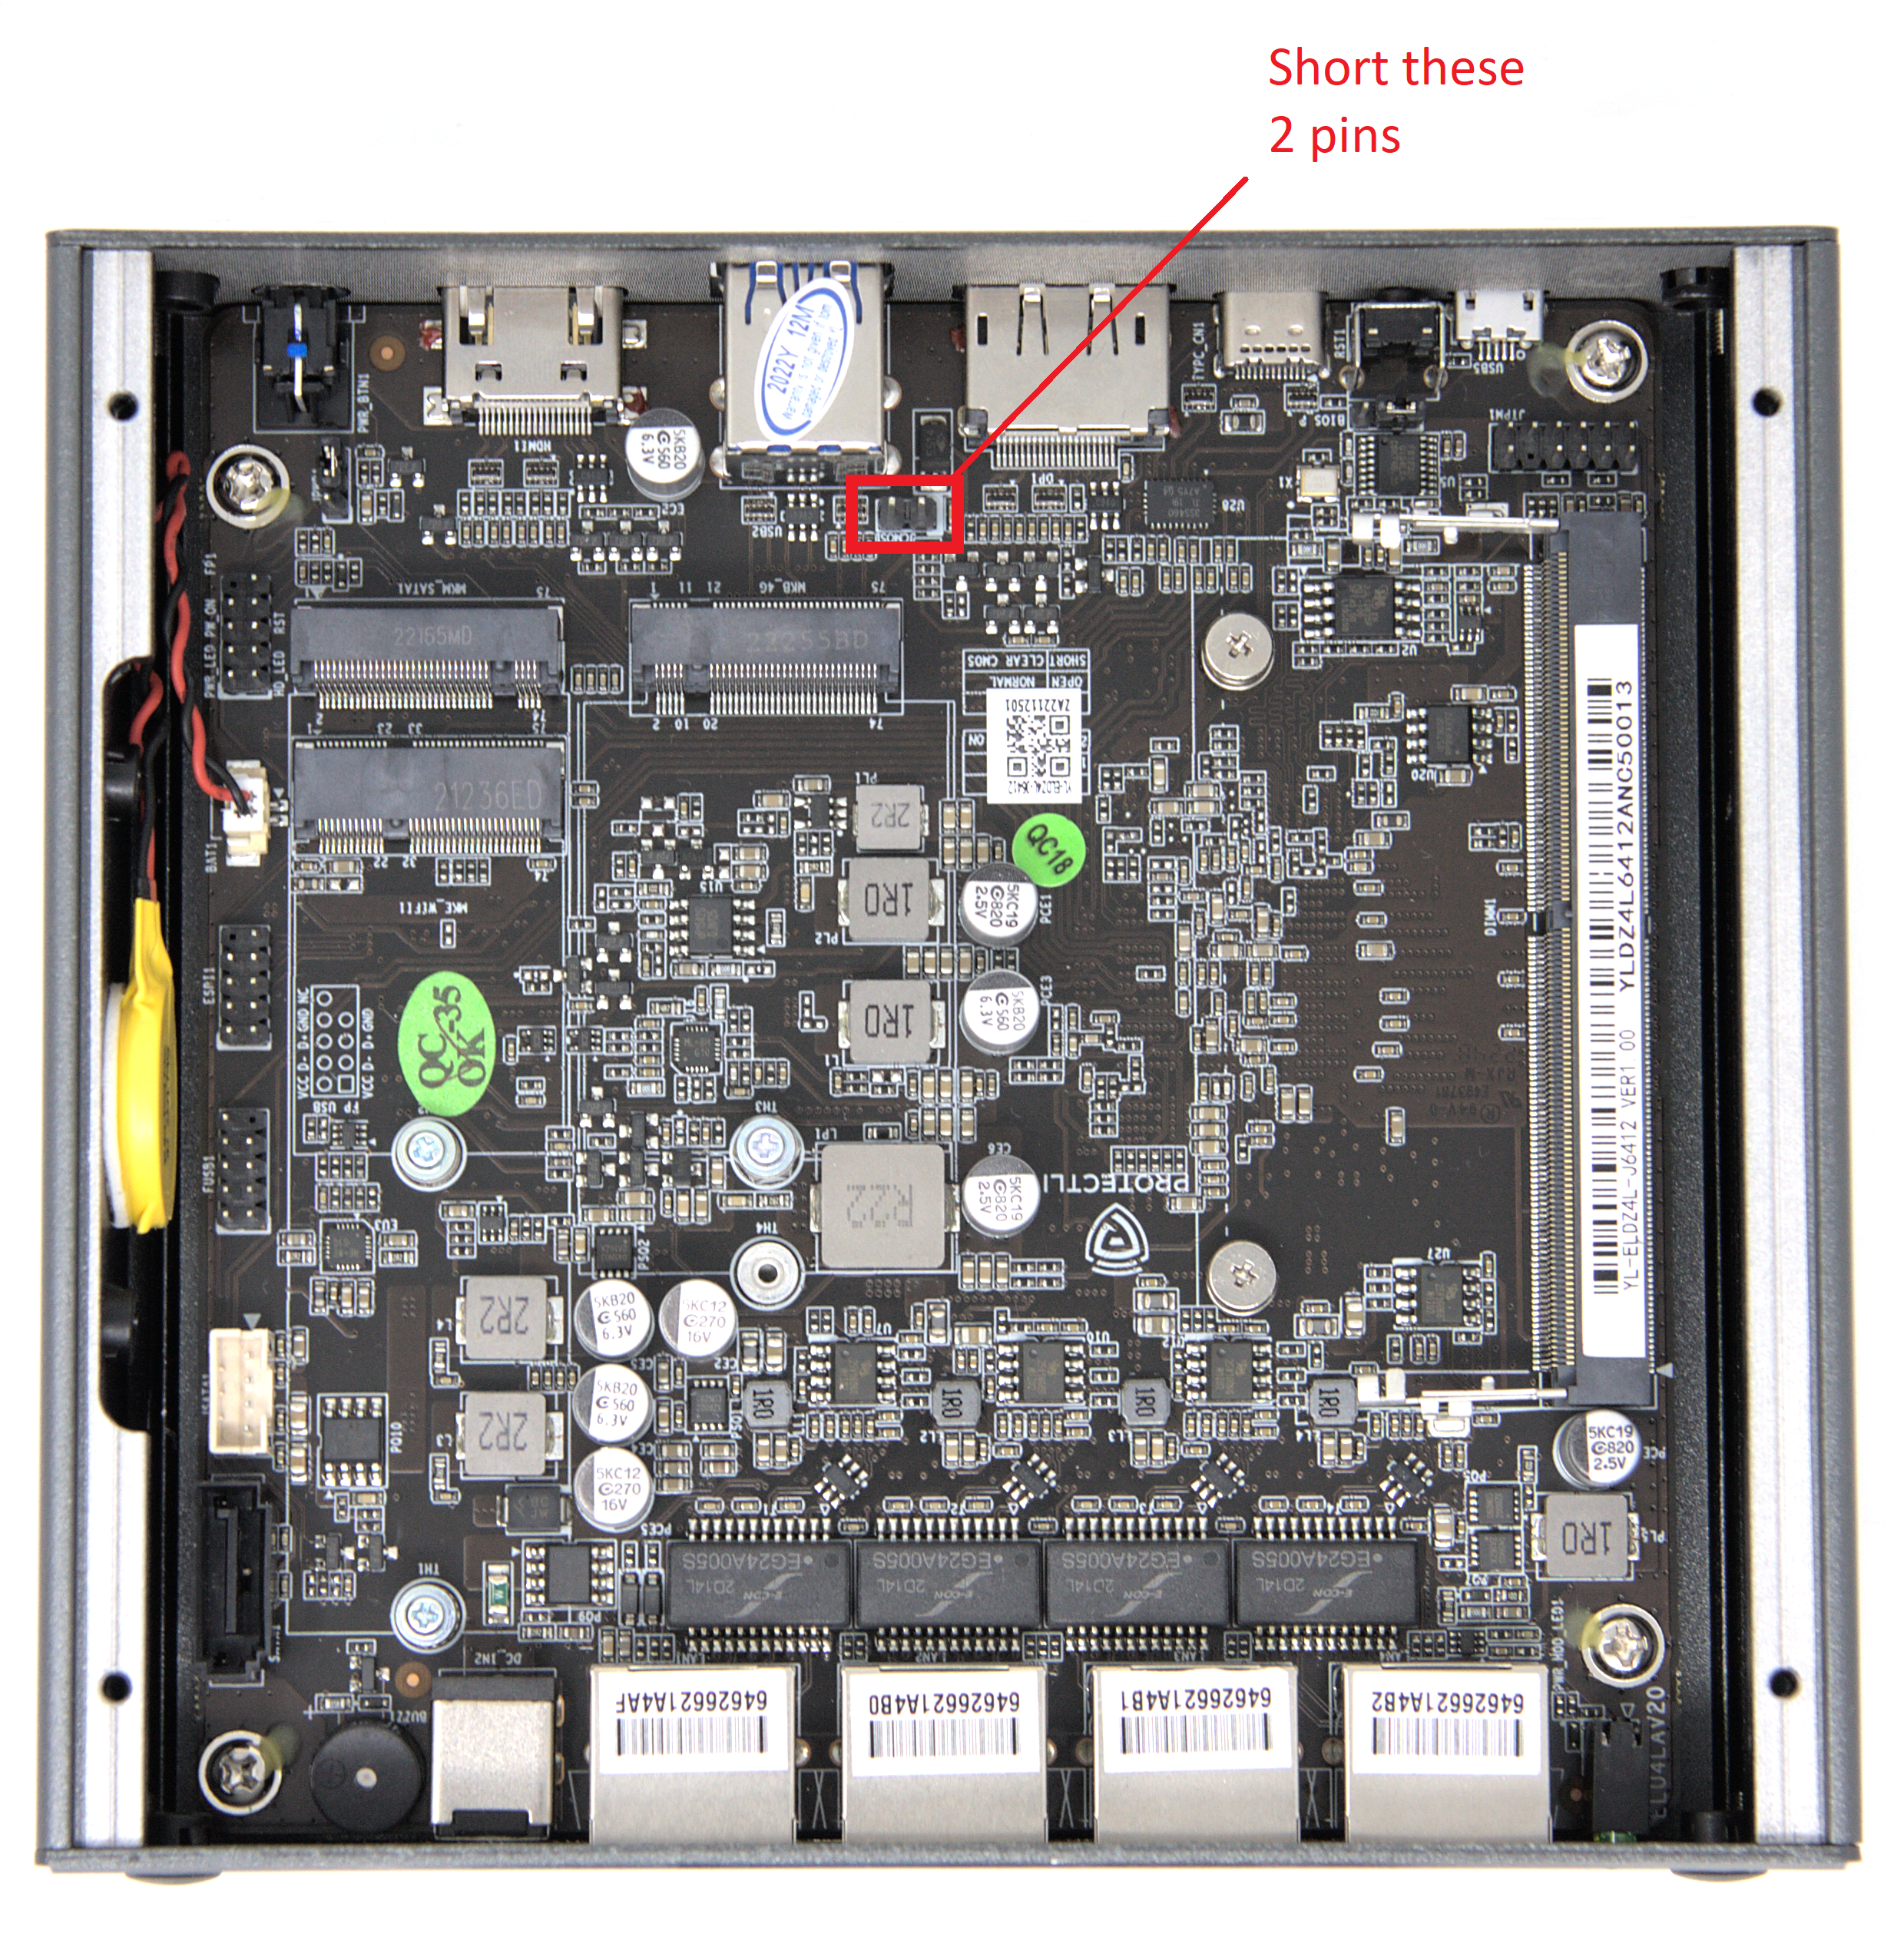
VP2430
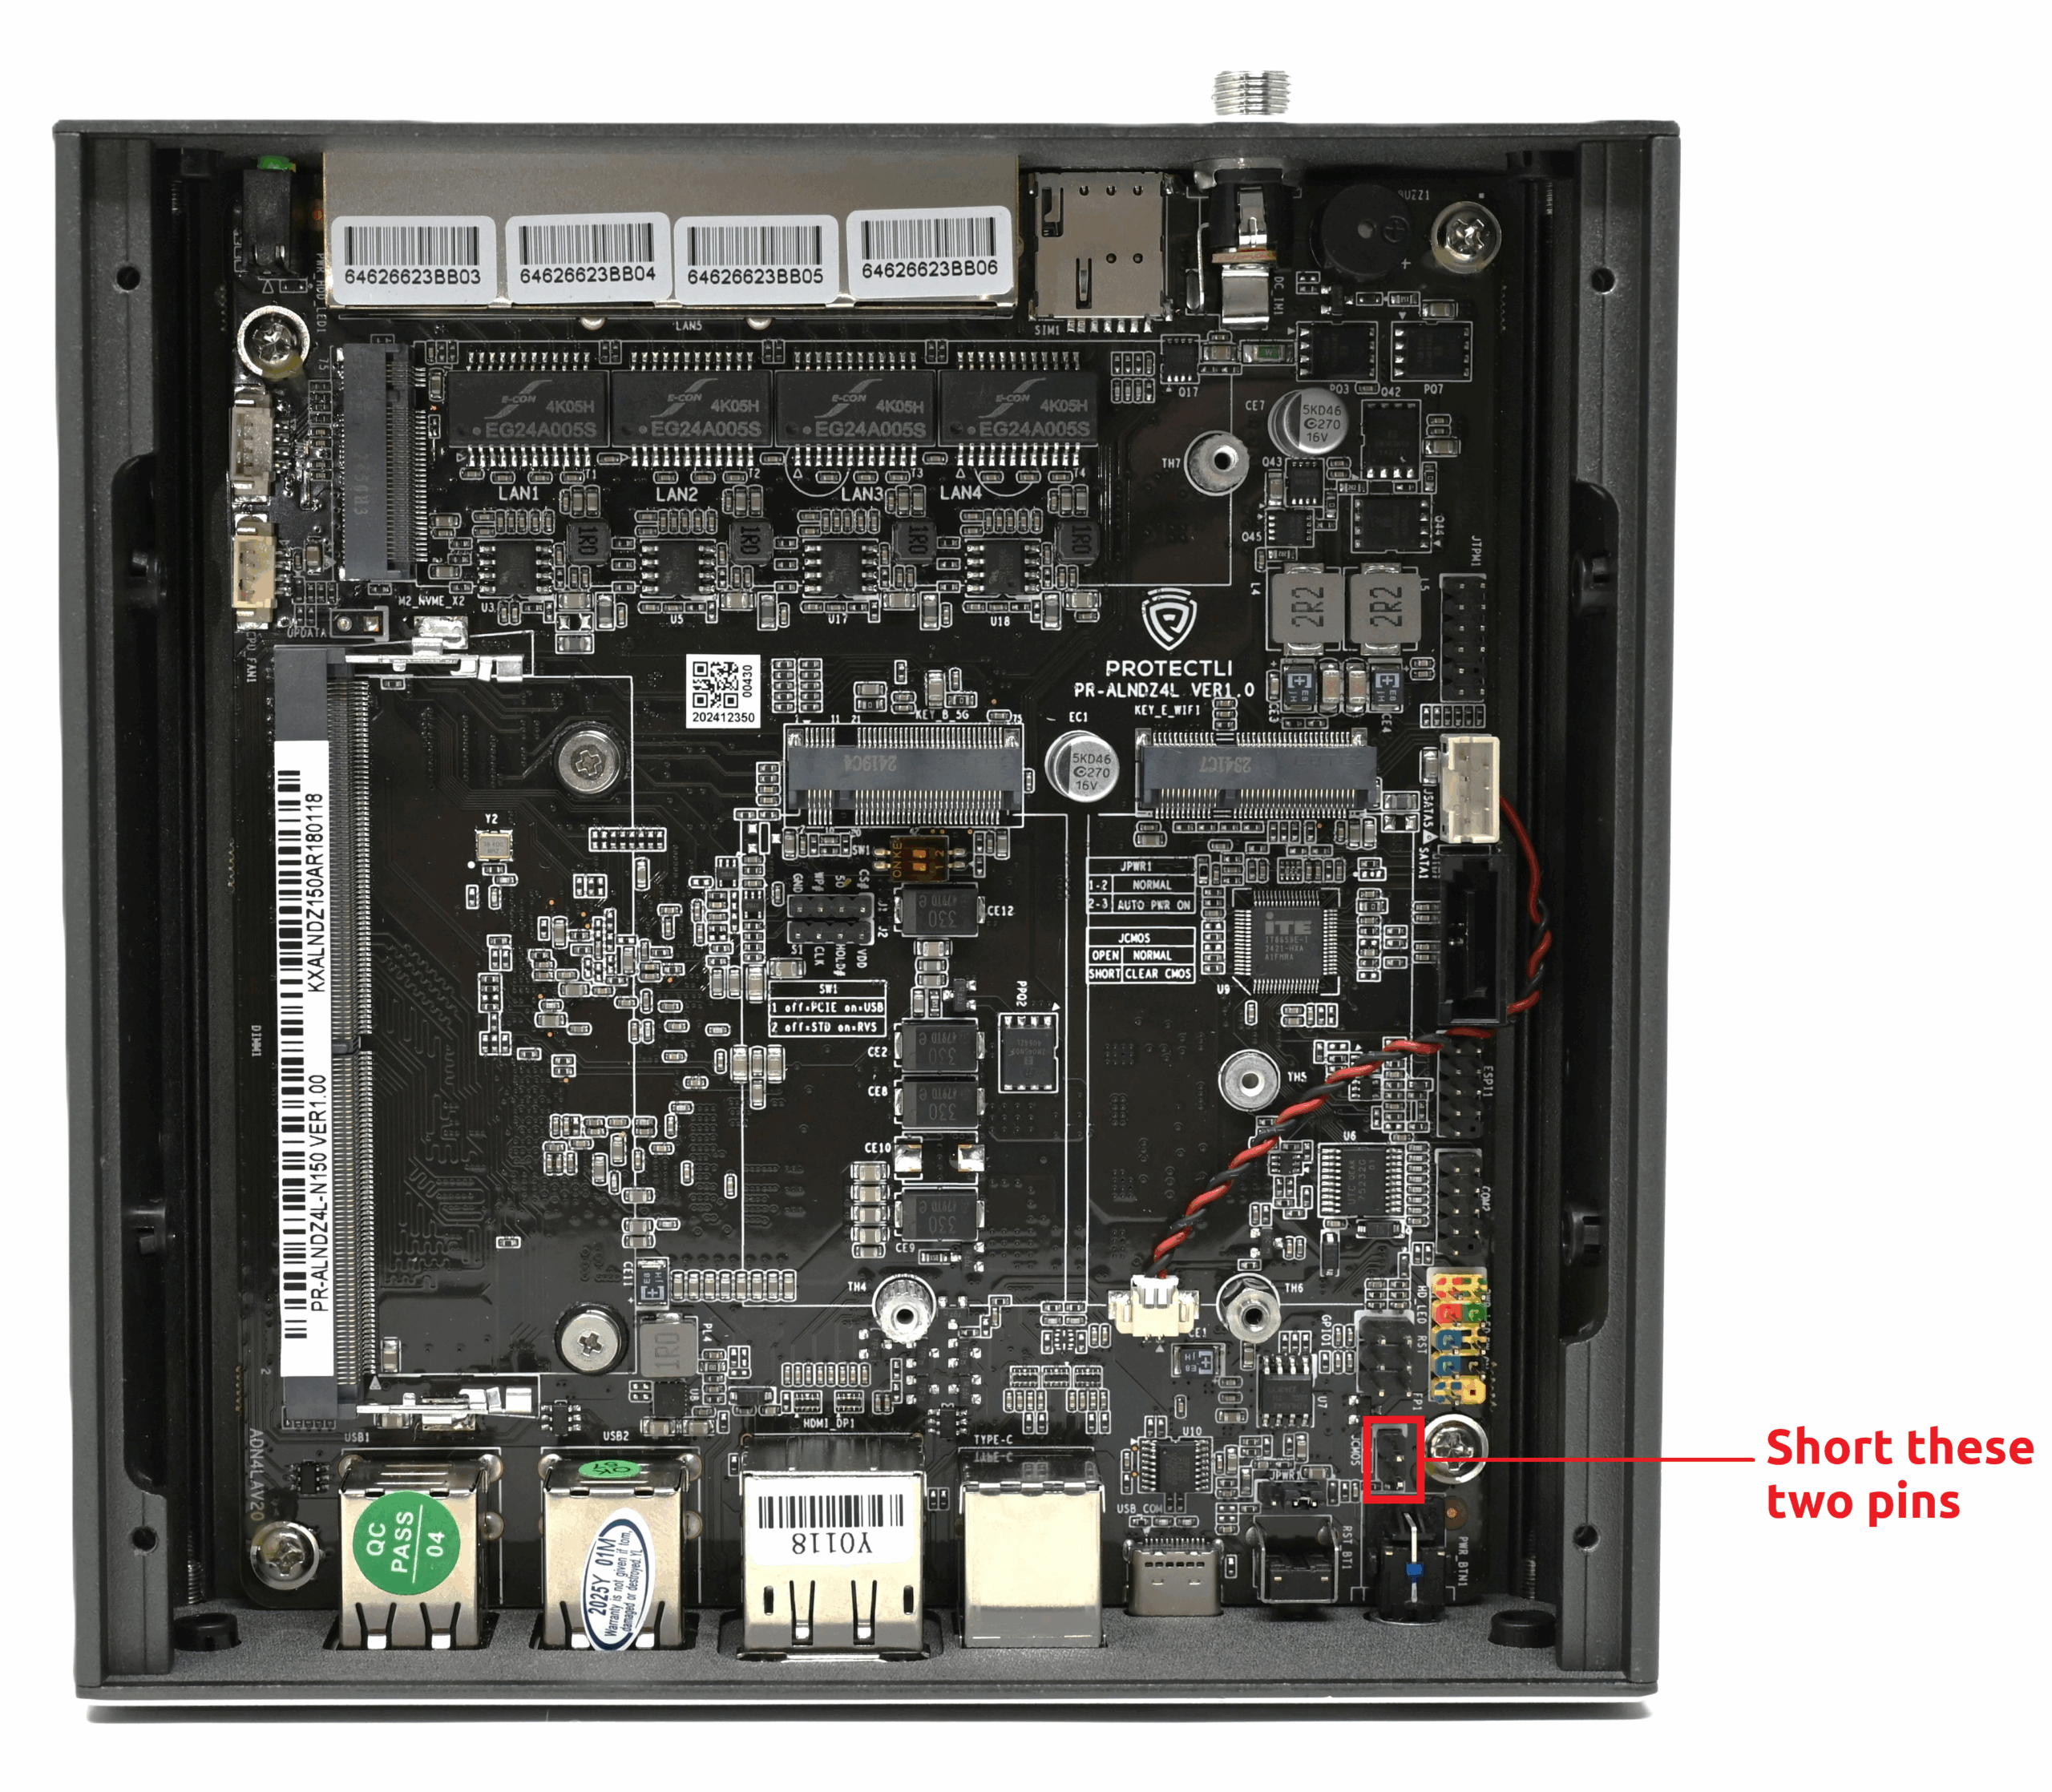
VP2440
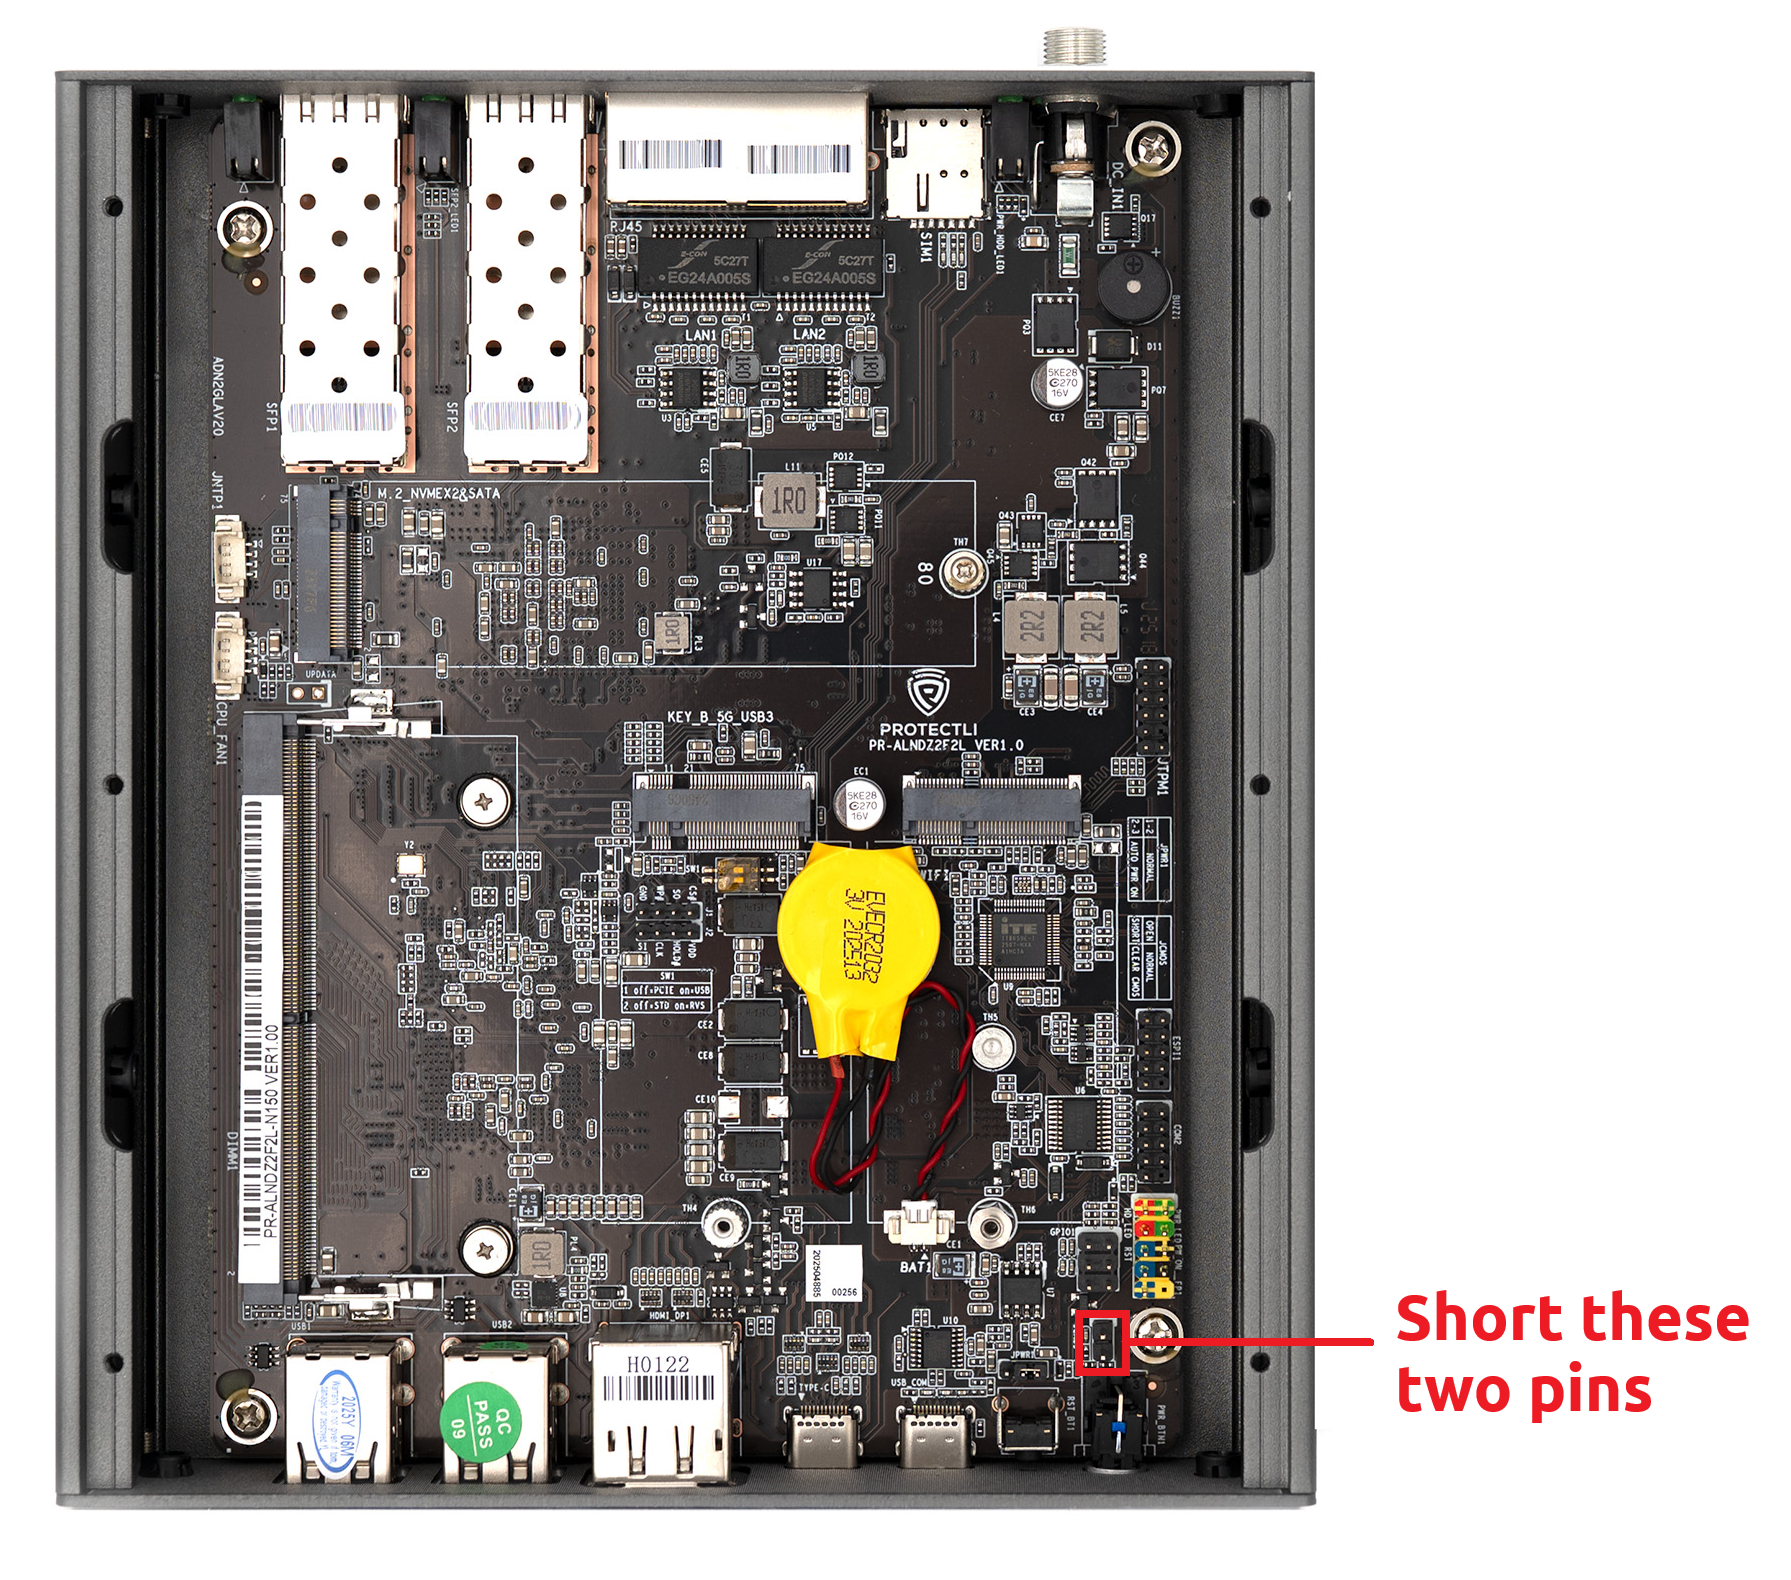
VP3200
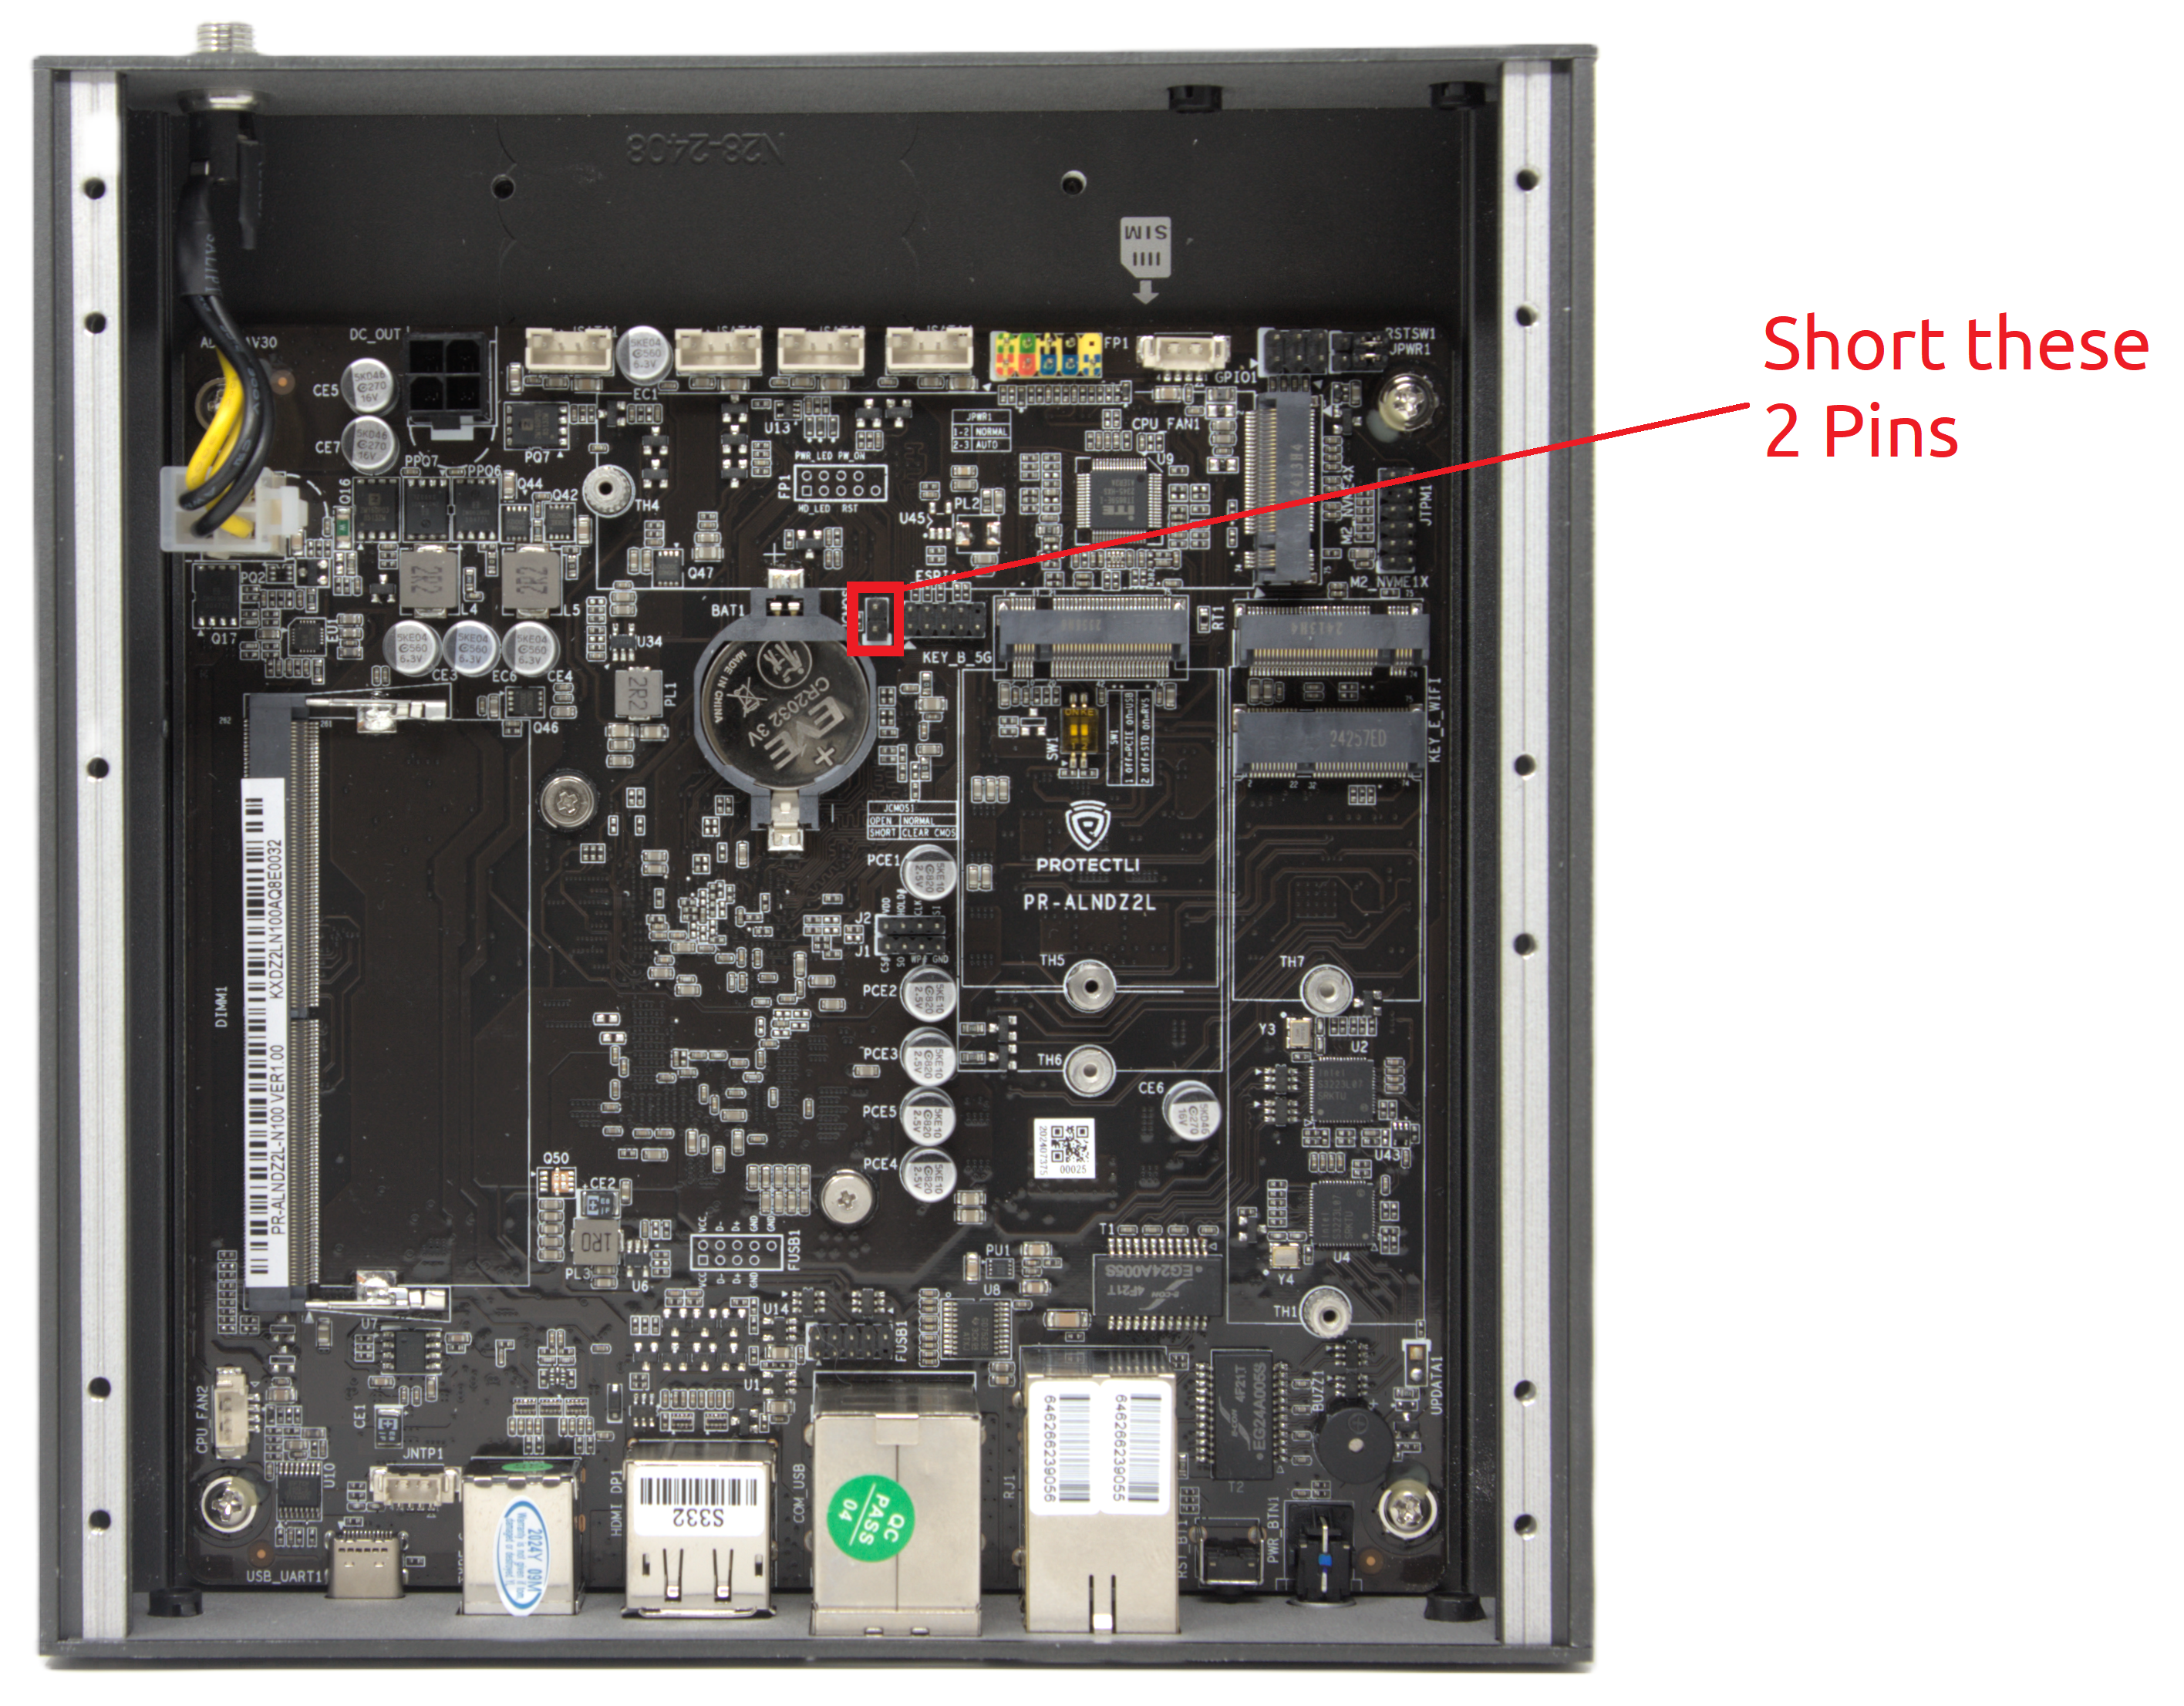
VP4600
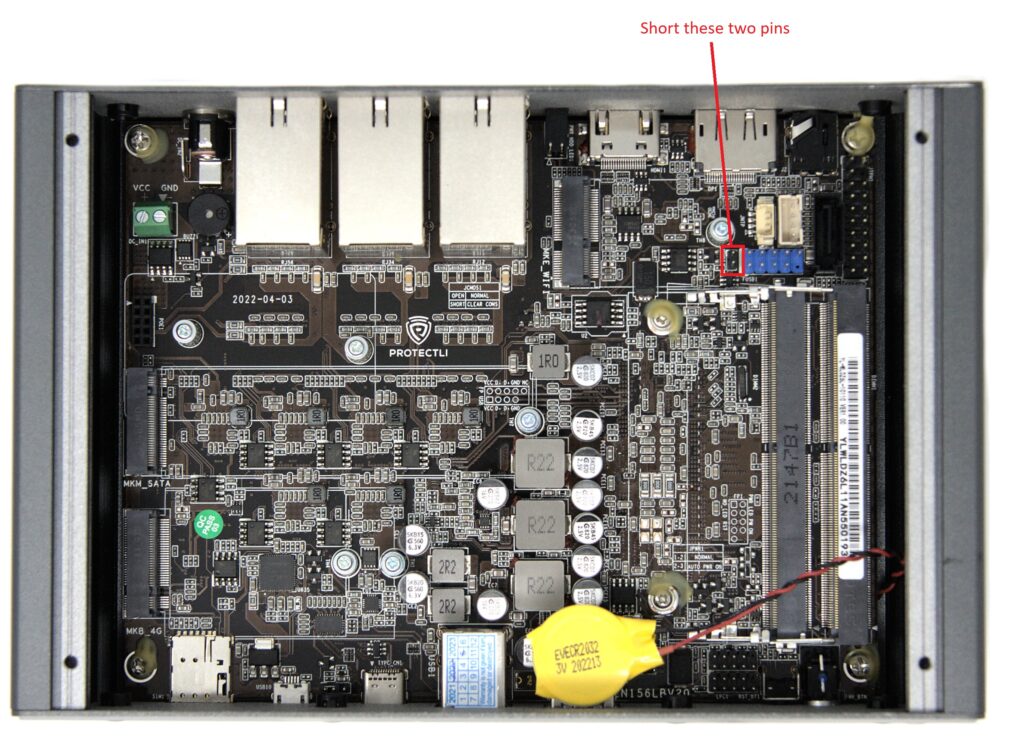
VP4600 Video Guide:
VP6600
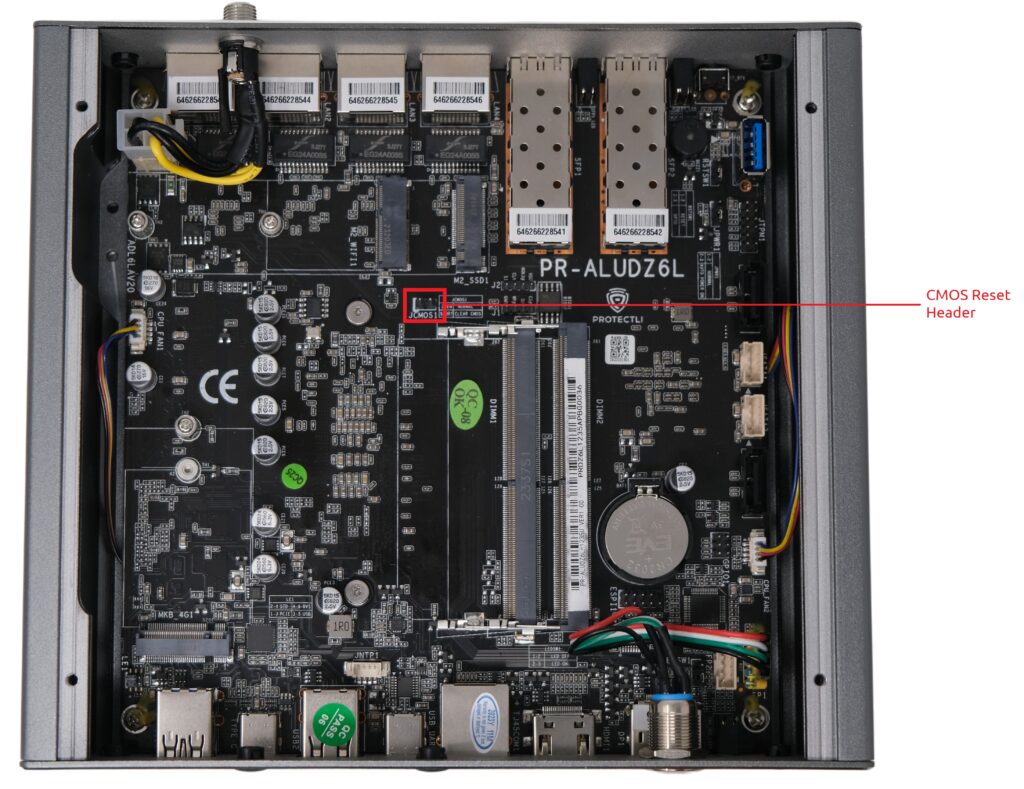
After resetting, boot the Vault and verify that the system comes up correctly. If the Vault does not boot and operate correctly, more advanced troubleshooting options may need to be used. If there are any questions, feel free to reach out to us at support@protectli.com, or find more information in our Knowledge Base.
