Have a Question?
How to Enable LAN Bridge with OPNsense
Overview
This article covers how to enable a LAN bridge in OPNsense. LAN bridges act as a switch using the optional ports on the Vault. While not optimal compared to using a separate physical switch, it works if needed.
Note: This will require physical access to the Vault if the port being used to access the web interface is added into the bridge.
How to Create a LAN Bridge in OPNsense
In this example we will be assigning the LAN interface to a bridge containing the Vaults additional ports, OPT1 and OPT2. The idea of this example can be used across all the Vault models with small variation.
- Access the web interface. The default IP address: 192.168.1.1, username: root, password: opnsense
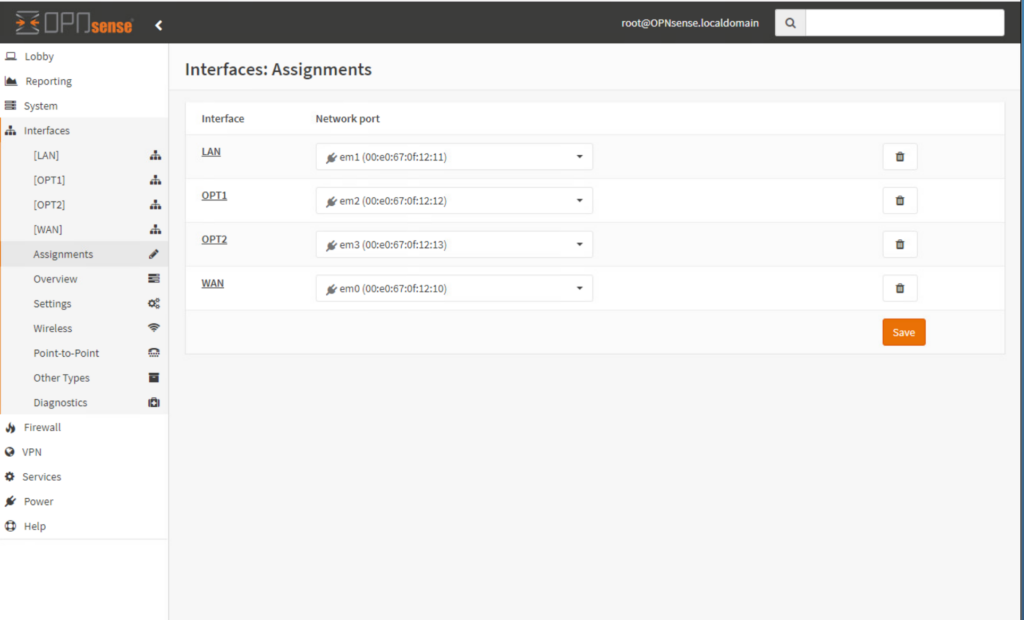
- Verify the Vaults optional interfaces(OPT1, OPT2, etc.) are assigned with default settings. They can be assigned by clicking the '+' then Save
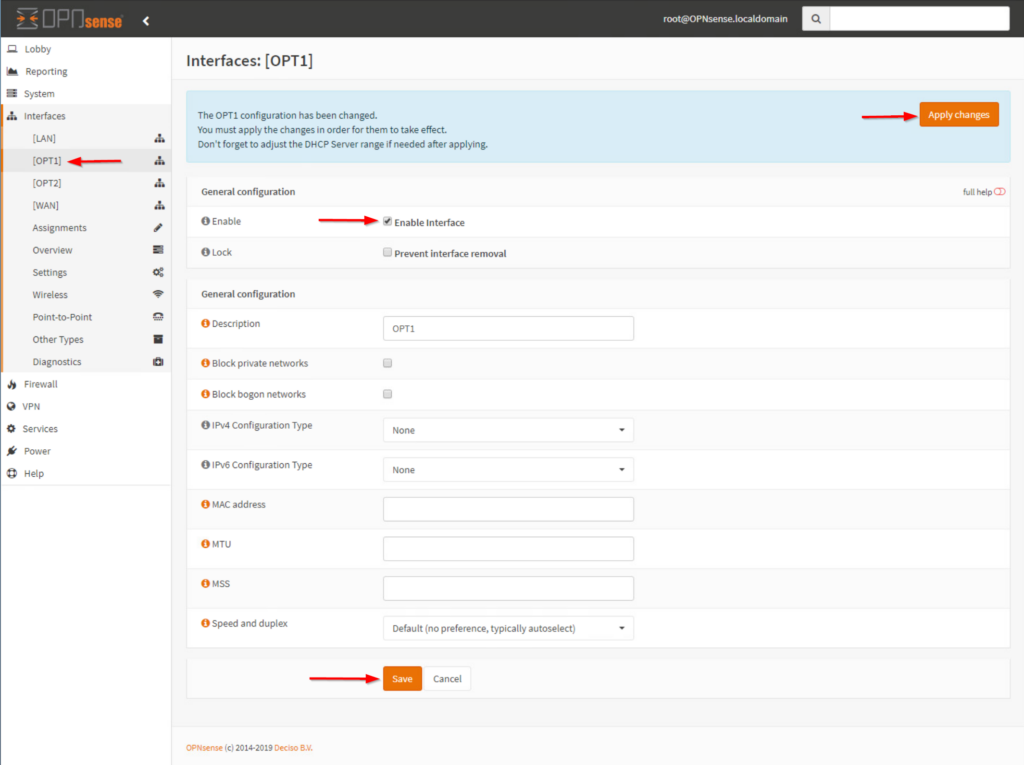
- Under the Interfaces tree open the OPT1 menu
- Check Enable Interface leave all settings default
- Click Save then Apply changes a the top
- Repeat on additional interfaces to be included in the bridge
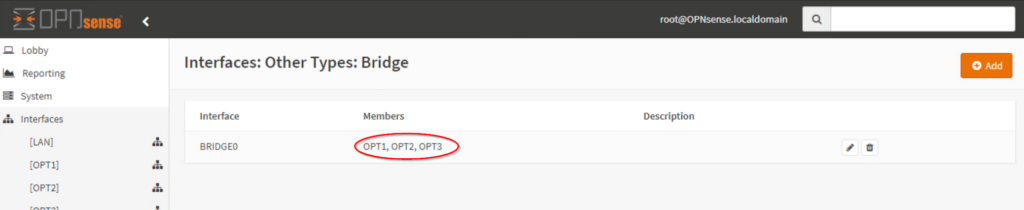
- Under the Interfaces tree select Other Types, then Bridge
- Click Add and select OPT1, OPT2, etc then click Save

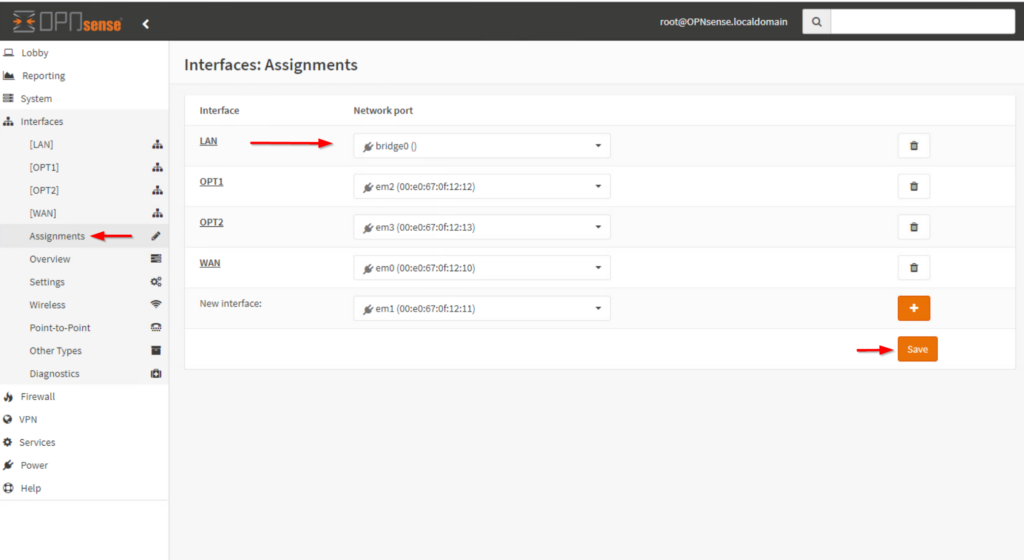
- Under the Interfaces tree select Assignments
- Change the LAN interface to bridge0 and click Save
Note: At this point access to the web interface will be lost. Plug into either port OPT1 or OPT2 to regain access.
- In the Assignments menu add the port(em1) which was previously assigned to LAN. Click Save
- Verify OPT3 is now assigned
- Enable OPT3 with default settings. Save and Apply Changes
- Navigate back to the Bridge menu and edit bridge0. Add OPT3 and Save
- Verify the LAN port now has web interface access
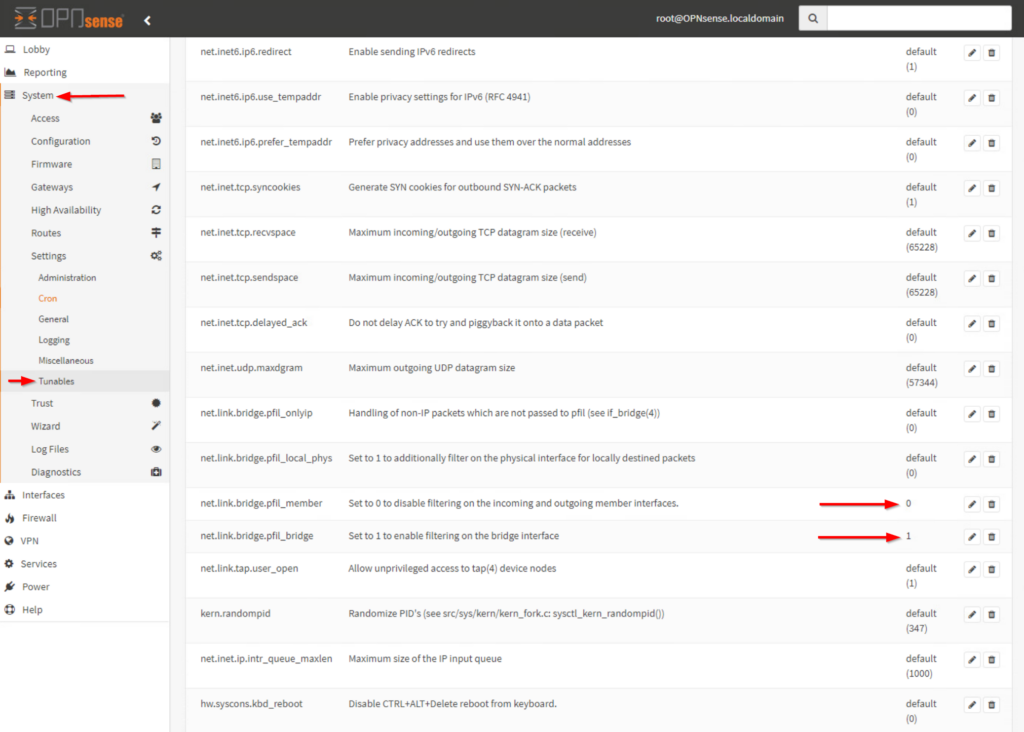
- Navigate to System > Settings > Tunables
- Locate net.link.bridge.pfil_member and change its setting from Default to 0. Save and Apply Changes
- Locate(directly below the previous setting) net.link.bridge.pfil_bridge and change the setting from Default to 1. Save and Apply Changes
- Reboot
- Verify bridged ports are functioning
At this point you should now have a functioning LAN bridge in OPNsense. If you need additional assistance, please feel free to reach out: support@protectli.com. You can also find more information in our Knowledge Base. or check the official pages at OPNsense.org.