Have a Question?
How to Enable LAN Bridge with pfSense®
Overview
This article covers how to enable a LAN bridge in pfSense®. LAN bridge act as a switch using the optional ports on the Vault. While not optimal compared to using a separate physical switch, it works if needed.
Note: If the port being used for the web interface is added to the bridge, then physical access to the unit will be necessary.
How to Create a LAN Bridge in pfSense®
In this example we will be assigning the LAN interface to a bridge utilizing the Vaults additional ports, OPT1 and OPT2. The idea of this example can be used across all the Vault models with small variation.
Note: Using this method/example will retain any configurations made on the LAN interface and apply them to any of the bridged interfaces, this includes firewall rules, DHCP, etc.
- Access the webGUI. The default IP address: 192.168.1.1, username: admin, password: pfsense
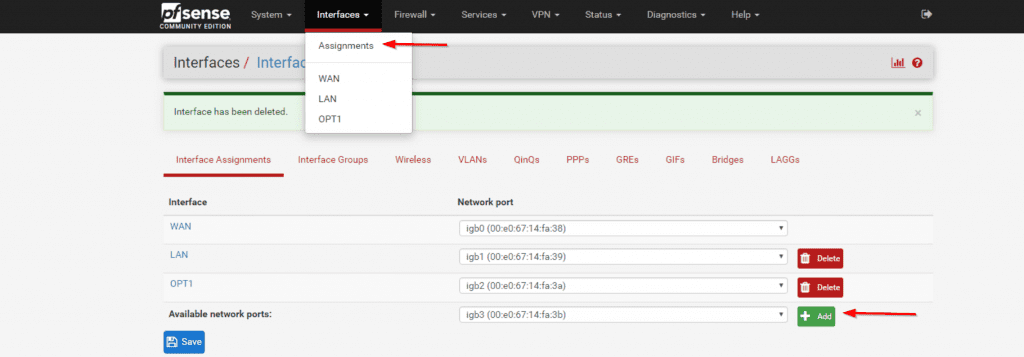
- Verify the Vaults optional interfaces(OPT1, OPT2, etc) are assigned with default settings.
- To assign simply click Add next to the port you wish to assign. Click Save.
- To enable the each interface, click the on the interface label(OPT1,OPT2,etc) in the left column.
- Click Enable, leave all other settings default. Save and Apply Changes

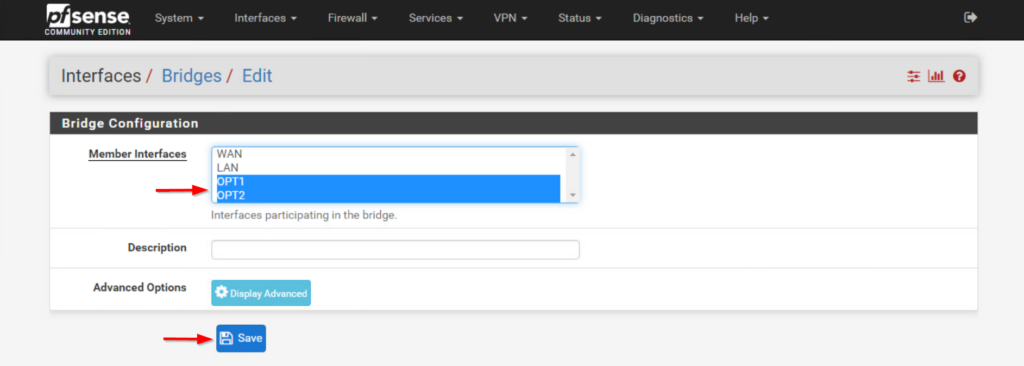
- In the Interfaces > Interface Assignments menu select the Bridges tab and click Add
- Select OPT1 and OPT2 using Ctrl+Click. Don't select the LAN interface. Click Save.
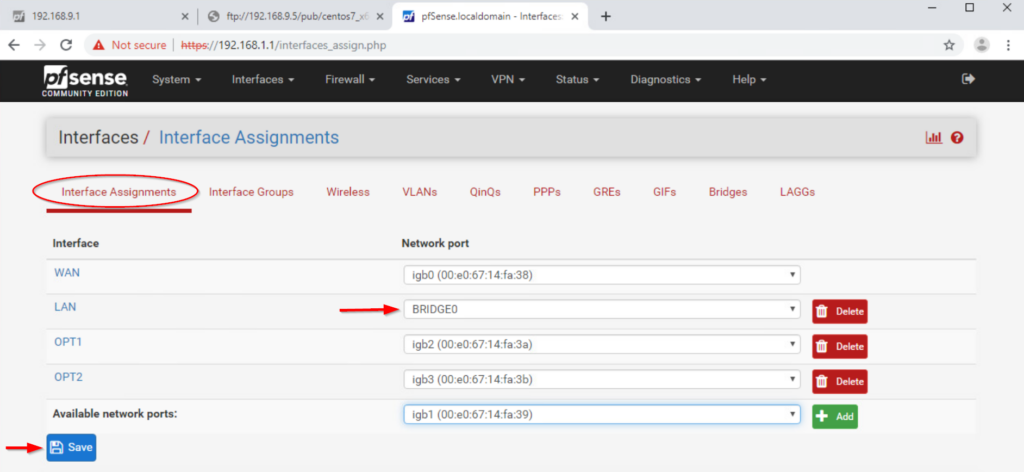
- Navigate back to the Interface Assignments tab and change the LAN interface port to BRDIGE0
- Note: Once the settings are saved connection to the web interface will be lost. Swap the Ethernet connection to one of the optional ports(OPT1,OPT2) added into the bridge to regain access
- Click Save
- Assign the port previously used as LAN to OPT3 and enable it as done in the steps earlier
- Navigate back to the Bridges menu and add(Ctrl+Click) OPT3. click Save
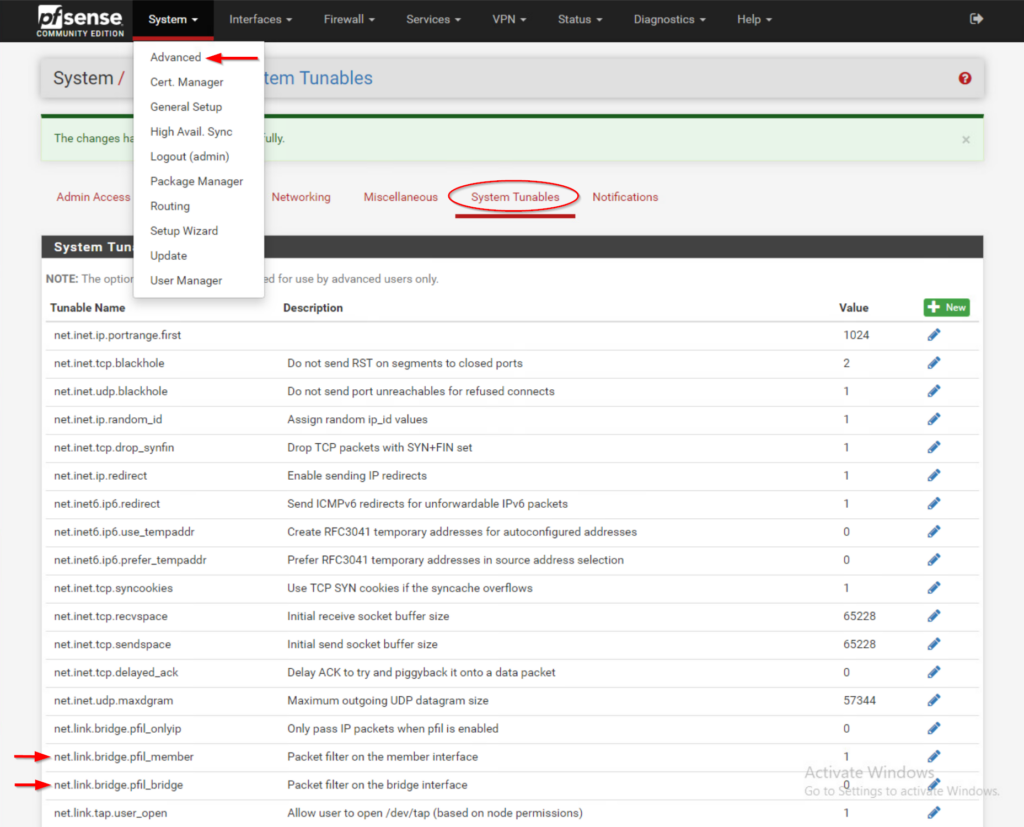
- Navigate to System > Advanced > System Tunables
- Select net.link.bridge.pfil_member and change its value to 0. Click Save
- Select net.link.bridge.pfil_bridge and change its value to 1. Click Save
- Click Apply Changes at the top

- Reboot
- Verify bridged ports are functioning
At this point you should have a functioning LAN bridge in pfSense®. If you need additional assistance, please feel free to reach out: support@protectli.com. You can find more information about pfSense on the Vault in our Knowledge Base, or at pfSense.org