Have a Question?
coreboot Versions, Info, and Security Features for all Protectli Vaults
![]()
coreboot is a secure, purpose-built, open-source firmware solution that fortifies the Vault’s role as a security-focused networking platform. coreboot initializes hardware, allowing key components such as CPU and RAM to run and function efficiently while keeping your hardware secure. Our coreboot images are developed specifically to work with each Protectil Vault product for maximum performance, stability, and trust.
coreboot is an alternative firmware that replaces the standard AMI BIOS/UEFI, which are often proprietary and have limited transparency. We at Protectli recommend that everyone uses coreboot as their firmware, assuming it supports your use case.
Protectli is committed to the ongoing development of coreboot on each of our compatible platforms. While coreboot images for the Vault may not be available with every minor coreboot project update, we will work diligently to ensure Vault coreboot updates are available to address serious vulnerabilities and feature requests. We will also work to contribute our coreboot updates back into the project master. Protectli verifies compatibility with most major operating systems before release.
coreboot can be selected at the time of ordering when purchasing directly from our website for no additional cost. It can also be installed directly by the user at home or in the field.
Current versions for coreboot can be found within sections below, and we highly recommend reading the "Variations of coreboot Between Vault Models" section to understand the intricacies and features of coreboot for your specific Vault product, especially if you plan on flashing it yourself. Please keep in mind that after flashing to coreboot you have the possibility to flash back to AMI (and back to coreboot) as you see fit
- V1610: The Atheros M.2 WiFi card offered on our storefront occasionally does not come up properly. Bluetooth functionality seems to always work, but WiFi capabilities will sometimes not initialize properly
- V Series: Only one PCR bank can be selected with the fTPM
- V Series: If Intel ME was set to HAP disabled, and you then re-enable Intel ME, you must reset the device two times before the TPM initializes properly
- V Series: Only one of the USB-A Ports can be used to wake up the device from sleep state. It is the USB port closest to the HDMI
- V Series: Wake on Lan (WoL) does not work
*Note: The newest version of coreboot available is 0.9.4, but we are shipping units with version 0.9.3 at the moment due to an issue with some NVMe SSDs. For more information please view the Technical Service Bulletin at this link: https://kb.protectli.com/kb/technical-service-bulletin/
| Vault | coreboot .rom file | SHA256 file | Notes | Release Date |
|---|---|---|---|---|
| V1210 | protectli_v1210_v0.9.4.rom | protectli_v1210_v0.9.4.rom.sha256 | Various Updates and Fixes | 12/17/2025 (Build Date 12/12/2025) |
| V1211 | protectli_v1211_v0.9.4.rom | protectli_v1211_v0.9.4.rom.sha | Various Updates and Fixes | 12/17/2025 (Build Date 12/12/2025) |
| V1410 | protectli_v1410_v0.9.4.rom | protectli_v1410_v0.9.4.rom.sha256 | Various Updates and Fixes | 12/17/2025 (Build Date 12/12/2025) |
| V1610 | protectli_v1610_v0.9.4.rom | protectli_v1610_v0.9.4.sha | Various Updates and Fixes | 12/17/2025 (Build Date 12/12/2025) |
Protectli has developed a script called "Flashli" that runs on Ubuntu. This script will automatically detect which Protectli Vault you have, and will flash your firmware accordingly. It is very important to note that you should not turn off the unit while the flashing is in progress. This script makes the process of flashing very simple and makes it extremely (!) unlikely to brick your device while flashing. The key concept here is that you must boot to a USB thumb drive that has Ubuntu on it, and run a script.
Please follow the instructions in this article to properly utilize Flashli: https://kb.protectli.com/kb/how-to-use-flashli/
The coreboot booting process consists of four main stages.
bootblock
The first stage is the "bootblock" which does the most basic tasks for the CPU, such as loading microcode, setting 32 bit mode, and setting the stack pointer for the next instruction.
romstage
The second stage is the "romstage". The romstage sets up the onboard cache to use as RAM before DRAM is initialized, known as "cache-as RAM" setup. It also calls the Intel Firmware Support Package (FSP) which is an Application Programming Interface (API) specific to the CPU which initializes on-chip functionality. It then initializes memory so that DRAM can be used.
ramstage
The third stage is "ramstage". In this stage the system is running in DRAM and it initializes the devices and functions of the hardware.
payload
The fourth and final stage of coreboot is the "payload". The payload is a third-party binary application that is primarily used to boot an OS or application. In the case of Protectli’s coreboot configuration, this payload is Tianocore/edk2 (UEFI payload) for the UEFI implementation.
UEFI Secure Boot
Disabled by default, can be enabled in coreboot firmware menu at Device Manager > Secure Boot Configuration. Supported by Ubuntu, Windows, and a handful of other operating systems.
While Verified Boot ensures security of the boot process through loading the Payload, UEFI Secure Boot is an additional security feature which verifies the security of an OS. It essentially adds the OS to the Chain of Trust by verifying the signature of the OS before loading it. It requires support in the OS. Popular OSes such as Windows and Ubuntu support Secure Boot, with adoption steadily growing. These OSes have their public keys included in the coreboot image in order to verify the integrity of the OS. If Secure Boot is enabled in the BIOS menu, it will not load the OS if the OS does not support Secure Boot, the public key for the OS has not already been installed in the firmware, or the OS fails its integrity check. Therefore, Secure Boot must be disabled in the BIOS menu in order to load an OS that does not support Secure Boot. Examples of OSes that do not currently support Secure Boot are OPNsense and other FreeBSD-based OSes.
Measured Boot (Enabled by default, utilizes built-in firmware TPM)
Measured Boot is a security feature that "measures", or checks, each stage of the boot process. Measured Boot writes the hash digest from each stage into a Trusted Platform Module (TPM) so that the OS can check/verify the value later. The V Series uses a TPM that is implemented in firmware, known as firmware TPM (fTPM).
Disk encryption utilities such as BitLocker and LUKS can be used to encrypt disks. However, a downside is that the password to unencrypt the disk must be entered manually when the system is booted or disk is remounted. If supported by the OS, it can read the measurements stored in the TPM which were made during the Measured Boot process and can be used to automatically unencrypt the disk. This means that you will not need to enter your disk encryption password as long as the firmware and settings have not been tampered with.
Intel ME Toggle (Introduced in v0.9.4)
Located at Dasharo System Features > Intel Management Engine Options. Used to access Intel Management Engine related options. Currently the only option available is "Intel ME mode" which allows to enable or disable Management Engine. By default, it is enabled.
It can be disabled in two ways. One option is "Disabled (Soft)", and the other is "Disabled (HAP)".
Disabled (Soft) causes the Dasharo firmware to send ME_DISABLE command via MEI/HECI. MEI/HECI interface is being hidden from OS when ME is disabled.
Disabled (HAP) causes the Dasharo firmware to set HAP bit in the flash descriptor. MEI/HECI interface is being hidden from OS when ME is disabled. HAP method is much more efficient as it halts the ME firmware execution even earlier than Soft Disable.
More information on Intel ME can be found on our standalone article at this link: [https://kb.protectli.com/kb/me-disable/]
CPU Throttling:
Found at Dasharo System Features > Power Management. The temperature offset from TjMax (maximum CPU temperature) above which the CPU will start throttling itself. Also known the TCC offset. The current absolute throttling threshold temperature is displayed in Current CPU Throttling Threshold Temperature checkbox. This is set to 20 by default.
Power State:
Found at Dasharo System Features > Power Management. "Power state after power/AC loss". Controls what power state the platform should switch to when the main AC power is restored. By Default, this is set to restore power after power loss.
*** If Intel ME is disabled via either method, the TPM becomes unusable
Located at Device Manager > TCG2 Configuration.
Allows the user to modify TPM settings. A built-in firmware TPM is present in all V Series Vaults.
These settings should only be modified if you are knowledgeable and confident of TPM functions. Settings range from disabling TPM, changing between TPM 1.2 or 2.0, as well as various hash algorithm modifications.
Located at Dasharo System Features > Serial Port Configuration, the user can enable/disable the COM port.
The Boot Maintenance Manager allows the user to modify a host of boot options. Located at Boot Maintance Manager.
Boot Options
Allows the user to change boot order or add/remove boot options. When a boot option is selected, it can be moved up or down in the boot order by pressing both "Shift" and "+" or "-" key.
Boot From File
This allows the user to select a file and then navigate through the filesystem to find the bootable file. This typically requires knowledge of the OS filesystem to identify the correct file.
Boot Next Value
Sets the boot source for the next time the system boots, one time only, and overrides the default setting.
Auto Boot Time-out
Allows the user to set the amount of time that the Protectli splash screen is displayed during boot. Default setting is typically 6.
This feature allows the user to iPXE boot the Vault over the network to a default Protectli site, or to specify a site. For example, one could boot to the netboot.xyz server which hosts multiple Operating Systems (OS) at https://boot.netboot.xyz. See example below. Note that using a specific site to boot an OS is supported by Protectli, but the actual OS that is loaded is not supported by Protectli, as is the case with all OS. In order to use the Network Boot feature:
- Verify the Vault is connected to the Internet via Ethernet port 1
- When the Protectli splash screen is displayed, press the F11 key
- Verify the Boot Menu is displayed
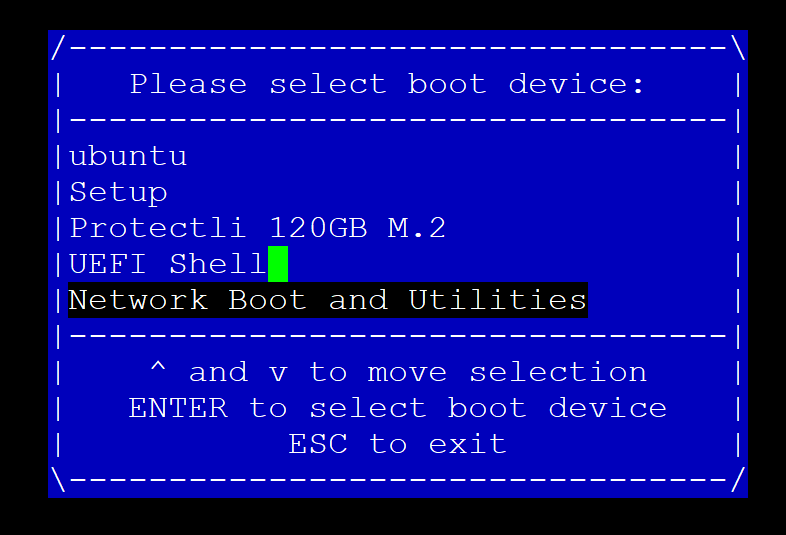
- Select "Network Boot and Utilities"
- Verify the "Network Boot and Utilities" page is displayed
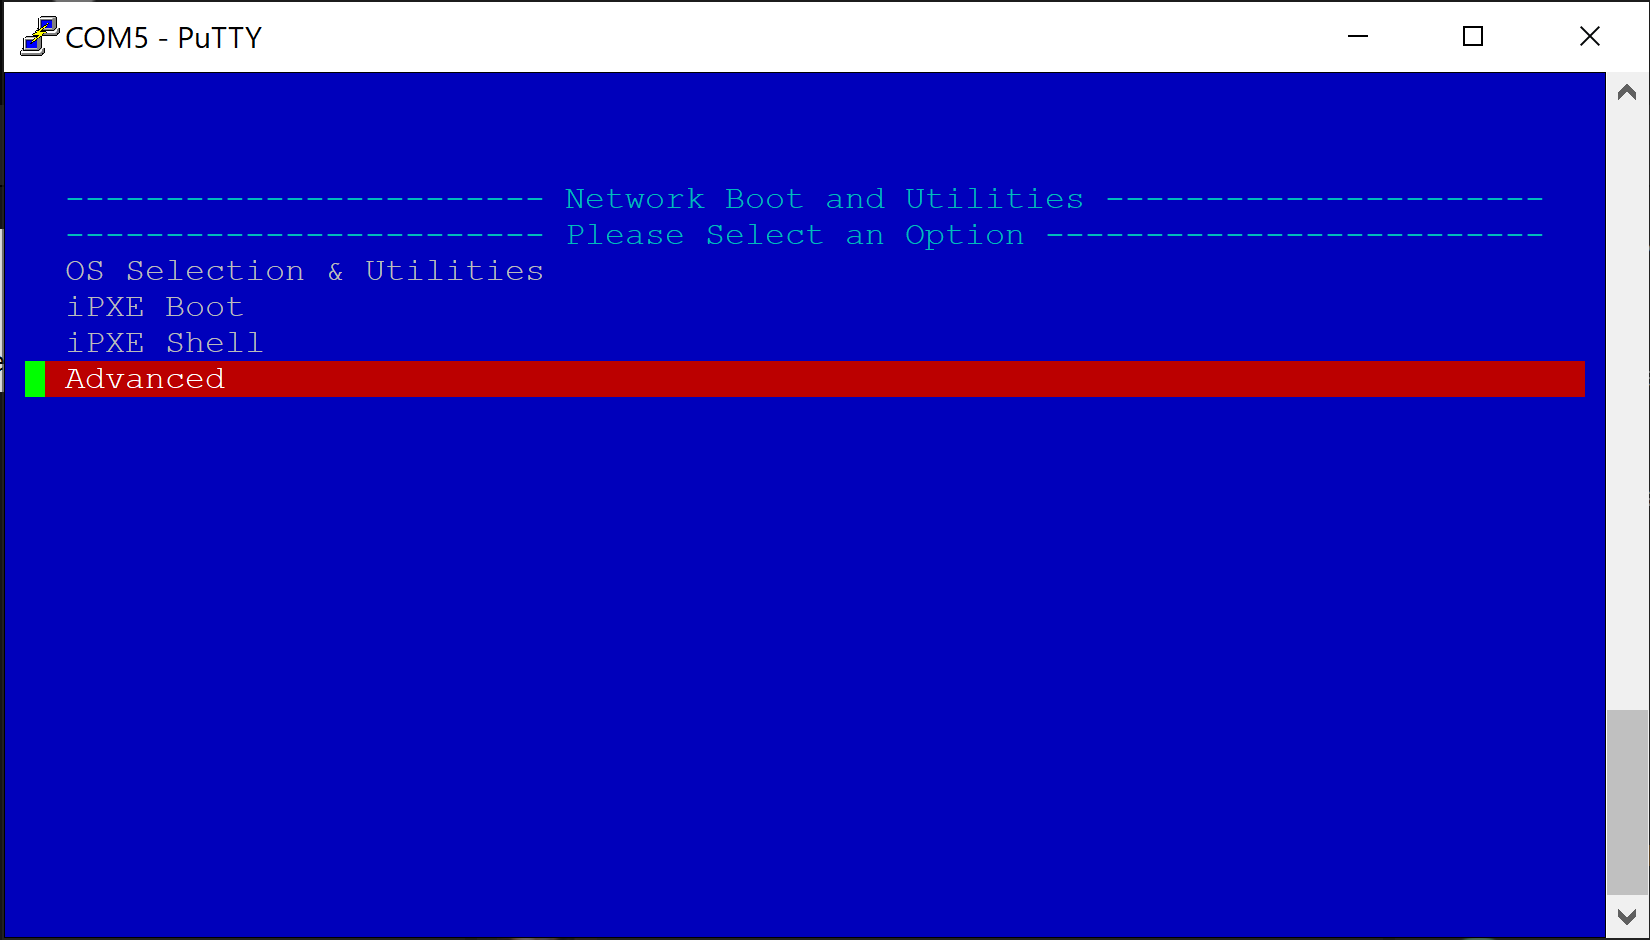
If nothing is selected, the system will count down a few seconds and automatically netboot to the default Protectli Network Boot and Utilities page at: https://netboot.protectli.com/menu.ipxe In order to specify a site:
- Select "Advanced"
- Verify the "Change Netboot Payload" page is displayed
- Enter the desired URL (Example: https://boot.netboot.xyz)
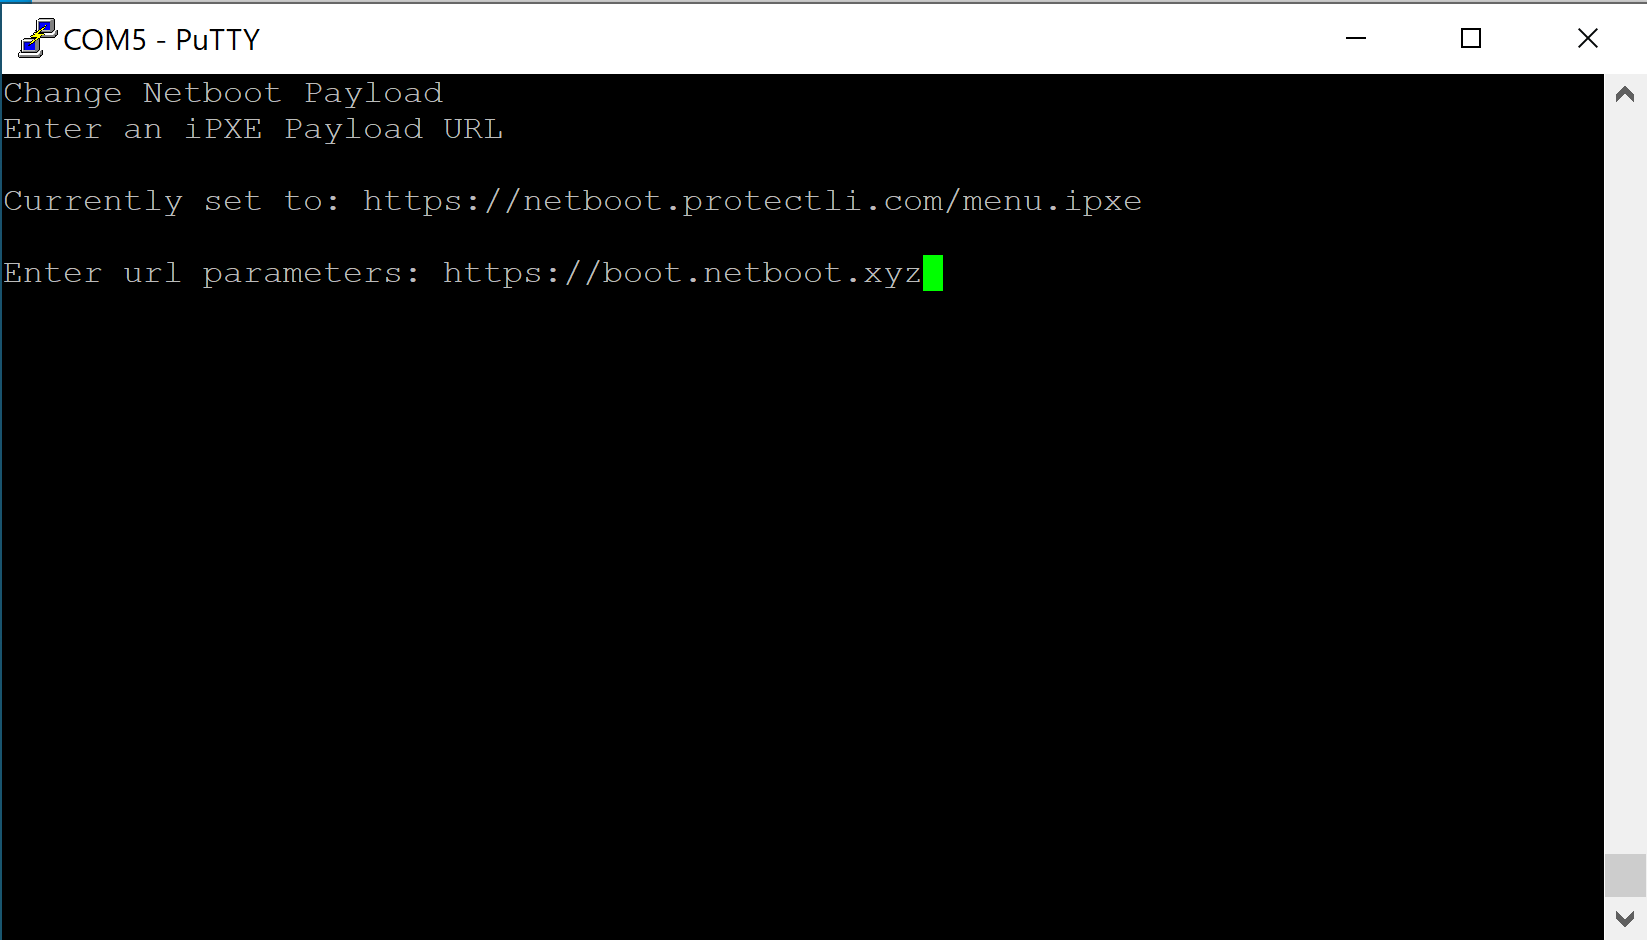
- Hit "Enter"
- Verify the Vault returns to the "Network Boot and Utilities" page
- Select "Apply and Exit"

- Verify the Vault begins the iPXE boot process
- Verify the Vault boots to the netboot.xyz Main Menu
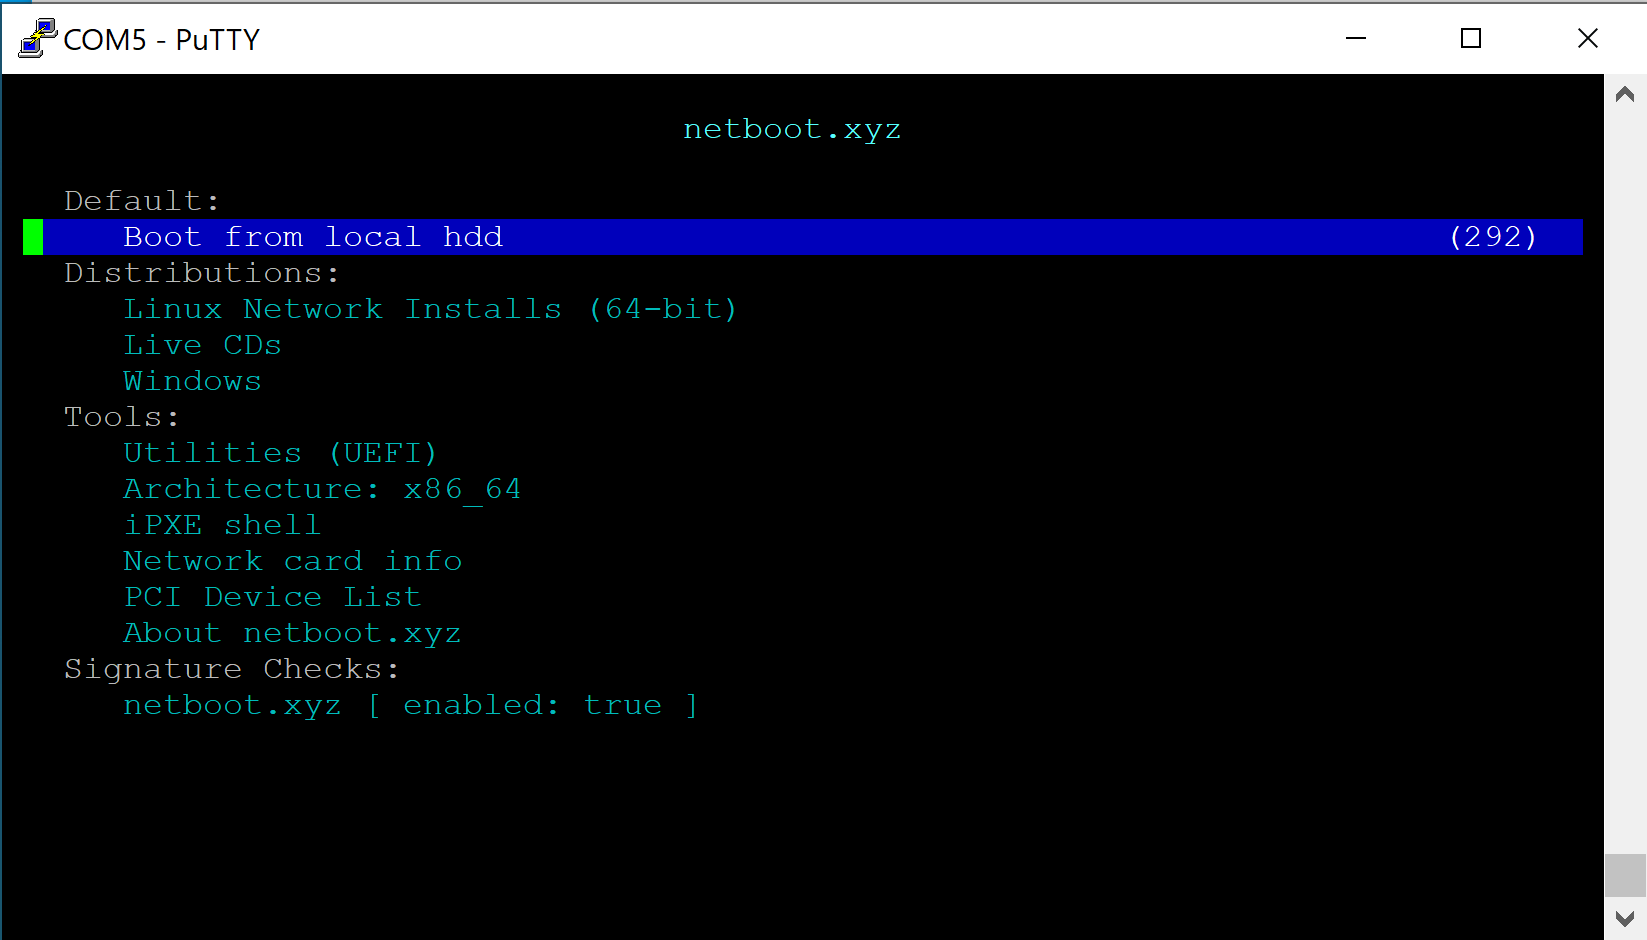
- For this example, select "Linux Network Installs (64-bit)
- Verify the "Linux Installers" page is displayed
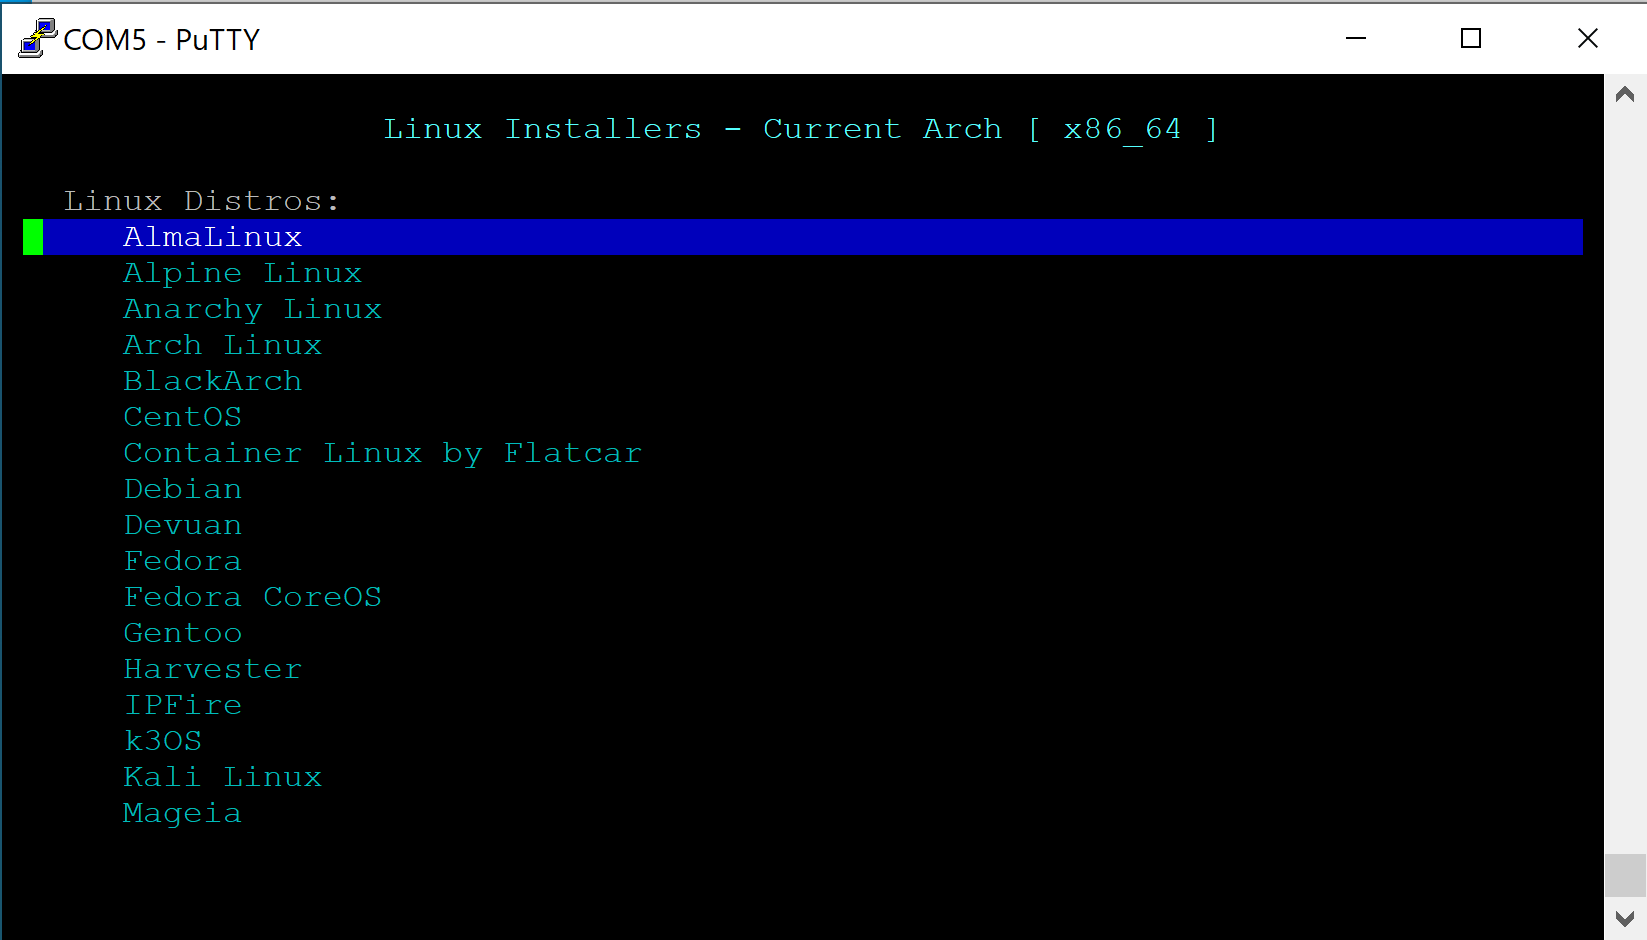
- Select the desired OS (In this example we use Ubuntu)
- Verify Netbooting starts
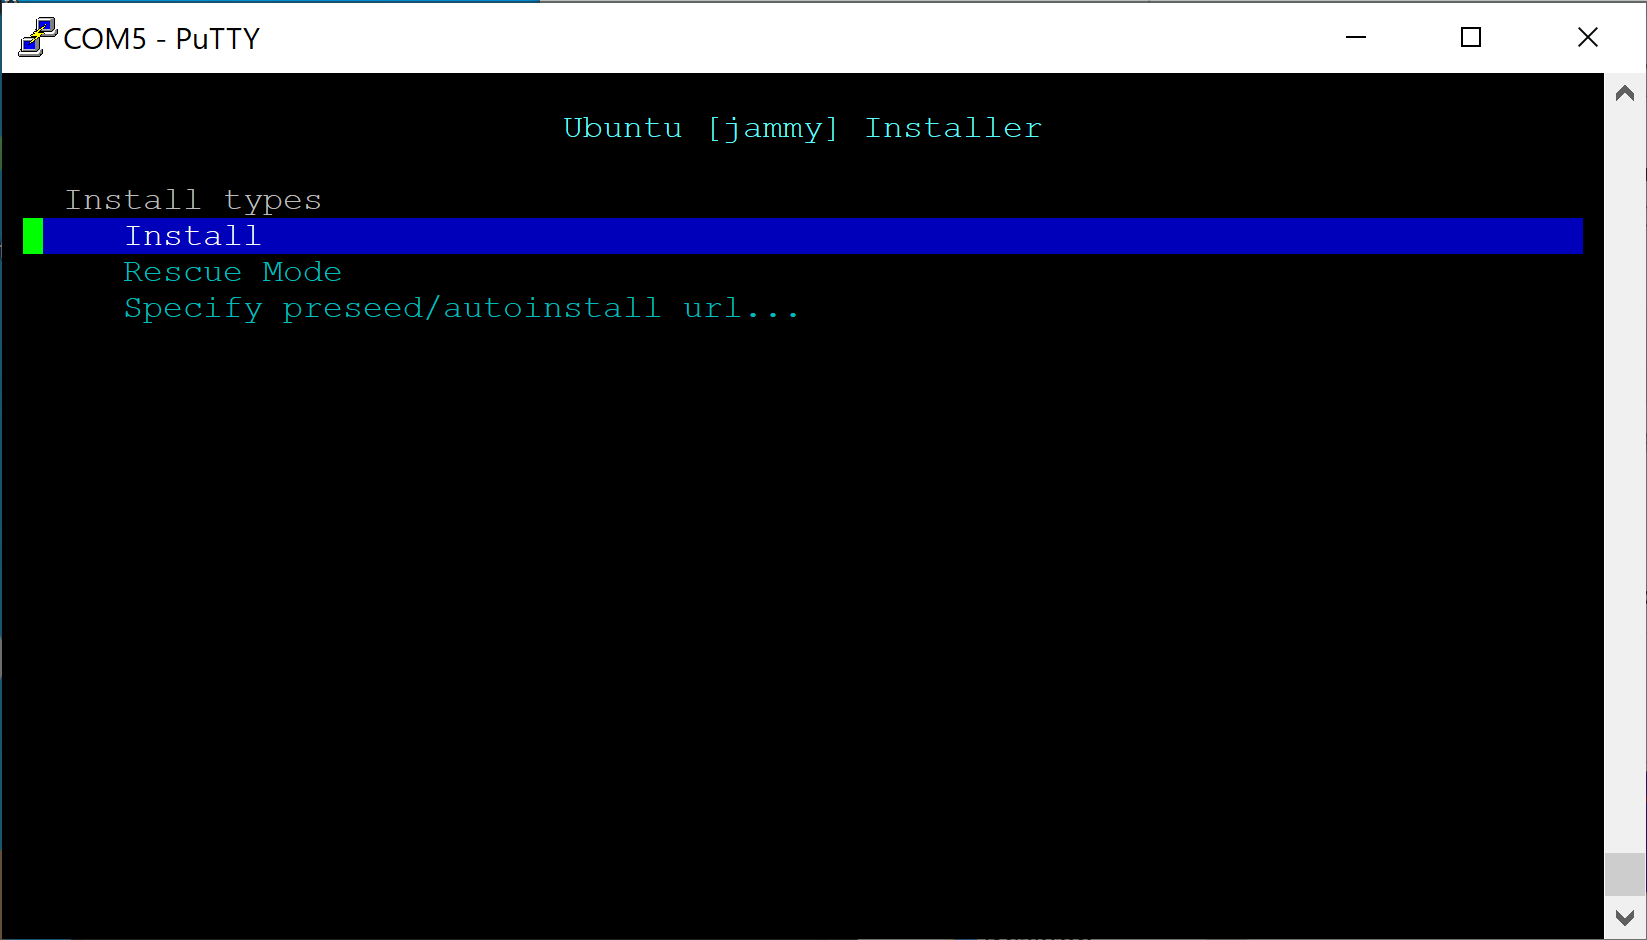
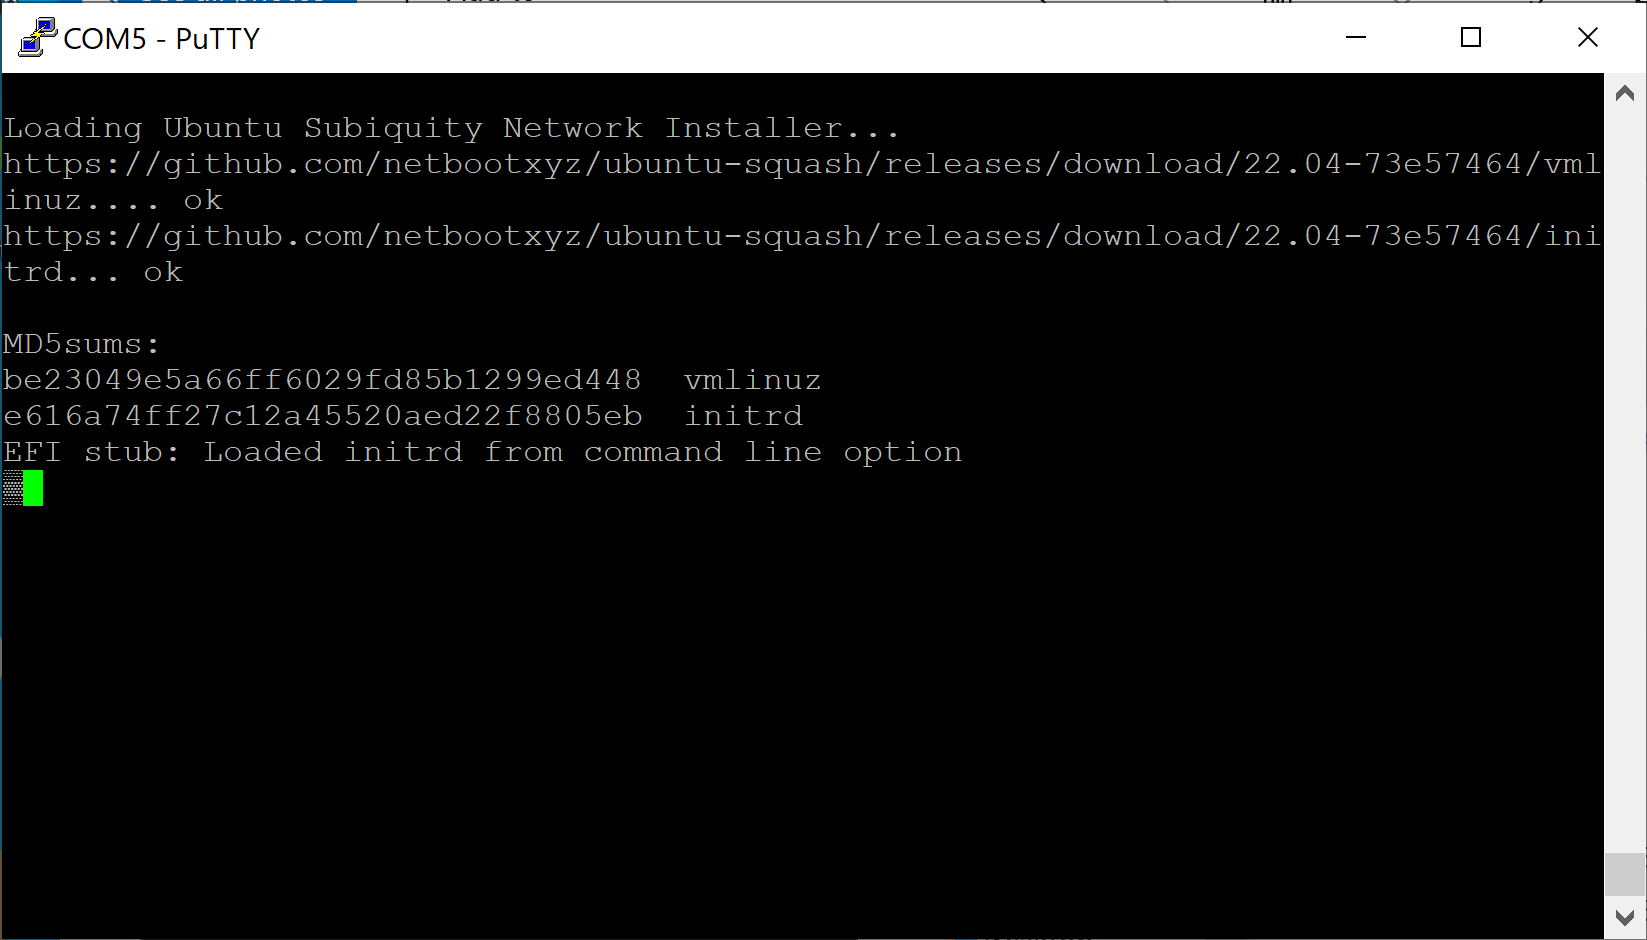
- Follow the OS instructions to install and configure the Vault as desired
Note that if a specified URL such as https://boot.netboot.xyz is selected, it will not be saved across reboots. It will need to be manually entered if the Vault is rebooted.
General:
- When using the OPNsense VGA .img installer, all VP units will attempt to default to Serial output. Video will still be displayed through HDMI/Display Port, but certain console messages may not show up, such as the prompt for assigning interfaces. Interfaces will automatically assign instead. If it appears nothing is happening when you boot to the installer, please give it a minute until you are prompted with a "login:" prompt. You can then login with the installer account to proceed.
VP2430/VP2440:
- Wake on LAN (WOL) is disabled on Ethernet Port 1 by default. All other Ethernet interfaces allow for WOL
VP2440:
- It may take up to 20 seconds after initial boot for the POST beep to occur and for the firmware menu to be accessible
- In the event that your firmware has an issue and you receive a warning regarding booting to the recovery firmware partition, pressing the "Enter" key to start the boot process will automatically boot into the first boot option rather than allowing you to press "Delete" or "F11" to access the coreboot menu or boot options. Please press the "Delete" or "F11" before pressing "Enter" to negate this.
VP6600 Series:
- The Fan profile setting for "Off" does not completely disable the fan from spinning. It will keep it running at a very low RPM but it will not completely shut off. If you require the fans to be turned off completely, you must unplug the fans from the header on the motherboard. We are looking into fixing this in the future.
| Vault | coreboot .rom file | SHA256 file | Notes | Release Date |
|---|---|---|---|---|
| VP2410 | protectli_vp2410_v1.1.1.rom | protectli_vp2410_v1.1.1.rom.sha | TPM fix | 01/21/2025 |
| VP2410 | protectli_vp2410_DF_1.0.9.rom | protectli_vp2410_DF_1.0.9.rom.sha | Initial Release, Initial HW Revision, Serial #'s 64-62-66-21-03-14 and below | 08/17/2021 |
| VP2420 | protectli_vp2420_v1.2.1.rom | protectli_vp2420_v1.2.1.rom.sha | TPM fix | 03/06/2025 |
| VP2430 | protectli_vp2430_v0.9.0 | protectli_vp2430_v0.9.0.rom.sha | Initial Release | 05/05/2025 |
| VP2440 | protectli_vp2440_v0.9.1-rc3 | protectli_vp2440_v0.9.1-rc3.rom_.sha_.zip | Fix for i226-V Throughput Degradation (More info found in technical service bulletin) | 02/18/2026 |
| VP3200 Series | protectli_vp32XX_v0.9.0 | protectli_vp32xx_v0.9.0.rom.sha | Initial Release | 07/16/2025 |
| VP4630/50/70 | protectli_vp4600_v1.2.0.rom | protectli_vp4600_v1.2.0.rom.sha | Auto Boot Time-out fix and rebase | 03/26/2024 |
| VP6630/50/70 | protectli_vp6600_v0.9.2.rom | protectli_vp6600_v0.9.2.rom.sha | ESXi fix | 06/11/2025 |
Protectli has developed a script called "Flashli" that runs on Ubuntu. This script will automatically detect which Protectli Vault you have, and will flash your firmware accordingly. It is very important to note that you should not turn off the unit while the flashing is in progress. This script makes the process of flashing very simple and makes it extremely (!) unlikely to brick your device while flashing. The key concept here is that you must boot to a USB thumb drive that has Ubuntu on it, and run a script.
Please keep in mind the VP4600 and VP6600 series must disable BIOS lock before flashing if you are currently on AMI firmware (Go to the 'Chipset' tab in BIOS/UEFI menu, then to PCH-IO Configuration, and disable the BIOS Lock. Save settings).
If you are flashing from one version of coreboot to another, BIOS lock must be disabled beforehand (found in Dasharo Security Features), and this is applicable to all VP units.
Please follow the instructions in this article to properly utilize Flashli: https://kb.protectli.com/kb/how-to-use-flashli/
The coreboot booting process consists of four main stages.
bootblock
The first stage is the "bootblock" which does the most basic tasks for the CPU, such as loading microcode, setting 32 bit mode, and setting the stack pointer for the next instruction.
romstage
The second stage is the "romstage". The romstage sets up the onboard cache to use as RAM before DRAM is initialized, known as "cache-as RAM" setup. It also calls the Intel Firmware Support Package (FSP) which is an Application Programming Interface (API) specific to the CPU which initializes on-chip functionality. It then initializes memory so that DRAM can be used.
ramstage
The third stage is "ramstage". In this stage the system is running in DRAM and it initializes the devices and functions of the hardware.
payload
The fourth and final stage of coreboot is the "payload". The payload is a third-party binary application that is primarily used to boot an OS or application. In the case of Protectli’s coreboot configuration, this payload is Tianocore/edk2 (UEFI payload) for the UEFI implementation.
As computers have evolved with more functionality, they have also become more vulnerable to security threats. Threats now include not only software viruses and malware, but threats to the firmware that initially boots the computer. These attacks can persist across reboots and OS updates so it is critical that they are mitigated. The coreboot implementation for the Protectli VP6600 series, VP4600 series and VP2400 series contains multiple security features to mitigate vulnerabilities to the firmware.
As noted above, the firmware process and "booting" a computer involves multiple stages. In order to guarantee a secure system, each stage must be verified as secure before it is loaded. In a secure system, a "Root of Trust" is established. In coreboot, the firmware is cryptographically signed to establish the Root of Trust. A "Chain of Trust" is then established as cryptographic signatures are checked against the additional modules before they are loaded into the system.
System Firmware User Password
Allows a user to setup a personal password to access the coreboot firmware menu in order to prevent unwanted access. Once a user password is setup, the password will be required to enter the coreboot firmware menu. The system firmware password prevents unauthorized access to the coreboot firmware menu. Present in coreboot v1.2.0 and newer, but also available on the VP2430's v0.9.0 coreboot release. Password can be set at User Password Management > Change Admin Password.
[Warning!] Make sure you do not forget your password. If you do, you won't be able to access the firmware menu. A CMOS reset will not reset the password!
Verified Boot (Always enabled)
In coreboot, "Verified Boot" is the feature / mechanism to provide the Root of Trust and Chain of Trust to ensure that the firmware has not been compromised. The Protectli VP6600 series, VP4600 and VP2420/VP2430 coreboot images have been "signed" with a cryptographic key. This establishes the "Root of Trust" for the secure boot process. Verified Boot adds another stage in the boot process called the "verstage". It is called right after bootblock and it adds the hooks into the process so that the subsequent stages can be verified cryptographically before they are loaded in order to establish the Chain of Trust.
Verified Boot requires 2 partitions in the BIOS chip for 2 copies of coreboot. When coreboot with Verified Boot is flashed into the BIOS chip, it writes 2 copies of the image. One partition is read-write and the recovery partition is read-only. Booting starts from the recovery partition, which verifies the read-write partition. If the read-write partition is verified, the system will boot from that partition. If it fails verification, the system will boot from the recovery partition and send a message to the screen that it is booting from the recovery partition.
BIOS Lock (Enabled by default)
Another security feature is BIOS Lock. When BIOS Lock is enabled (default setting) in the coreboot firmware menu, it protects the recovery partition from being overwritten. The recovery partition is used to verify the read-write partition. When updating a version of coreboot, only the read-write partition is updated. If you are flashing to a different firmware such as AMI or updating to a newer version of coreboot, BIOS Lock must be disabled so that the entire BIOS chip can be written. The BIOS lock setting can be changed at Dasharo System Features > Dasharo Security Options > Lock the BIOS boot medium.
UEFI Secure Boot (Disabled by default)
Disabled by default, can be enabled in coreboot firmware menu at Device Manager > Secure Boot Configuration. Supported by Ubuntu, Windows, and a handful of other operating systems.
While Verified Boot ensures security of the boot process through loading the Payload, UEFI Secure Boot is an additional security feature which verifies the security of an OS. It essentially adds the OS to the Chain of Trust by verifying the signature of the OS before loading it. It requires support in the OS. Popular OSes such as Windows and Ubuntu support Secure Boot, with adoption steadily growing. These OSes have their public keys included in the coreboot image in order to verify the integrity of the OS. If Secure Boot is enabled in the BIOS menu, it will not load the OS if the OS does not support Secure Boot, the public key for the OS has not already been installed in the firmware, or the OS fails its integrity check. Therefore, Secure Boot must be disabled in the BIOS menu in order to load an OS that does not support Secure Boot. Examples of OSes that do not currently support Secure Boot are OPNsense and other FreeBSD-based OSes.
Measured Boot (Enabled by default, requires physical dTPM 2.0)
Measured Boot is a security feature that "measures", or checks, each stage of the boot process. In addition to Verified Boot, Measured Boot also writes the hash digest from each stage into a Trusted Platform Module (TPM) so that the OS can check/verify the value later. A TPM can be a separate physical component, referred to as discrete TPM (dTPM), or it can be implemented in firmware, known as firmware TPM (fTPM). The Protectli VP6600 series, VP4600 series, and VP2400 Series supports an optional physical dTPM. If no dTPM is present, Measured Boot will not be utilized, but other Verified Boot, BIOS Lock and UEFI Secure Boot will still function correctly.
Disk encryption utilities such as BitLocker and LUKS can be used to encrypt disks. However, a downside is that the password to unencrypt the disk must be entered manually when the system is booted or disk is remounted. If supported by the OS, it can read the measurements stored in the TPM which were made during the Measured Boot process and can be used to automatically unencrypt the disk. This means that you will not need to enter your disk encryption password as long as the firmware and settings have not been tampered with.
The USB security feature allows you to enable or disable the USB UEFI driver loading. This feature can help prevent the loading and execution of malicious firmware or software on your device via USB. The feature is regulated by two settings, "USB Stack" and "USB Mass Storage"; they are enabled by default. These settings load the drivers for both USB devices as well as USB storage media. USB Stack controls drivers that load anything pertaining to USB devices such as a keyboard; when this setting is disabled neither USB devices nor USB storage will work within the UEFI menu. After the OS is initialized then USB devices will be operable. On the other hand the USB Mass storage setting only loads drivers pertaining to USB storage media. When enabled any USB storage media will be operable, while disabled USB storage media will not be operable until the OS initializes.
NOTE: disabling USB stack will render your keyboard inoperable within the BIOS. To re-enable the USB stack you will have to use a serial connection. The setting persists through a CMOS reset. Mac users with a VP2400 or VP4600 will be unable to serial in due to a lack of driver support
For more information regarding the serial connection please see COM port tutorial documentation at this link: https://kb.protectli.com/kb/com-port-tutorial/
VP2420/VP2430 and VP4600 series with coreboot version 1.1.0 (and above) and VP6600 series with coreboot version 0.9.0 or newer are the only units that currently utilizes USB security features. VP2420 and VP4600 series both use a USB micro to USB A connection for serial, which is included with each unit. VP6600 series can use a RJ45 to USB A connection or USB C to USB A connection for serial. The VP2430 uses a USB C COM cable.
These settings are found at Dasharo System Features > Dasharo Security Options > USB Configuration.
The Intel Management Engine (ME) is a complete stack on an independent subsystem that allows remote access to a system. In some cases, the ME can run even when the device is powered off. However, there have been multiple vulnerabilities over the years, and security conscious customers have wanted the ability to disable the functionality. Intel ME Disable is a feature which disables the Intel ME. The implementation of coreboot for the Protectli VP4600 and VP2420 has Intel ME disabled by default using the soft-disable method, VP6600 series and VP2430 uses HAP method. These methods are documented at this link: https://docs.dasharo.com/osf-trivia-list/me/#soft-disabling-me
Note that if the unit is reflashed to AMI firmware, Intel ME will be reenabled and all of the security features mentioned above will be inactive.
Addtional information can be found on this article: [https://kb.protectli.com/kb/me-disable/]
Found in all Vault Pro coreboot images. Settings found at Dasharo System Features > Power Management Options.
Power State After Power/AC Loss
A primary feature is the ability to change the default power state after power loss. This settings works in tandem with the JPWR header on the motherboard (header not present on VP2410). By default, these Vaults will automatically attempt to power back on after a case of power loss. This setting can be changed between "Powered Off", "Powered On", or "The state at the moment of power failure". The behavior that occurs in relation to the JPWR jumper and the coreboot setting can be found within the datasheets for the Vault model you have.
CPU Throttling Temperature Offset
This sets the temperature offset from maximum CPU temperature which the CPU will start throttling itself.
Fan Profile
This setting is currently only available on the VP6600 and VP3200 series due to the presence of included fans. This setting can set the preferred fan operation mode. The options are "Silent", "Performance", or "Fans Off".
This setting will slightly vary between models, but generally allows the ability to disable/enable serial console output.
VP6600/VP3200
Located at Dasharo System Features > Serial Port Configuration, the user can enable/disable COM output for either the RJ45 COM port (COM0), or USB-C COM port (COM1).
VP2430
Located at Dasharo System Features > Serial Port Configuration, the user can enable/disable COM output for either the USB-C COM port (COM0), or the internal COM header on the motherboard (COM1).
All other VP Models
Located at Dasharo System Features > Serial Port Configuration, the user can enable/disable the COM port.
The VP6600 Series contains CPU Configuration settings that allow the user to edit the number of active Efficiency-Cores or Performance-Cores for the CPU. This can be especially useful if certain operating systems cannot properly utilize one or the other. For example, ESXi requires E-Cores to be disabled in order to properly run.
The user may also enable/disable Hyper-Threading.
Settings are located at Dasharo System Features > CPU Configuration.
The Boot Maintenance Manager allows the user to modify a host of boot options. Located at Boot Maintance Manager.
Boot Options
Allows the user to change boot order or add/remove boot options. When a boot option is selected, it can be moved up or down in the boot order by pressing both "Shift" and "+" or "-" key.
Boot From File
This allows the user to select a file and then navigate through the filesystem to find the bootable file. This typically requires knowledge of the OS filesystem to identify the correct file.
Boot Next Value
Sets the boot source for the next time the system boots, one time only, and overrides the default setting.
Auto Boot Time-out
Allows the user to set the amount of time that the Protectli splash screen is displayed during boot. Default setting is typically 6.
This feature allows the user to iPXE boot the Vault over the network to a default Protectli site, or to specify a site. For example, one could boot to the netboot.xyz server which hosts multiple Operating Systems (OS) at https://boot.netboot.xyz. See example below. Note that using a specific site to boot an OS is supported by Protectli, but the actual OS that is loaded is not supported by Protectli, as is the case with all OS. In order to use the Network Boot feature:
- Verify the Vault is connected to the Internet via Ethernet port 1
- When the Protectli splash screen is displayed, press the F11 key
- Verify the Boot Menu is displayed
- Select "Network Boot and Utilities"
- Verify the "Network Boot and Utilities" page is displayed
If nothing is selected, the system will count down a few seconds and automatically netboot to the default Protectli Network Boot and Utilities page at: https://netboot.protectli.com/menu.ipxe In order to specify a site:
- Select "Advanced"
- Verify the "Change Netboot Payload" page is displayed
- Enter the desired URL (Example: https://boot.netboot.xyz)
- Hit "Enter"
- Verify the Vault returns to the "Network Boot and Utilities" page
- Select "Apply and Exit"
- Verify the Vault begins the iPXE boot process
- Verify the Vault boots to the netboot.xyz Main Menu
- For this example, select "Linux Network Installs (64-bit)
- Verify the "Linux Installers" page is displayed
- Select the desired OS (In this example we use Ubuntu)
- Verify Netbooting starts
- Follow the OS instructions to install and configure the Vault as desired
Note that if a specified URL such as https://boot.netboot.xyz is selected, it will not be saved across reboots. It will need to be manually entered if the Vault is rebooted.