Have a Question?
How to Install the Included M.2 Heatsink to the VP4600/VP6600 Series
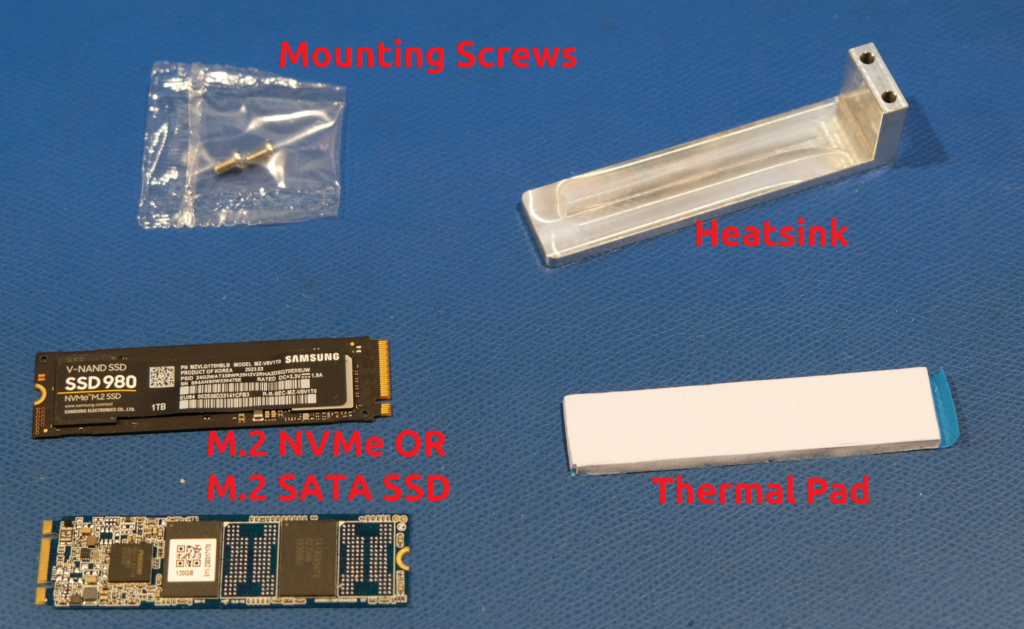
Proper installation of the heatsink requires the following components:
- The heatsink (Included)
- Thermal pad (Included)
- Mounting screws [x2] (Included)
- M.2 SSD
- Philips-head screwdriver with a relatively thin/long neck
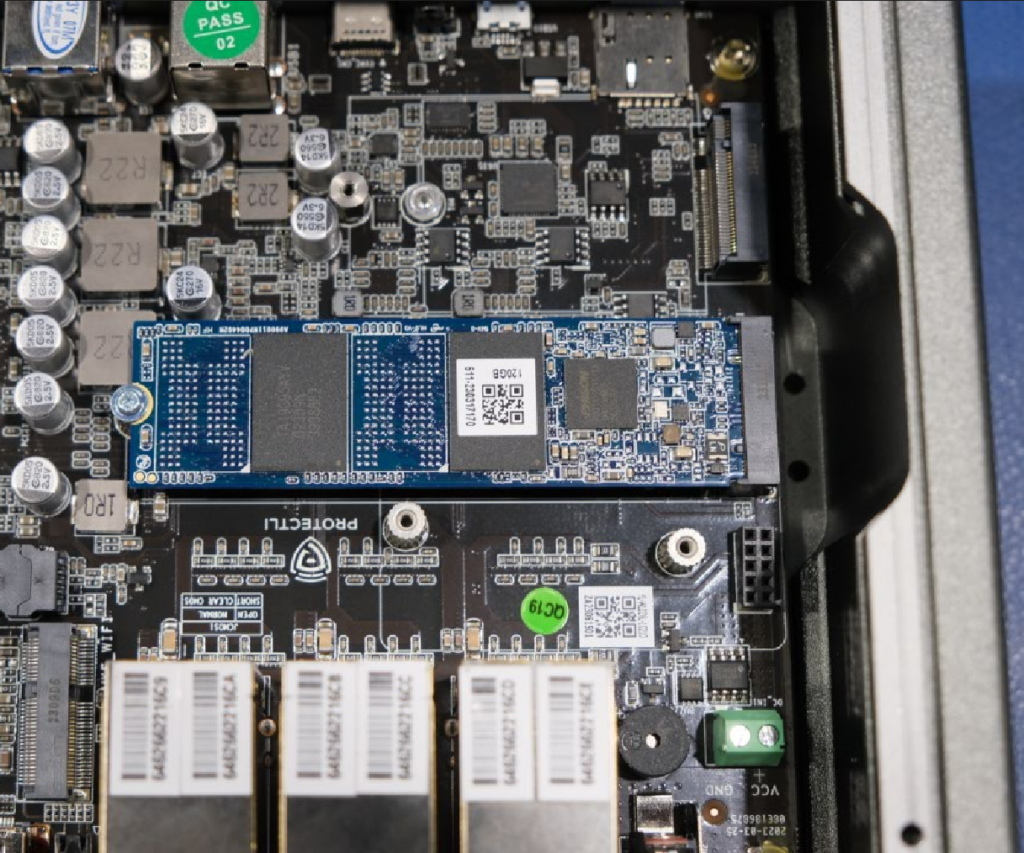
- Install M.2 SATA/NVMe drive into the M.2 SSD slot
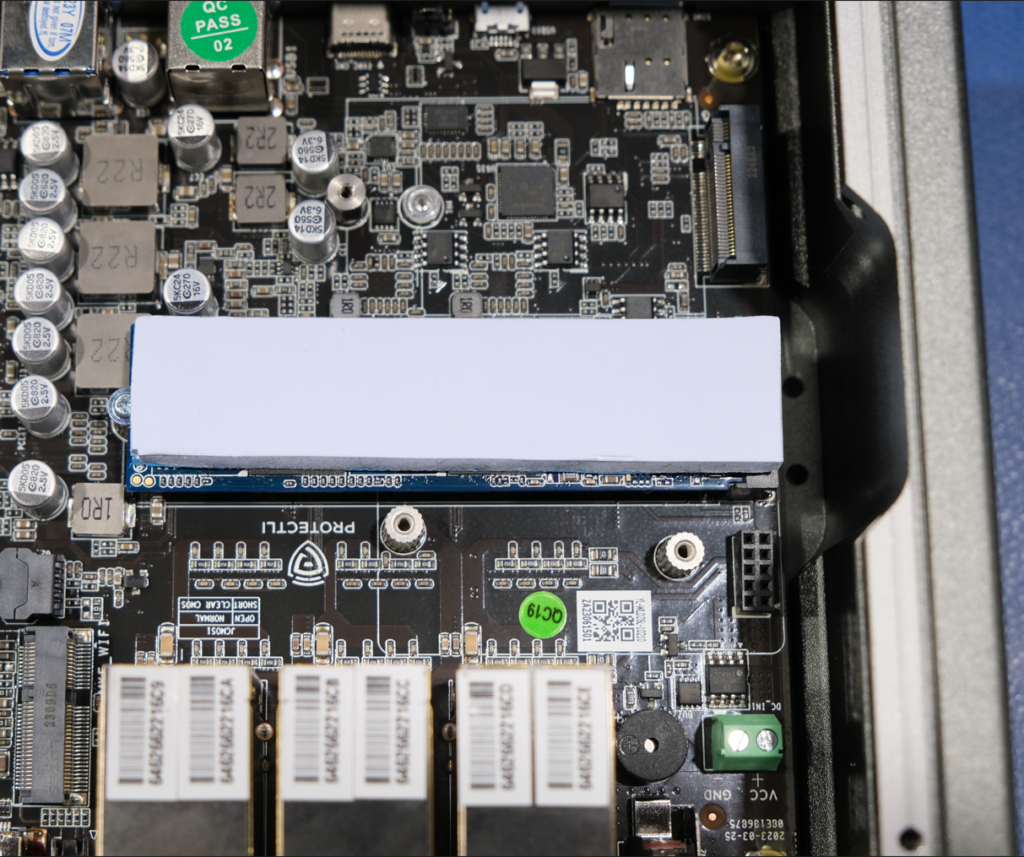
- Place the thermal pad on-top of the SSD (make sure to remove the plastic covers on both sides of the thermal pad)
- Place heatsink into the slot on the chassis, verify the heatsink is making contact with the thermal pad on-top of the SSD
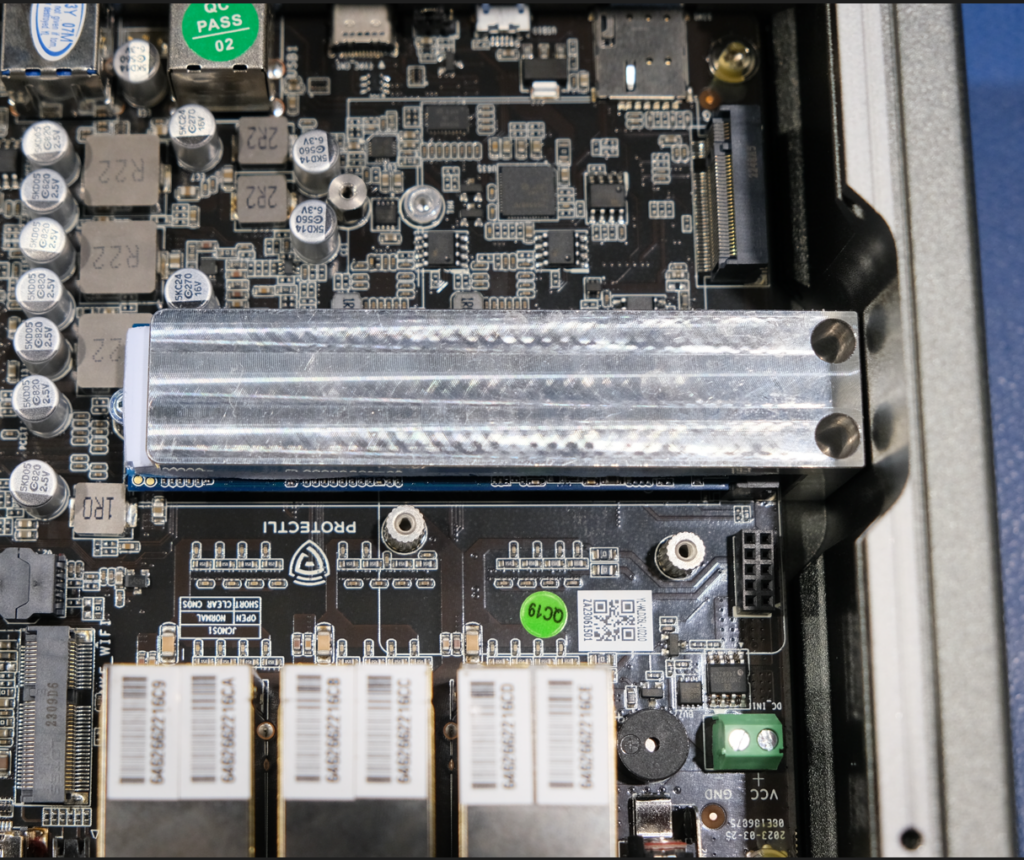
- Screw heatsink into place using Philips-head screwdriver with the included mounting screws
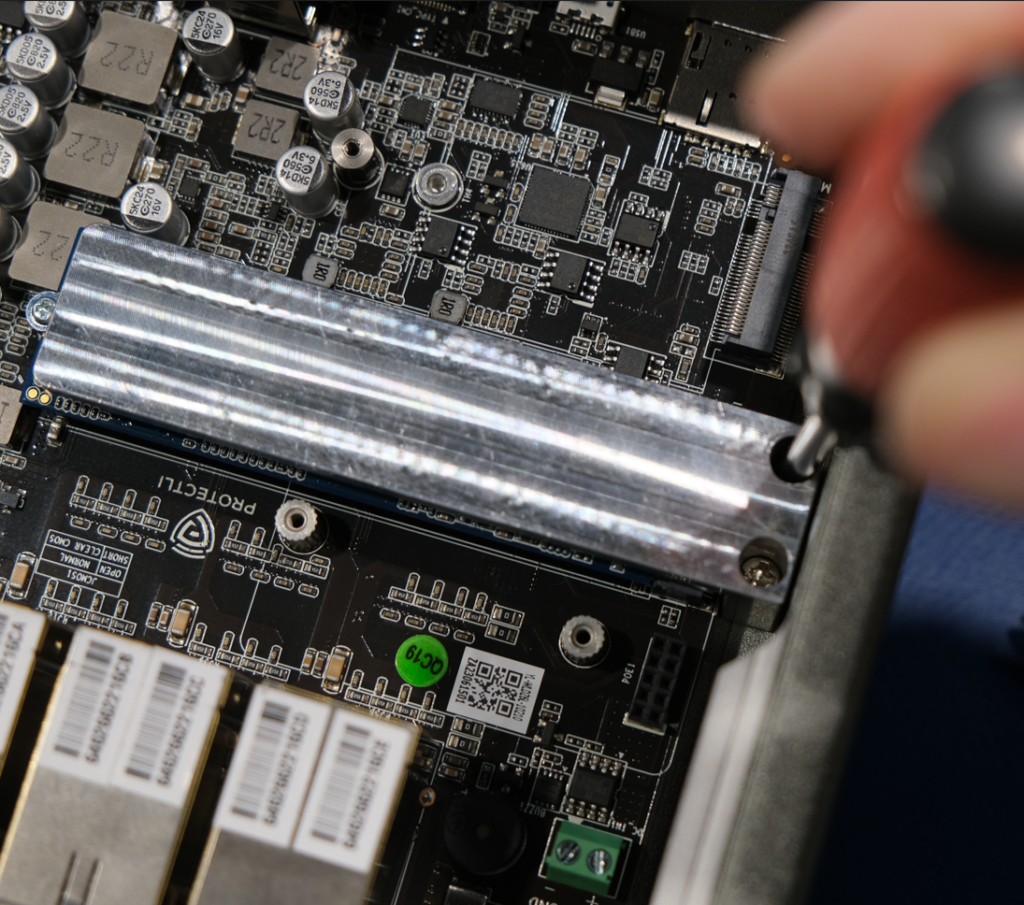
- Verify heatsink is fully tightened down
- You're good to go!
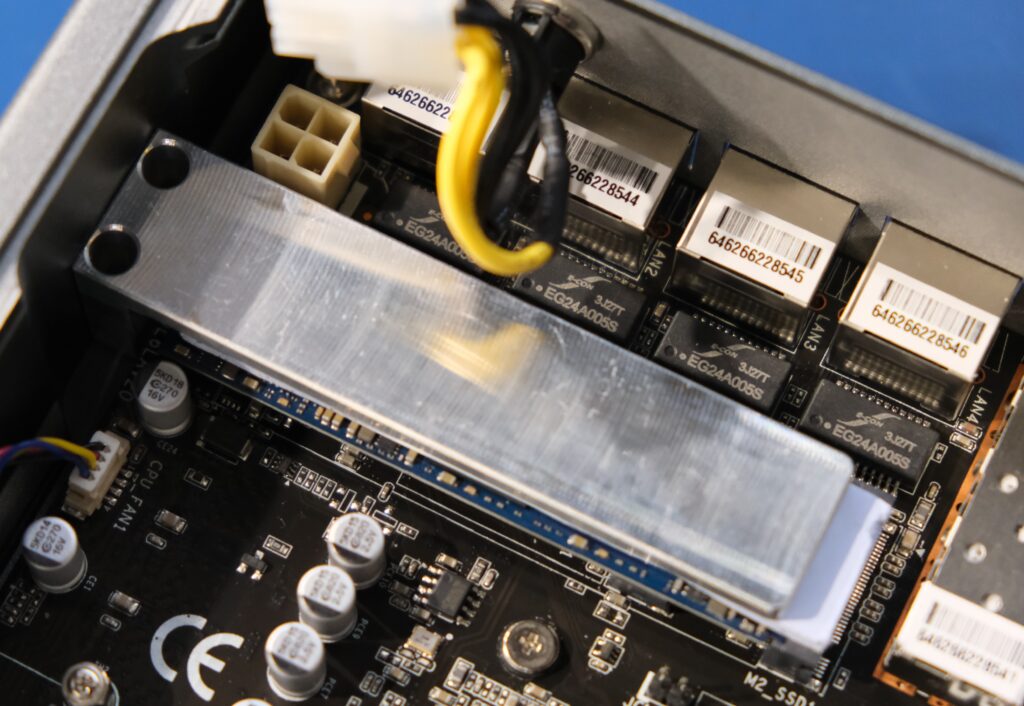
- Install your M.2 NVMe into the designated slot on the motherboard
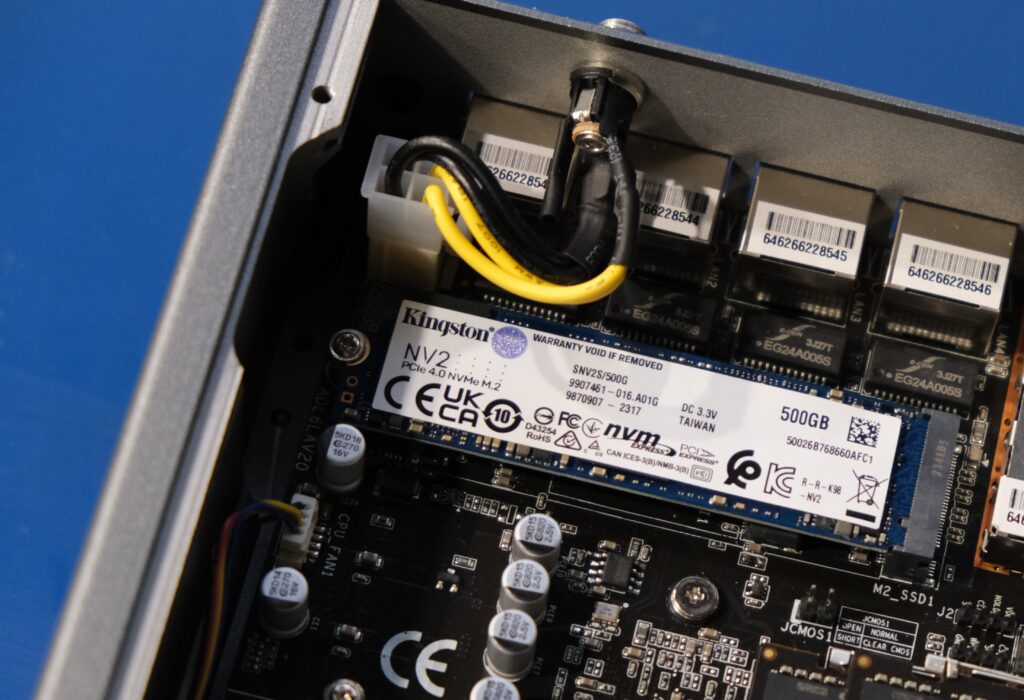
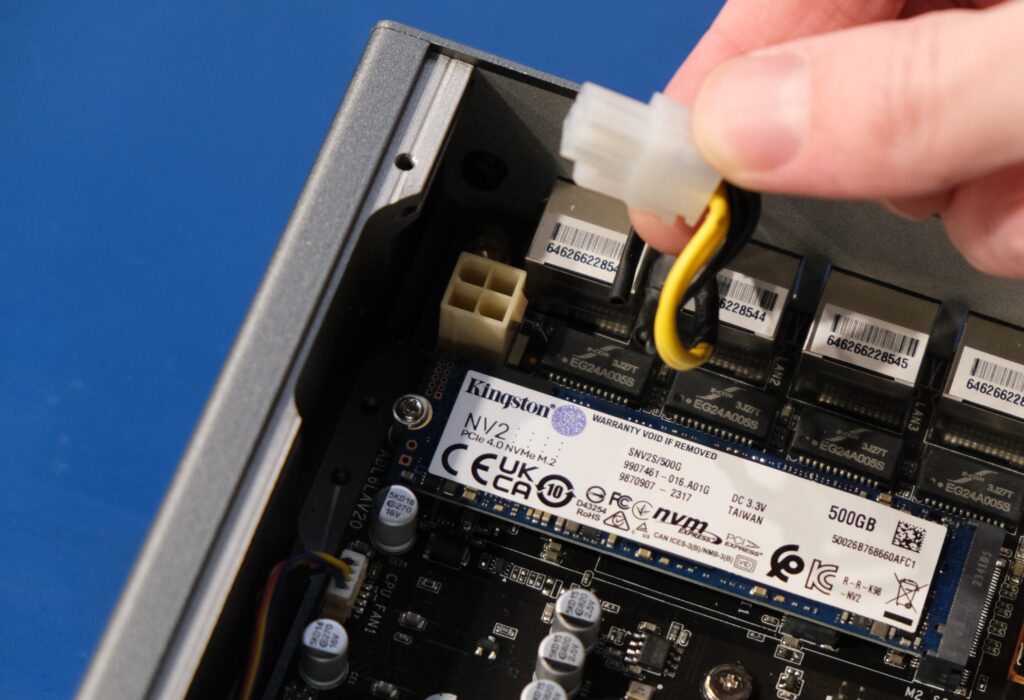
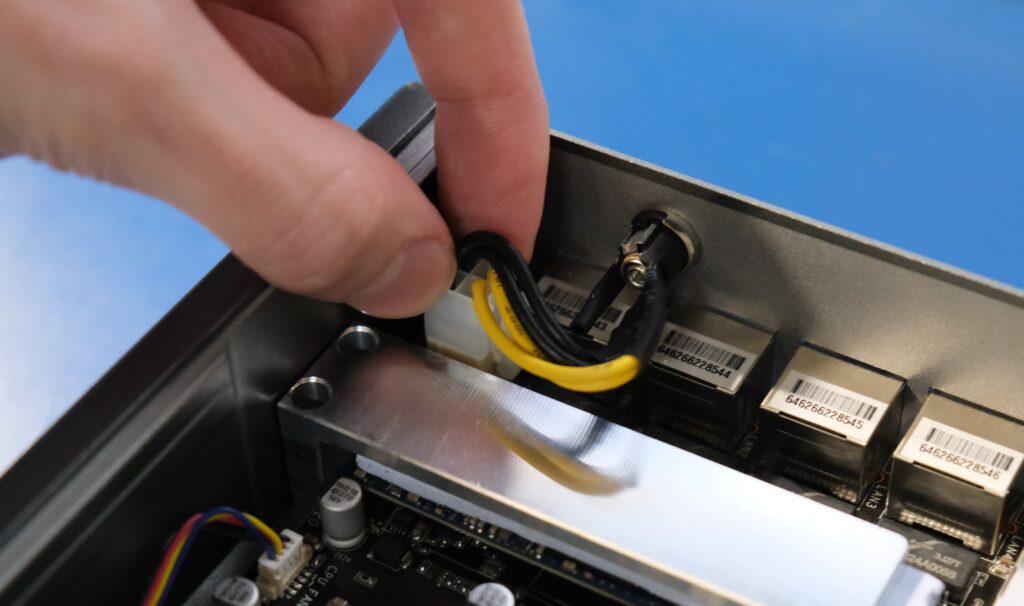
- The 4-pin ATX connector may get in your way, so temporarily unplug it by firmly pressing the release clamp, and gently pull it out
- Place the thermal pad on your NVMe drive (make sure to remove the plastic covers on both sides!)
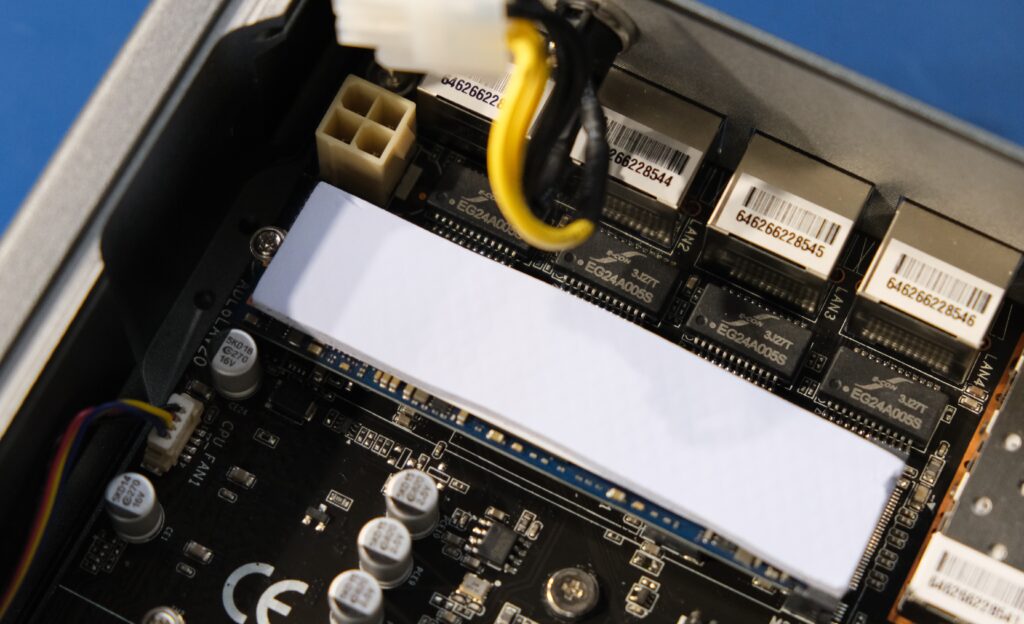
- Place heatsink on top of thermal pad, make sure that the holes lineup with the screw holes in the chassis
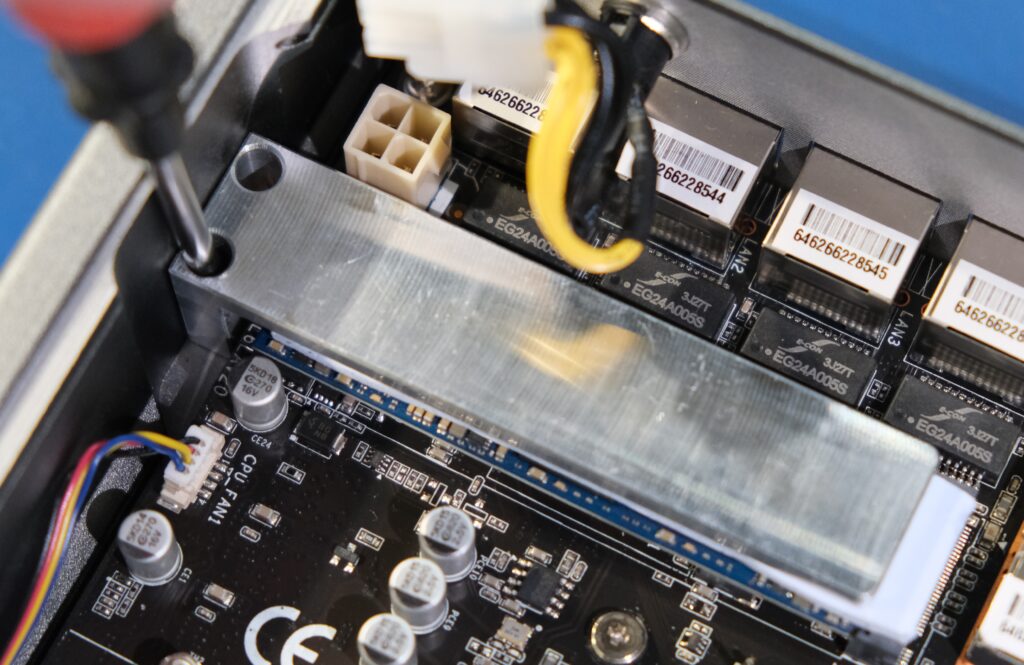
- Use the two screws to screw down the heatsink into the chassis
- Reconnect the 4-pin connector
- You're good to go!