Have a Question?
VP6600 Series Hardware Overview
Overview
The VP6600 series is the third iteration of the Vault Pro (VP) lineup. The VP6600 series offers newer, more efficient, and more powerful technologies compared to previous Vault products. It includes some of the most requested features we've had from the Protectli fan base.
Some key features of this lineup are the utilization of 12th generation Intel CPUs, implementation of two 10GbE SFP+ cages (Intel X710-BM2) , four 2.5GbE RJ45 ports (Intel i226-V), DDR5 SO-DIMM compatibility (Dual Channel), M.2 NVMe SSD storage, support for two 2.5" SATA SSDs, two serial COM ports (either USB-C or RJ45), two replaceable fans (6010) to keep the unit cool, and the ability to install a M.2 WiFi card and M.2 4G/5G modem. Other features include three USB-A 2.0 / one USB-A 3.1 / one 3.2 USB-C port, HDMI, and Display Port. More detailed information on each aspect of this product lineup can be found within this article.
A detailed datasheet including information such as pin layouts for headers on the motherboard and other useful tech specs can be found at the links below:
CPU
There are currently three options for the CPU. They are the VP6630 (12th Gen Intel Core i3-1215U), VP6650 (12th Gen Intel Core i5-1235U), or the VP6670 (12th Gen Intel Core i7-1255U).
VP6630 (i3-1215U): 64 bit, 2 Performance Cores, 4 Efficient Cores, 6 Total Cores, 8 Threads, Max Performance-core Turbo Frequency 4.40 GHz, Max Efficient-core Turbo 3.30 GHz, 10MB Cache
VP6650 (i5-1235U): 64 bit, 2 Performance Cores, 8 Efficient Cores, 10 Total Cores, 12 Threads, Max Performance-core Turbo Frequency 4.40 GHz, Max Efficient-core Turbo 3.30 GHz, 12MB Cache
VP6670 (i7-1255U): 64 bit, 2 Performance Cores, 8 Efficient Cores, 10 Total Cores, 12 Threads, Max Performance-core Turbo Frequency 4.70 GHz, Max Efficient-core Turbo 3.50 GHz, 12MB Cache
Memory
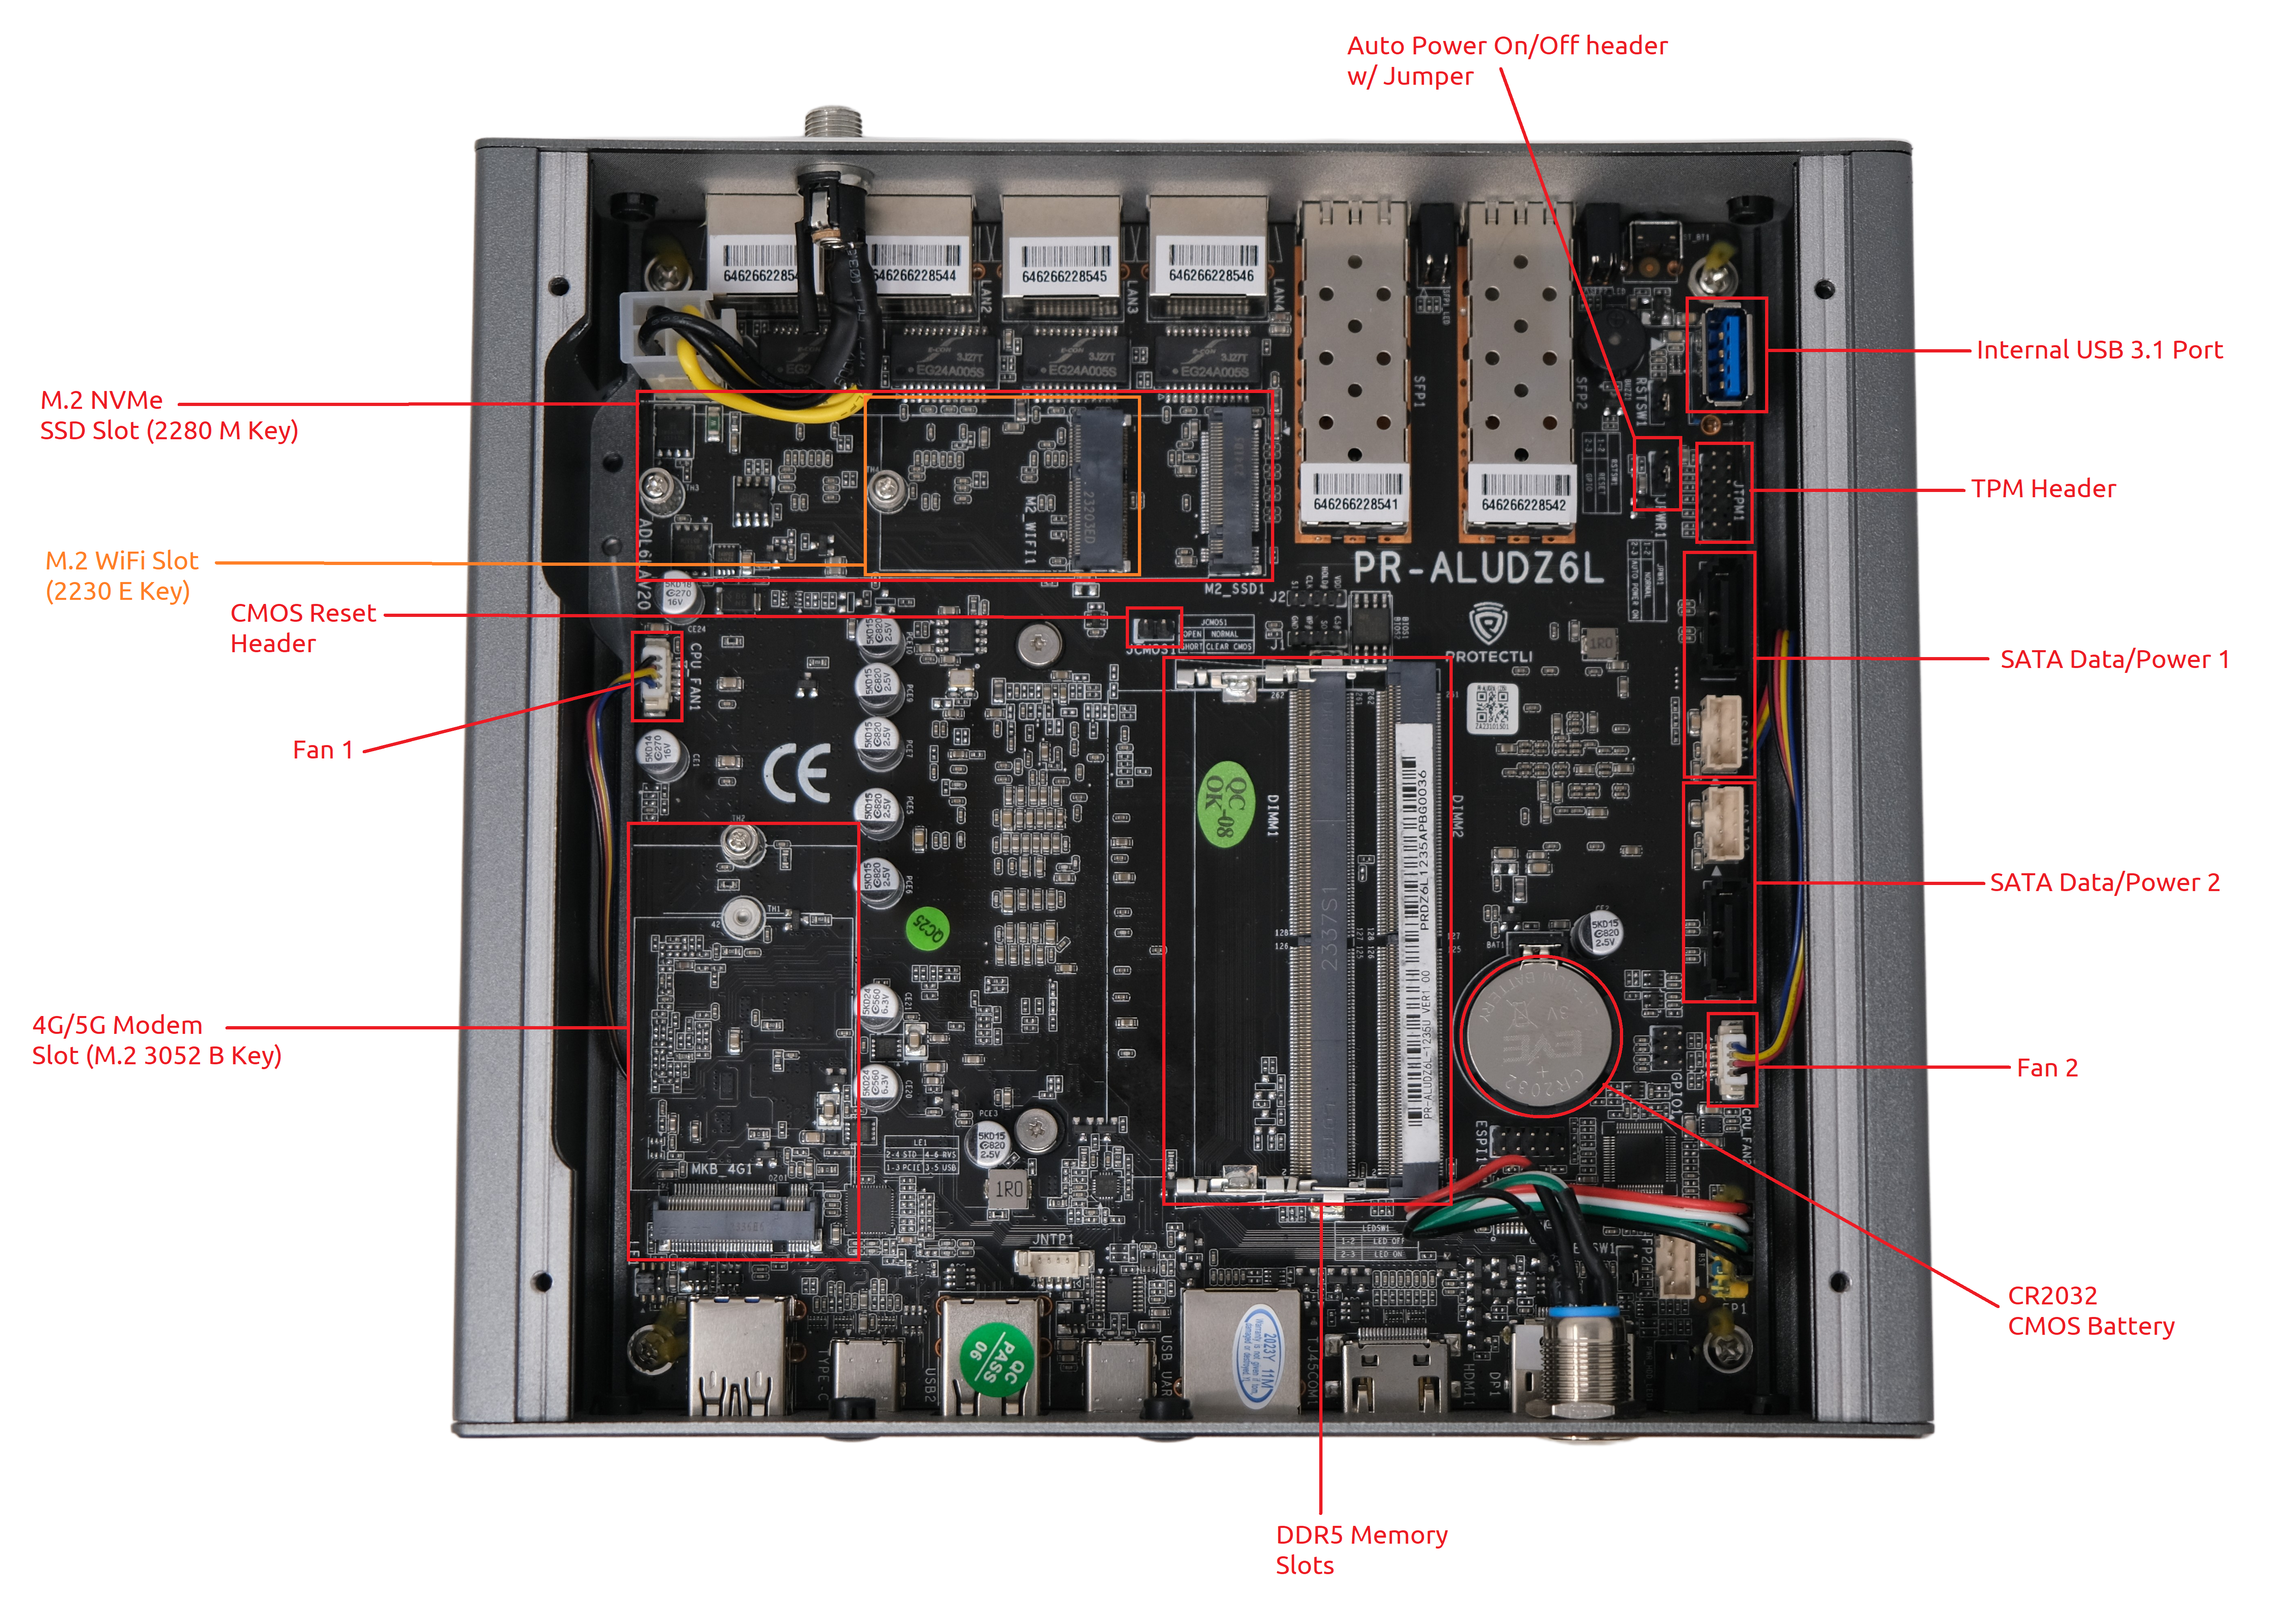
The VP6600 series is the first of our lineup to utilize DDR5 SO-DIMM. There are two sockets allowing for two DRAM modules to be installed, up to 96GB. The VP6600 supports Dual Channel operation and is rated at 4800 Memory Transfers per second (MT/s). Note that the CPU determines the transfer rate and DRAM must be rated at the CPU Memory Transfer speed or higher. DDR5 is a recent technology and during qualification of the VP6600, some incompatibilities with DDR5 DRAM were found. Based on those test results, the default MT/s has been set in the BIOS to 4200 MT/s. With the setting at 4200 MT/s, no incompatibilities were found. The setting can be changed by the user to optimize performance for specific DRAM if there are no issues.
Regarding coreboot and RAM initialization: If you flash your VP6600's firmware to coreboot, it may take up to two minutes for RAM to initialize on the first boot. Please be patient after flashing to coreboot because it may seem like the unit is not actually booting. Please wait at least 2 minutes for the unit to boot. This behavior may also occur when swapping RAM for a different module, or if you are installing your own RAM after purchasing a VP6600 from us with no RAM preinstalled. All subsequent boots after the first one should only take a matter of seconds.
In regards to 48GB modules: we have tested multiple brands and models, and quite a few of them will fail a memtest and crash. The 48GB modules that we sell on our site have been extensively tested to guarantee that they work as expected. This involves running multiple passes of memtest over hundreds of hours, and verifying that operating systems can actually utilize all 96GB of RAM when two modules are installed. More details on RAM that has failed our testing can be found on our VP6600 Component Compatibility article. It is recommended to keep the MT/s set to 4200.
Storage (NVMe)
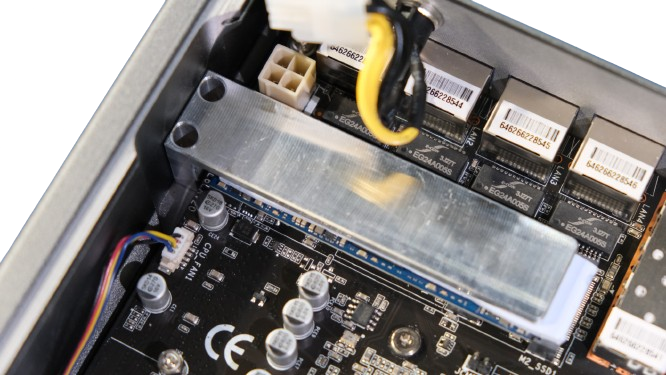
The VP6600 series supports 1x M.2 2280 NVMe SSD. It supports current industry standard capacities of 250 GB, 500 GB, 1 TB, and 2 TB. The VP6600 supports NVMe PCIe 4.0 (16GT/s) with width of x4. A heatsink is included with these units which can help with heat dispersion. An NVMe with the heatsink installed can be seen below.
Storage (SATA)
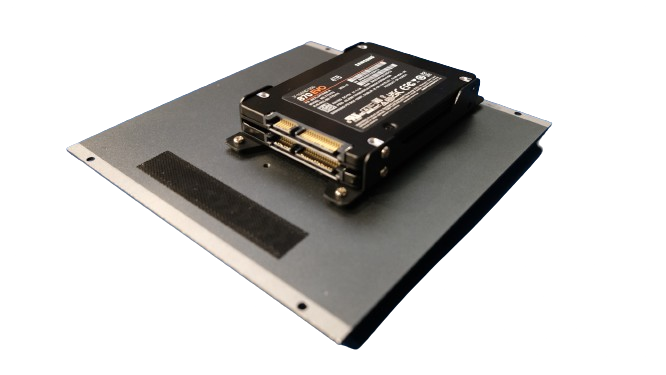
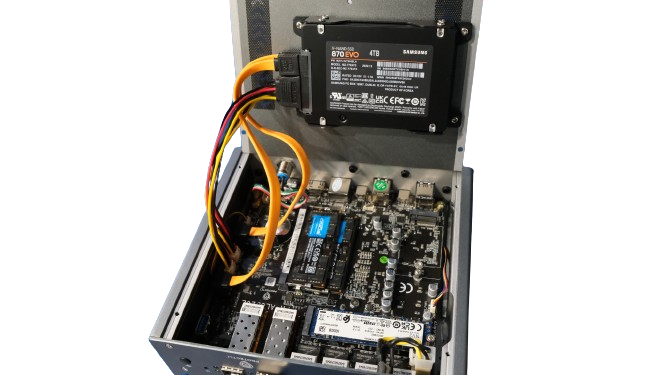
For additional storage space, the VP6600 contains a set of two SATA data/power headers on the motherboard allowing for two standalone 2.5" SATA SSDs to be installed. The Vault comes with the SATA data and power cables, and a 2.5″ mounting bracket that can fit two drives inside of the chassis. An example can be seen below.
SFP+ Ports (10 Gigabit)
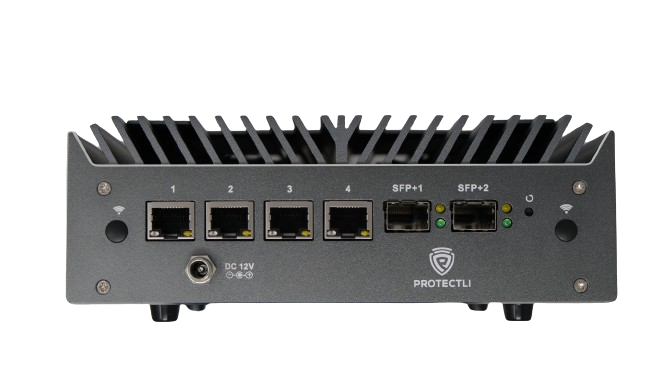
A key feature of the VP6600 series is the inclusion of two standalone 10GbE SFP+ cages. These use the Intel X710-BM2 controller chipset. You can support any SFP+ module which conforms to the SFP+ Multi-source Agreement (MSA). At initial release, Protectli provides Copper RJ-45, Multi-mode Fiber (MMF), Single-mode Fiber (SMF) and Direct Attach Copper (DAC) SFP+ options.
RJ45 Ethernet Ports (2.5 Gigabit)
There are four standalone 2.5GbE RJ45 ports included in these models. All of the RJ45 ports use independent Intel I226-V NICs.
Trusted Platform Module (TPM)
The VP6600 provides a polarized header for an optional TPM. The TPM is available from Protectli at this link. More information on TPM features can be found on this article.
Serial COM Ports (RJ45 and USB-C)
Serial COM output is typically used to edit the BIOS or modify an OS without the need for a monitor to be attached.

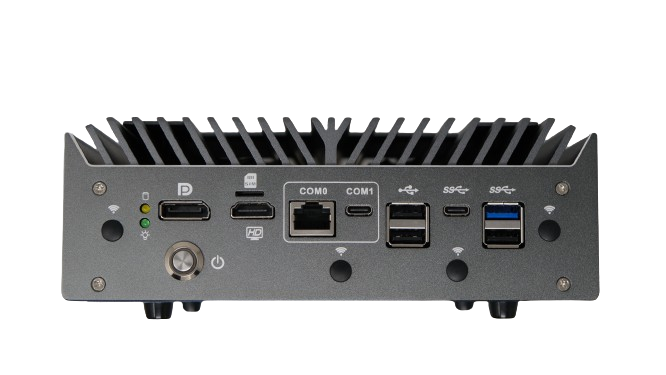
The VP6600 has two options for serial COM output. There is an RJ45 port and a USB-C port, both utilize the FTDI chipset. The USB-C COM cable is included with the product.
Some operating systems will prioritize the RJ45 port and will prevent the USB C port from displaying an image, so if you wish to use the USB-C port for serial COM output, you will need to modify some options in the BIOS. Please follow our guide on how to do this here: VP6600 Series COM Guide
WiFi
The VP6600 provides an M.2 2230 E Key socket for an optional WiFi module.
The Antennas can be mounted to the chassis via the pre-drilled chassis holes on the front or rear panel.
A compatible 802.11ac WiFi module that is available from Protectli can be found at this link.
LTE
The VP6600 provides an M.2 3052 B Key socket for an optional 4G or 5G LTE module.
To insert a SIM in the external LTE slot, have the SIM oriented with contact points facing down (towards the HDMI port) and SIM notch facing inward.
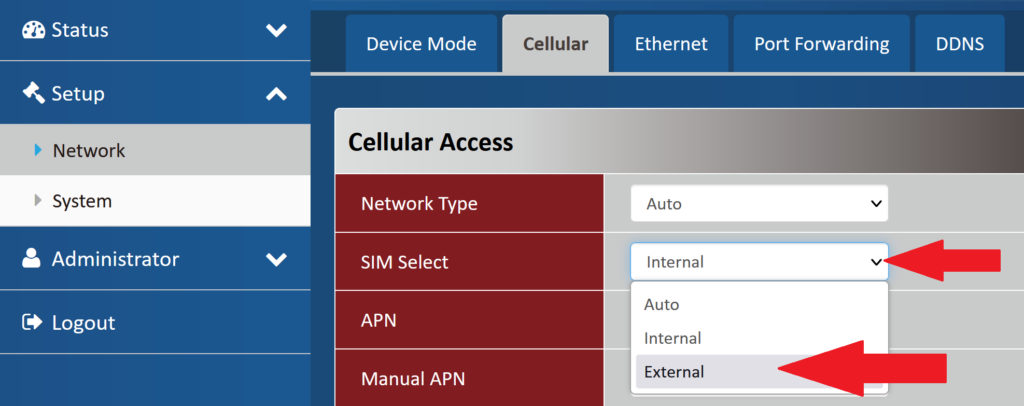
Additionally the installed modem will need to be configured to utilize the external SIM slot.
If using a Protectli internal modem: Navigate to Setup -> Network -> Cellular Tab -> SIM Select – External
