Have a Question?
Starlink Bypass Mode (Bridge Mode)
Overview
Starlink is a versatile satellite ISP provided by SpaceX with Residential, Business, and RV options. For more information regarding Starlink and service plans, please see their website here (link). The standard Starlink packages includes a satellite dish and a Starlink router. While the provided WiFi router will get the job done for basic connectivity, adding a firewall Operating System (OS) device protects the network and is consistent with today's "best practices" for network security.
In order to utilize a firewall/routing device, the Starlink must by put into "Bypass Mode", so that all data is just passed through to the firewall/router.
This article covers how to configure the Residential Starlink for "Bypass mode", or also known as a "Bridge Mode", for use with routing and firewall operating systems. This article uses OPNsense for example purposes.
Note: Starlink uses Carrier Grade NAT (CGNAT), so simple port forwarding will not allow access from outside the network. We will cover a solution for this in another article.
Prerequisites
Protectli Vault with OPNsense installed (Or your choice of operating system)
Starlink Kit (Dish+Router) and service
Starlink Bypass Mode Configuration
- Install the Starlink following the instructions provided by the manufacturer
- Verify Starlink has a "Online" status and Internet access
- This can be done by following the initial setup instructions provided by Starlink
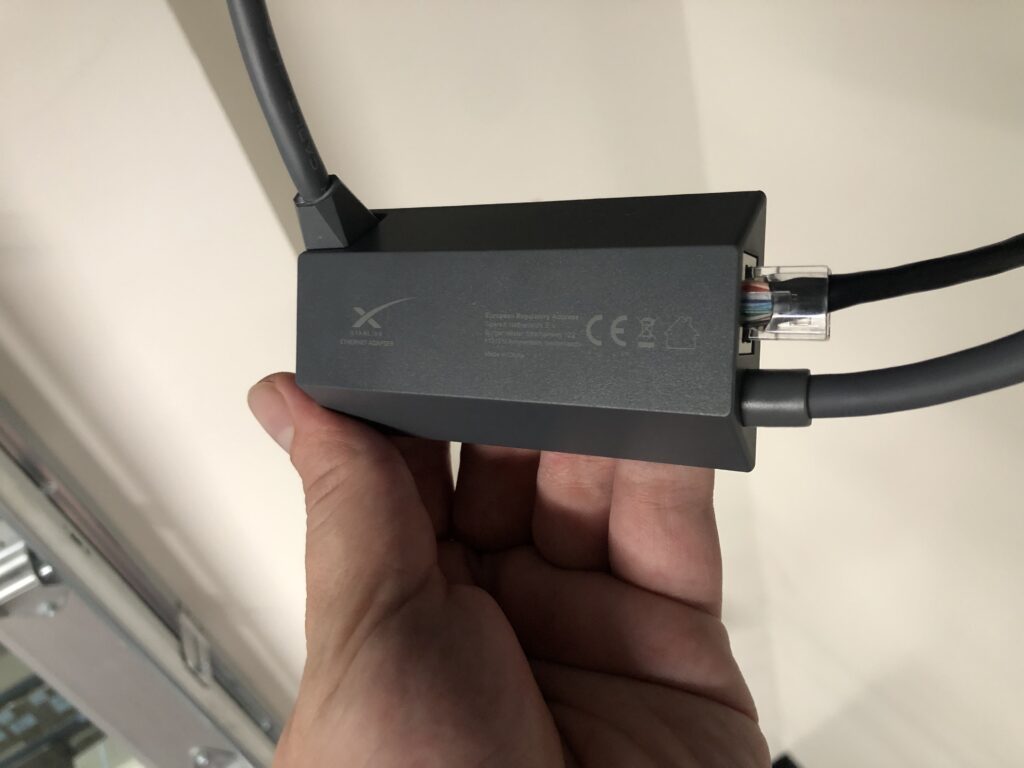
- Connect a Ethernet cable to the RJ45 connection included with the Starlink power cabling. See picture below for reference. Note: depending on the Starlink version purchased this may differ
- Using the Starlink phone app, navigate to Settings
- Select "Bypass Starlink WiFi router"
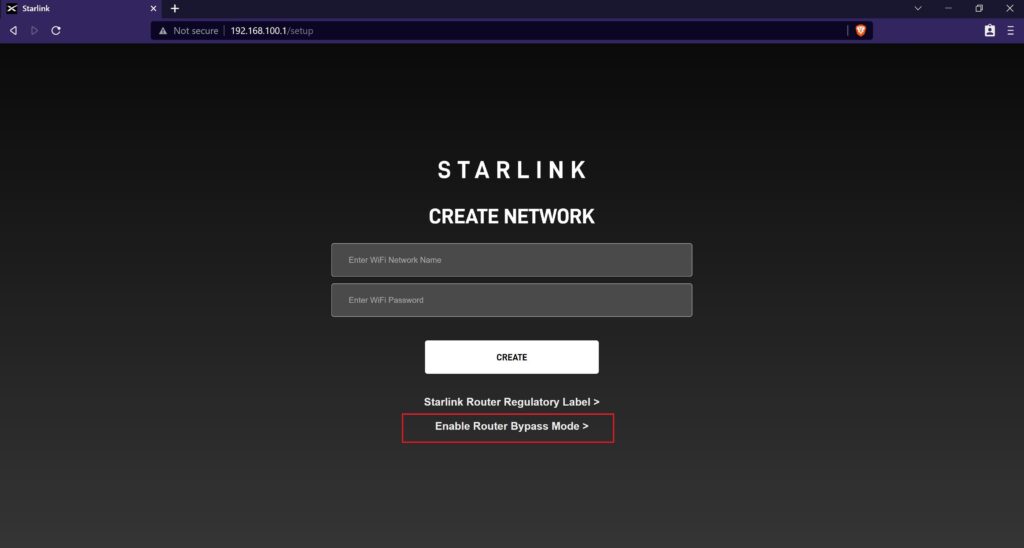
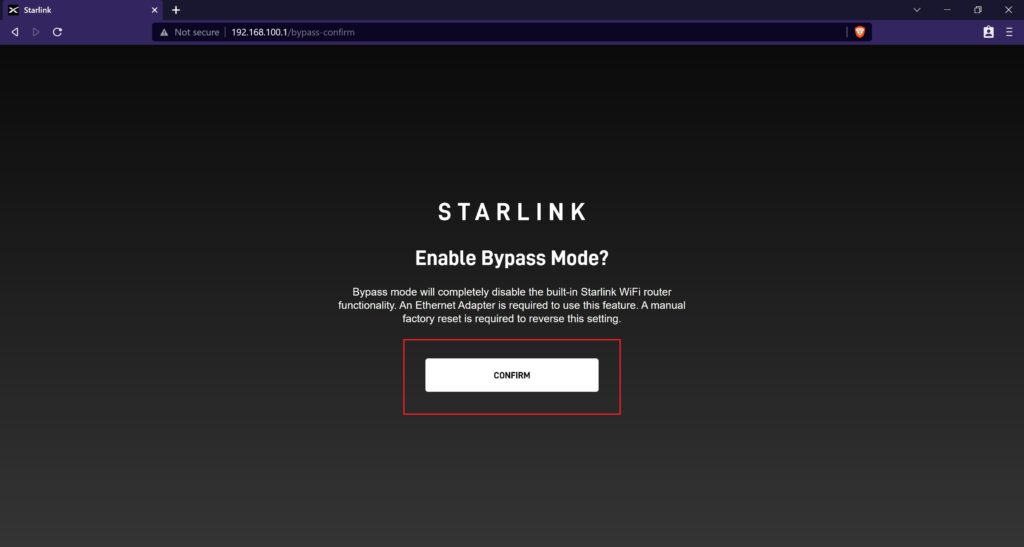
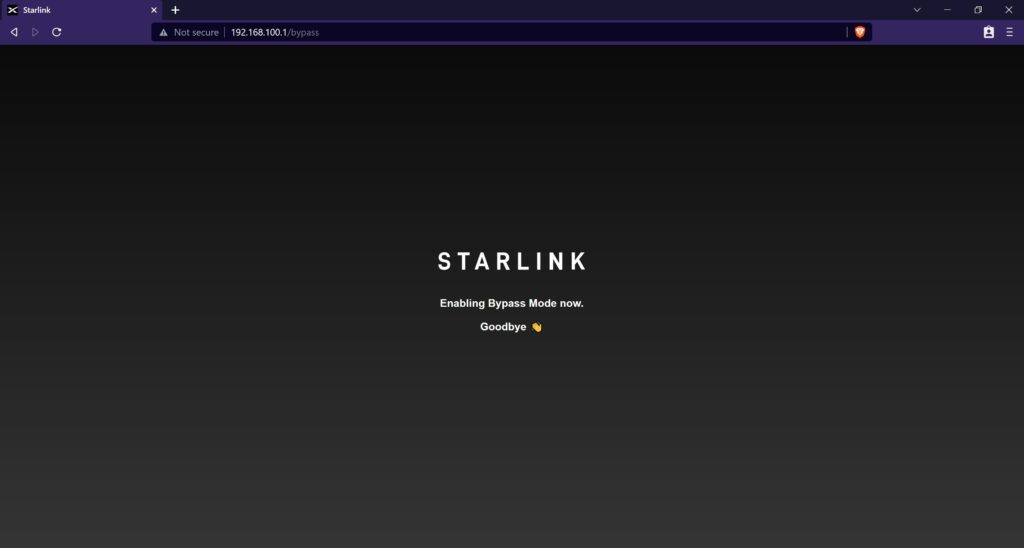
- Alternatively "Bypass Mode" can be achieved via a hardwired connection directly to a PC after factory reset (Power cycle 3 times with 2-3 second intervals between), then browsing to 192.168.100.1 . See screenshots below for reference
- Connect the other end of this Ethernet cable to the OPNsense WAN port
- Connect a PC to the OPNsense LAN port
- Log in to the OPNsense webUI
- See OPNsense documentation here for default login and credentials (link)
- Verify the OPNsense webUI dashboard is displayed
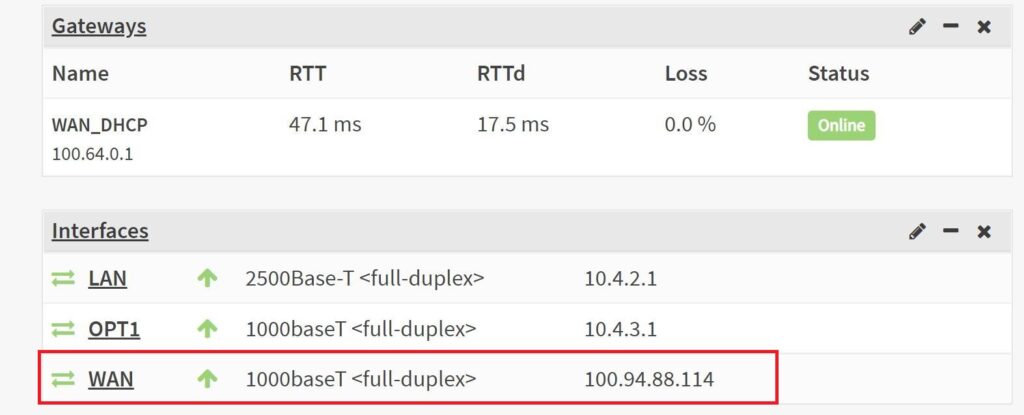
- Navigate to the "Interfaces" widget
- Verify the WAN interface receives a 100.x.x.x address. See screenshot below for reference
-
- If a 100.x.x.x address is not provided, try disconnecting and then reconnecting the Ethernet cable into the OPNsense WAN port.
- If the address provided is still 192.168.100.x, connect the "WAN" Ethernet cable directly between the Starlink router and the PC
- Navigate to 192.168.100.1
- Verify the Starlink Web UI is displayed
- Verify "Bypass Mode" is correctly enabled
- Reconfigure the Ethernet cables such that the Starlink router is connected to the WAN port of OPNsense and the PC is connected to the LAN port of OPNsense.
OPNsense Configuration Recommendations
Satellite communications pose some additional challenges. See the recommendations below.
- Navigate to the OPNsense webUI
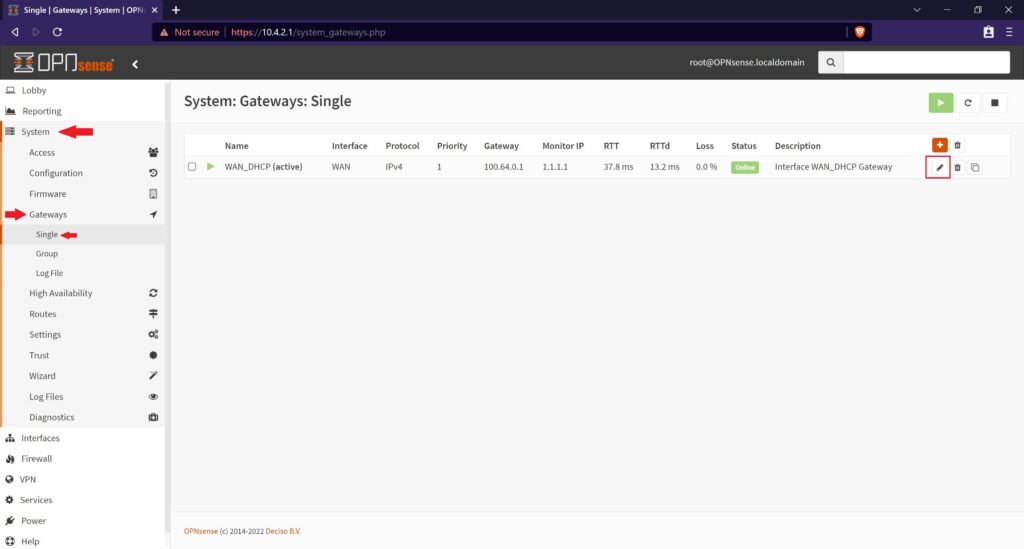
- Navigate to System>Gateways>Single – WAN_DHCP
- Click the pencil icon to edit
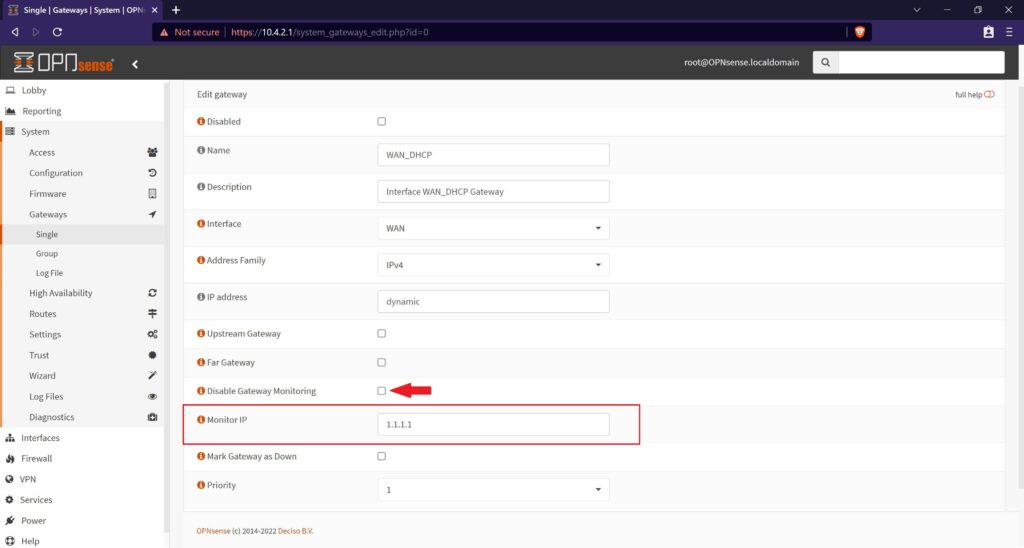
- Verify the Gateway Configuration page is displayed
- Navigate to "Disable Gateway Monitoring"
- Uncheck the box to enable Gateway Monitoring
- Select the Monitor IP field
- Add a known reliable public IP address. We recommend Cloudflare's DNS address 1.1.1.1
- Scroll down and select Save
- Scroll up to the top right and select Apply changes
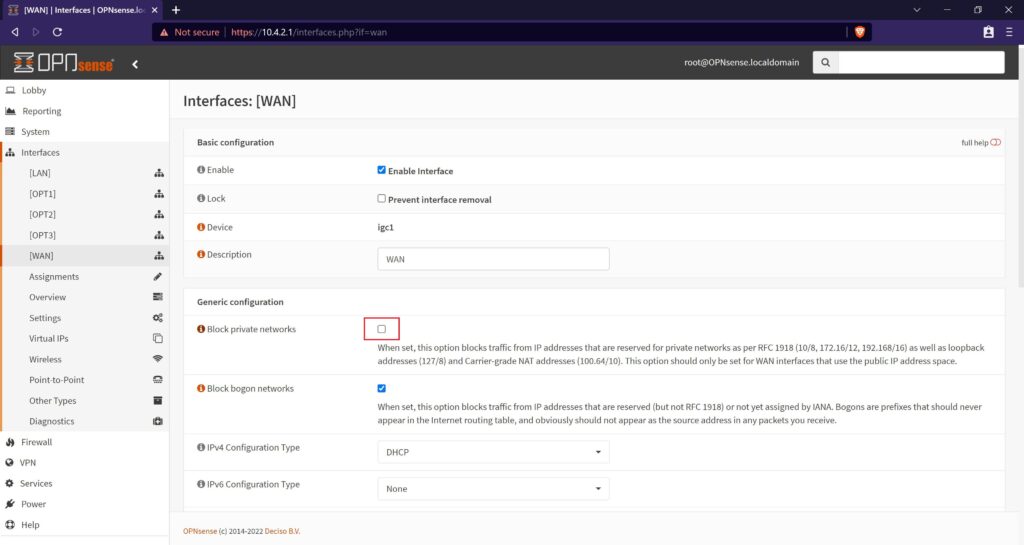
- Navigate to Interfaces>WAN
- Verify the WAN page is displayed
- Starlink provides CGNAT addresses. Since CGNAT uses private IP addresses, Uncheck the option "Block private networks"
- Scroll down to "DHCP client configuration"
- Navigate to the "Reject Leases From" field
- In order to prevent the possibility of the router from handing a LAN IP address to OPNsense in case of an unexpected power cycle, Enter 192.168.100.1 into the "Reject Leases From" field

- Scroll down and select Save
- Scroll up to the top right and select Apply changes
- Reboot the Protectli Vault and allow OPNsense to fully load
- Verify a PC is connected to the OPNsense LAN port
- Browse to a site of your choice
- Verify the site is displayed which indicates correct internet connectivity
At this point you have successfully configured "Bypass Mode" and passes the Starlink IP address to OPNsense.
Note: If for any reason the Starlink router is factory reset, it will block connectivity from the OPNsense firewall/router and the earlier "Bypass mode" instructions will need to be applied again.
If you need additional assistance, please feel free to reach out at support@protectli.com.