Have a Question?
Quick Start Guide/Initial Setup
Getting Started!
Thanks for purchasing a Protectli Vault product! If you are completely new to our products or have never installed an operating system on a computer before, you may be a bit overwhelmed or confused with what you have gotten yourself into. This guide should help clear up any confusion you may have and assist with getting the Vault up and running. This article will go over such things as what is normally included with the product, what they do, and how to get started with installing an operating system so you can actually utilize the device for your intended purpose.
If you purchased the Vault from Amazon, you will NEED to install an operating system before it will work as a firewall, server, hypervisor, etc. If you purchased a "barebones" unit that did not include RAM or storage (SSD), you will also need to install components in the unit before it can even turn on to be utilized.
If you purchased the Vault directly from our website and selected an operating system to be preinstalled we will provide additional information to help you get started further down in the article.
If you already have OPNsense installed, or are already familiar with installing pfSense®, you may want to check out our Getting Started With Using the Vault as a Firewall article for more in-depth information on networking topics and other useful information.
As a side note: our Knowledge Base has a plethora of articles pertaining to many different topics that may prove useful (for example, here is a link where you can find the datasheet for your Protectli Vault Product). We also have a YouTube channel with a bunch of different tutorials that may also help you with your journey. (https://www.youtube.com/@protectli)
Clearing Up Common Questions
What even is the Protectli Vault?
All Vault products are essentially small form factor computers that can run a wide range of operating systems for your desired use case. If you purchased this device from Amazon, there will not be an operating system running on the Vault, so you will need to install one for the device to do anything meaningful. People commonly learn about us from YouTube videos, podcasts, or have seen us mentioned on internet discussions and may assume that the Vault is a device that you just hook up to your network and it starts working as a firewall, however, you will first need to do some relatively basic setup to achieve this. If you purchased the Vault directly from our website with an operating system preinstalled, it will be a bit more straightforward.
A very popular use case for our Vault products is to use an operating system like OPNsense or pfSense® to act as a firewall. Protectli does not develop these operating systems and we do not preinstall pfSense® for customers. Instructions on how to set up the Vault as a firewall will be found in this article. Keep in mind the Vault doesn't have to be a firewall, there are many other use cases and operating systems you can install.
What is coreboot?
coreboot is an open source and secure BIOS/UEFI firmware option that can replace the default AMI firmware to offer a more secure and purpose built firmware solution. It is not an operating system, it is the firmware that runs directly on the hardware. If you are unfamiliar with what a BIOS/UEFI is, please read this article from TechTarget to get a better understanding. Our coreboot images are built specifically for each Vault model to offer efficient and purpose-built features. Information on the features of coreboot can be found on our article here.
If you purchased a Protectli Vault from Amazon, your Vault will only have coreboot pre-flashed if specifically mentioned in the name of the product. Otherwise, you will instead have American Megatrends International (AMI) BIOS/UEFI. We typically recommend everyone to flash their Vaults to use coreboot firmware due to the more secure nature compared to AMI. If you want to flash to coreboot, instructions can be found further down in this article.
What is a barebones unit? Did I buy one?
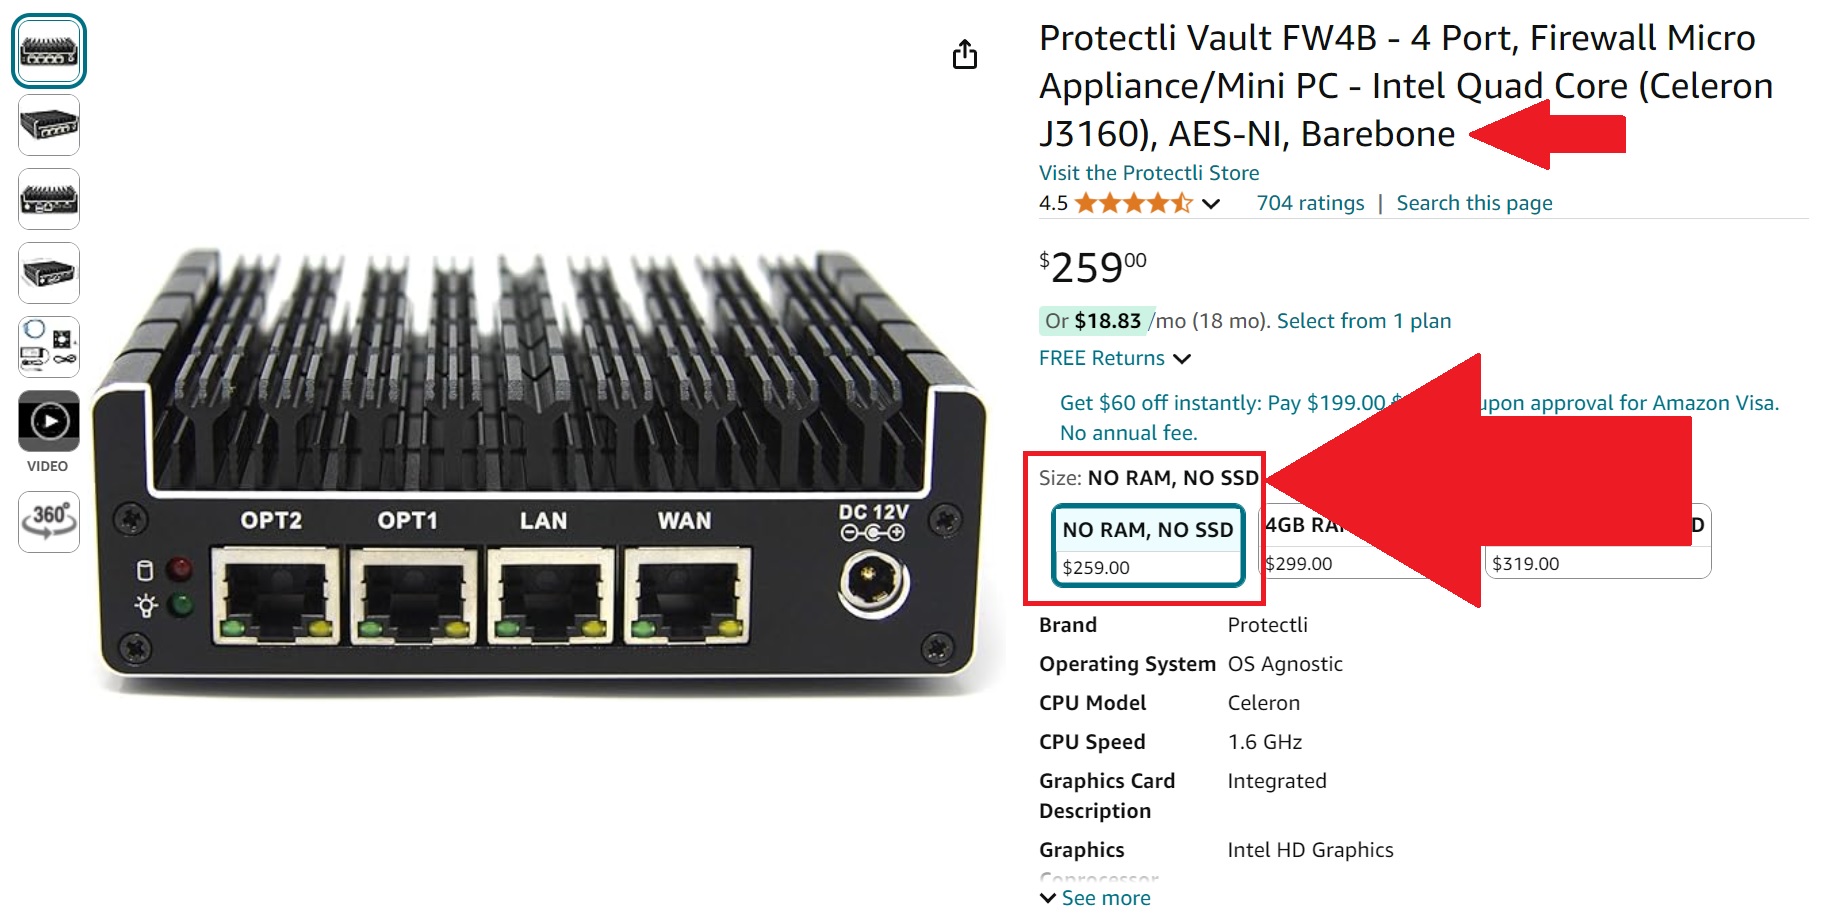
A "barebones" unit is a Vault that was purchased without RAM or Storage (SSD) installed. Since the Vault is a computer, it NEEDS RAM to actually boot. You will also need storage to install an operating system to. If you purchased a barebones Vault, make sure you install RAM and storage! A list of compatible RAM can be found on our article here. An example of a barebones unit shown on Amazon can be seen below:
1. First Step (Unboxing and Understanding Components)
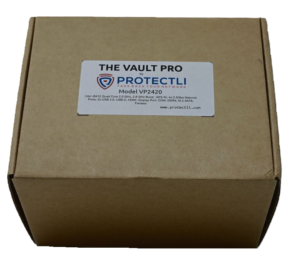
We recommend familiarizing yourself with the hardware. We have many different Vault models and they may use different components and offer unique features. The name of the specific model you purchased can be found on top of the box it is packaged in, or on the label found on the bottom of the actual Vault. Click on the links below to see an overview of your Vault:
If you have not already done so, you should open the box that the Vault arrived in and take it out. In the bottom section of the box underneath the Vault will be other accessories like a power supply, serial COM cable, and VESA mount. Some Vault models may contain accessories not found in other Vaults and not all Vaults come in the same sized box.
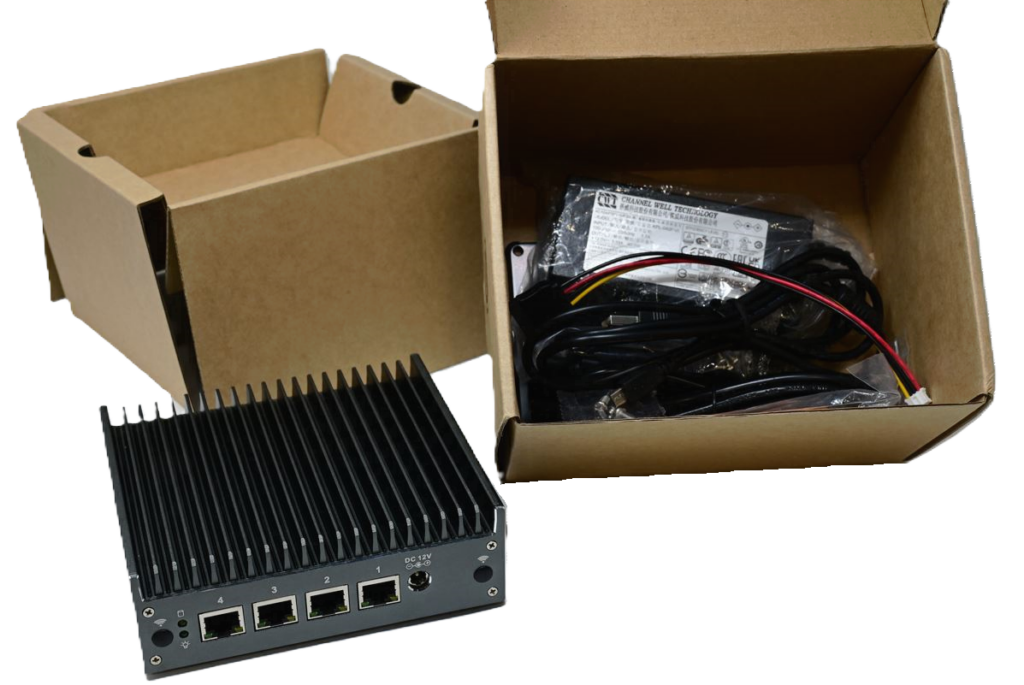
- Power supplies will vary between units. Some will connect to a brick and others will be a "wall wart" style. Currently all Vaults use 12V power supplies providing varying wattage depending on the Vault.
- SATA data and power cables will be included with certain models and can be used to connect a 2.5" SATA SSD to the SATA headers on the motherboard (if applicable). There will also be a bag of SATA screws to mount the SSD to the bracket in the chassis.
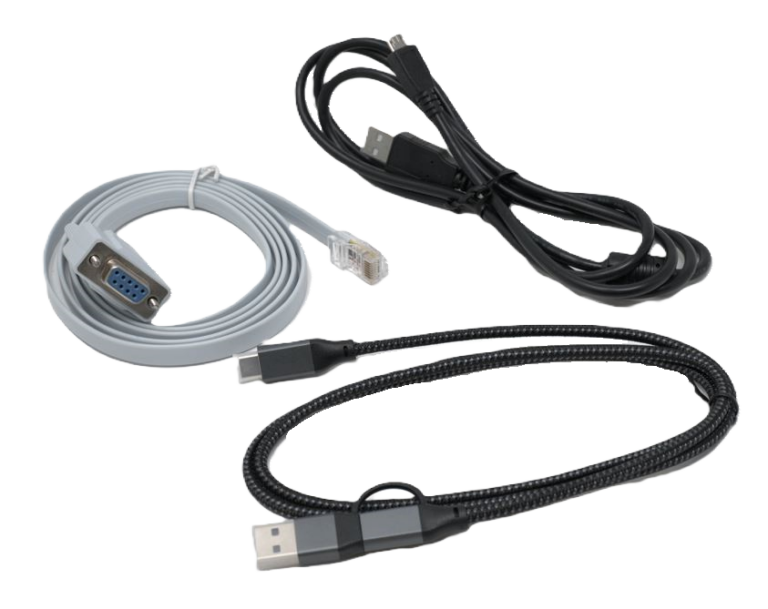
- COM Cables will vary between Vault models and can be used for serial output. More info on COM/Serial cables can be found on our article here.
- Some Vault Pro models come with internal heatsinks. The VP4600/VP6600 series include an NVMe heatsink, and the Vault Pro VP2430 includes a large component heatsink and an NVMe heatsink. Instructions for installing the VP2430 heatsinks can be found on our article here.
- VESA Mounts are included in some Vault products and can be used to mount the Vault to something like a monitor. We have a video explaining how it would be used here.
- There may be an additional bag of screws that are used to screw down SSDs, WiFi Cards, and other internal components inside of the Vault.
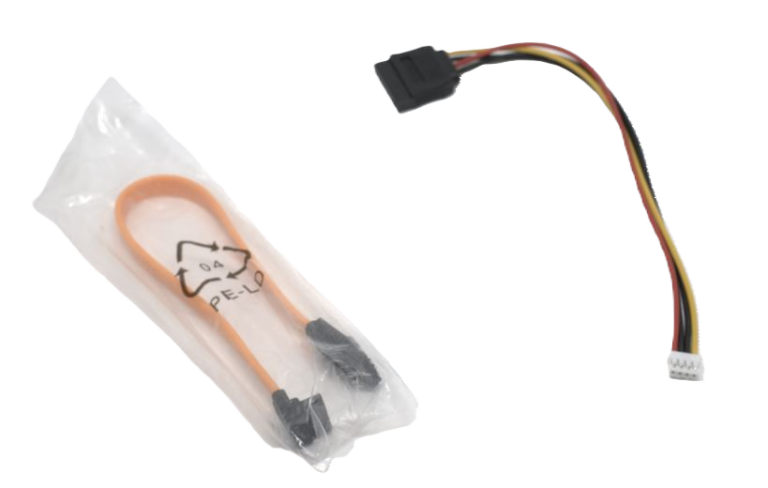
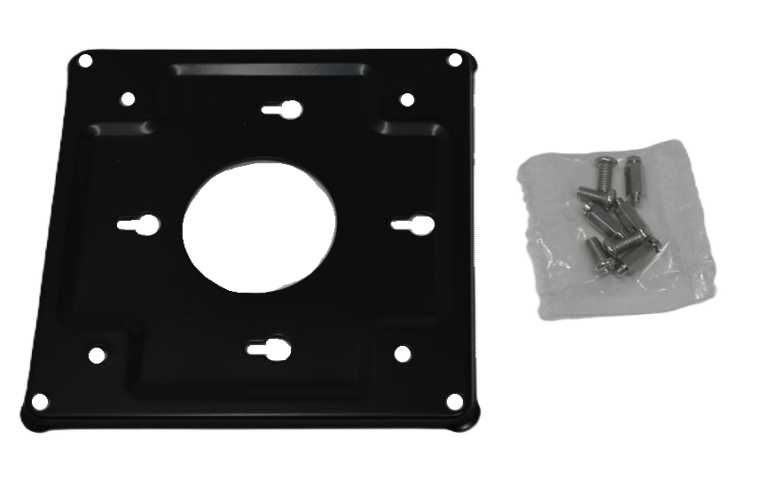
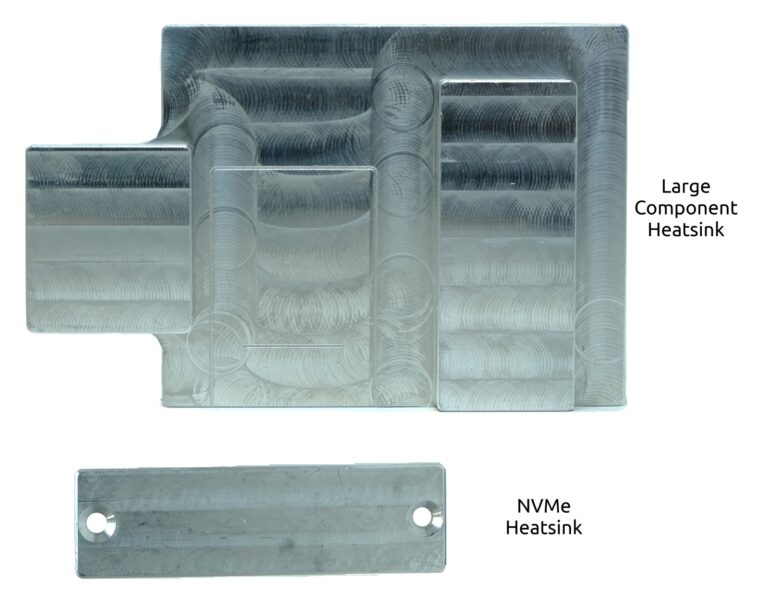
2. Second Step (Other Materials You Will Need)
If you purchased a Vault from Amazon or if you purchased a Vault from our website without an operating system (OS) preinstalled, you will need:
- A USB thumb drive (USB storage device) in order to install an OS to the Vault
- A wired keyboard to connect directly to the Vault (we do not recommend using a wireless keyboard)
- Display monitor (or a TV) and an HDMI or DisplayPort cable (depending on Vault product) to connect to the Vault
- If you don't want to use a monitor and keyboard, you can use the serial COM connection but keep in mind you will need to install the serial version of the operating system
- A desktop, laptop, or other computer running Windows, Linux, or MacOS to burn an operating system image to your USB drive
- Two ethernet cables (one to connect your modem to the Vault [WAN], and one to connect your computer/laptop to the Vault [LAN])
- Around 15-30 minutes of your time depending on your skill set! (Don't feel bad if it takes longer than that)
If you purchased a Vault from our website with an operating system preinstalled (like OPNsense), you will need:
- A desktop, laptop, or other computer running Windows, Linux, or MacOS
- Two ethernet cables (one to connect your modem to the Vault [WAN], and one to connect your computer/laptop to the Vault [LAN])
- Potentially a monitor and wired keyboard, but we will get into that later if needed. (If OPNsense was preinstalled you don't necessarily need one, but if Ubuntu Desktop was preinstalled you definitely will need a monitor)
- You can skip to the Seventh Step of this article
3. Third Step (Do You Want to Flash to coreboot?)
If you already have coreboot pre-flashed from us or do not want coreboot, skip this section.
If you purchased a unit from Amazon and want to flash your firmware to coreboot (which we typically recommend), please follow the steps below. This process basically requires you to boot the Vault into Ubuntu and then you will need to run a script called "Flashli" (which we created) which will reflash the firmware on the Vault. Make sure that you do not accidently power off the Vault while the unit is in the middle of being flashed.
- Please follow the instructions found on this article
- Please keep in mind you will need a monitor, a keyboard, a USB thumb drive with Ubuntu burned to it, and you will need an ethernet cable to connect the Vault to your modem during the process
- More info on coreboot can be found on our article here.
For a comprehensive video explaining the process, please check this out:
4. Fourth Step (Determing What OS You Want to Install)
If you want to use the Vault as a firewall, you will probably want to install OPNsense or pfSense®. These are both fairly similar operating systems and will both accomplish your goal of having a configurable firewall. Every single Vault will run these operating systems fantastically.
Another popular router software with great WiFi card support is OpenWrt, which we have instructions on installing located here.
If you want to use the Vault as a hypervisor to run multiple virtual machines, you will want to install something like Proxmox VE, XCP-ng, or ESXi VMWare. Keep in mind you should only do this on a Vault with a powerful CPU that has around 32GB of RAM installed (the FW2B/4B/4C would not be good options for this).
If you simply want to use the Vault as a workstation/desktop computer, you can install Windows or a Linux distribution like Ubuntu or Debian.
5. Fifth Step (Burning OS to a USB drive)
You will now need to grab your USB thumb drive as well as your computer that has access to the internet. You will be downloading an image for the OS you want to install and you will also need to download a program to burn the image to your USB. Once the image is burned to the USB, you will plug it into the Vault and boot to it.
If you navigate to our article on how to create a bootable USB drive, you can get more in-depth information for this process. With that being said:
- If you are using a Windows computer, we recommend downloading/installing Rufus to your computer.
- If you are using a Mac, we recommend downloading/installing BalenaEtcher.
After downloading/installing one of the above programs, you should download an image file for the OS you want to install to the Vault.
OPNsense image download links and instructions can be found here.
pfSense® image download links and instructions can be found here.
Other OS install instructions can be found here.
6. Sixth Step (First Time Boot and Installing OS)
After you have successfully burned an OS image to your USB drive, it is time to actually boot the Vault and install it!
- Place the Vault in a location where you will be able to connect a monitor and keyboard to it
- Connect your keyboard to one of the USB ports
- Connect an HDMI/DisplayPort cable to your monitor and Vault (must be connected before powering on the Vault)
- Connect your USB drive with the OS burned to it into the Vault's other available USB port
- Make sure the Vault's power supply is plugged into the wall, and then plug the other end into the Vault
- The Vault will immediately begin to power on
- Hold down the "F11" key to see a boot menu
- Select the USB drive to boot to it
Please follow the install instructions for the OS you are installing for in-depth information:
7. Seventh Step (Booting into the installed OS)
Once the OS is installed you will be able to boot into it.
If OPNsense was installed: simply refer to the instructions on this article. There is a video tutorial available as well as a section that explains how the WAN/LAN ports are setup. You will want an ethernet cable connected from your modem to the WAN port on the Vault. You will also want a computer connected to the LAN port. You will just need to power on the Vault, and it should automatically boot to OPNsense (which may take upwards of a minute). If it doesn't automatically boot to OPNsense, make sure your boot order is correct. A video showcasing how to connect your Vault to your Modem can be found here.
If pfSense® was installed: simply refer to the instructions found on this article. On the first boot, it is recommended to keep a monitor and keyboard connected in case you need to setup the WAN/LAN interfaces.
If Ubuntu was installed, you will just need a monitor and keyboard attached to the Vault, and then power on the Vault. You should eventually be greeted with the Ubuntu login screen and you can use it as normal. Further documentation on Ubuntu can be found on their website.
If you installed another OS, please refer to the documentation we have for it on our KB.
8. Final Step (Now What?)
If you made it this far and everything is working as expected, congratulations and great job!
If you are using OPNsense or pfSense® you may be wondering if there are any recommended tweaks to make. In a default state, these OS's will work as a functional firewall and nothing else necessarily has to be changed. We highly encourage you to learn more about the operating system you installed to perfect your setup. Some useful firewall tips can be found on our article here. If you want to utilize features like a VPN connection or IDS/IPS, please refer to the official documentation for the OS you are using. Otherwise, you can find other articles from us for the OS you are using here.
Considering how many different options you have for operating systems, just remember you can always repurpose the Vault for a different purpose down the line.
To stay up to date with new firmware and product releases, you can subscribe to our email newsletters by following step 3 on this page (https://protectli.com/getting-started/vault/).
Remember that if you run into any issues, you can open a support ticket to reach out to our support team. Alternatively, you can email support@protectli.com, support@eu.protectli.com (for European users), or support@ca.protectli.com (for Canadian users). You can also reach out to us if you have any general questions or concerns, we are happy to help!
A general troubleshooting guide can be found here.
To learn more about our company as a whole, check out our About Protectli page.
